This tutorial
was done in PSP 9 but can be done in 8 as well.
To start open
a new image 500x500. Flood fill with black or a
darker contrasting color from your tube. Add a new
raster layer and flood fill with #d8da8d or a
light color of your choice.
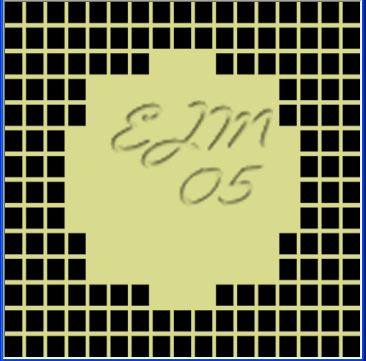
Go to layers,
Load/Save Mask, Load Mask from disk and choose
mdh_103, fit to canvas checked, Source luminance
checked. Show all mask checked. Invert
transparency unchecked and hit ok. Delete the mask
layer and click yes if needed. Go to layers and
merge group, your image should look like this:
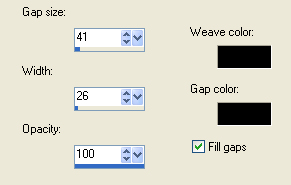
Go to effects,
texture effects and choose Weave and apply these
settings:
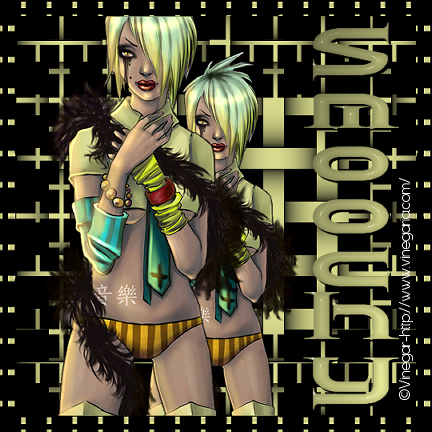
Copy your tube
and paste as new layer and resize as needed. For
this tube I resized 90%. Duplicate the tube layer
and resize this one by 80% and move it down under
(Or in behind) the original tube layer. Position
to where you would like it, or use my tag as an
example, merge all layers.
For the font, have your foreground and
background to #d8da8d or a color of your choice.
Have your font (Quantum Taper) and depending on
your name set to about 50, you will want the
direction to be vertical and right and create as
vector. Set your Kerning to about –225. Position
your text and stretch it a bit to the left to make
the font wider. Convert to raster layer, then go
to Effects, Plug ins, Eye Candy 4000 and choose
glass, use the default setting but change the
glass color from green to white and click ok. Go
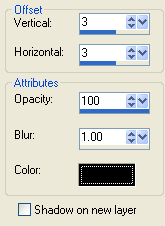
to effects, 3D effects, drop shadow and apply
these settings:
Apply the same
drop shadow but change the values to –3 for both
and the color to white.
Go to Image,
Add borders, and choose a border 20 pixels
symmetric, color white. Hit ok to merge the
layers. Select the border with your magic wand and
flood fill black or your contrasting color. While
still selected add a new raster layer and flood
fill with #d8da8d and apply the same mask as
before. Delete the mask layer again and merge
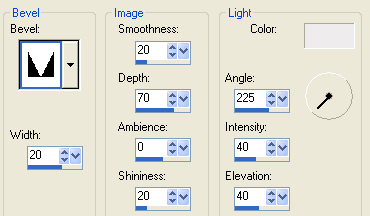
group. Then you will want to go to Effects, 3D
Effects, Inner Bevel and apply these settings:
Merge all
layers and select none, from here you can add your
copyright your watermark and resize as needed. I
hope you had fun with this tutorial and if you
need any help, please let me know.
No direct linking
to this tutorial without permission from the
owner/writer. No copying this tutorial
without permission from the owner/writer.
This tutorial was written by Smoochy May
2005. This tutorial is all from her own
imagination and PSP experience. Any
resemblance to this tutorial with other tutorials
is purely coincidental.