 |
 |
 |
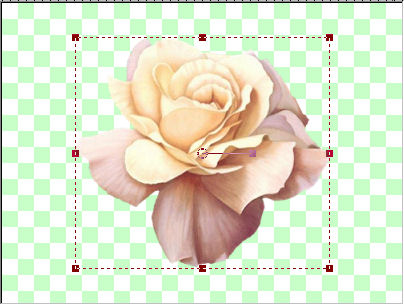
| SUPPLIES: (rosebloom, orchid, woman, jewellery). FILTER: ULead Art Texture is optional. FONT: Cherish Written in and for PSP9. You will need a good working knowledge of PSP and it's tools to prepare this tut. I encourage you to use your imagination and creativity. What you see here is only a guideline. You are invited and welcome to use your own tubes and materials. |
| LET'S BEGIN 1. Open your tubes and make copies (SHIFT + D), then minimize them on your workspace. Open a new file 500 x 375, transparent, 16 million colours. 2. LAYERS/New Raster Layer (I always have a spare empty raster layer in case I decide to add something later, but this is a preference only). 3. We are going to make our own background first. Restore your rosebloom tube and edit / copy, edit / paste as new layer onto your blank canvas. 4. Click on your DEFORMATION tool. Pull on the corner nodes to stretch your "rosebloom" image to your corners, then the other nodes as needed to make your image fill the canvas. |
 |
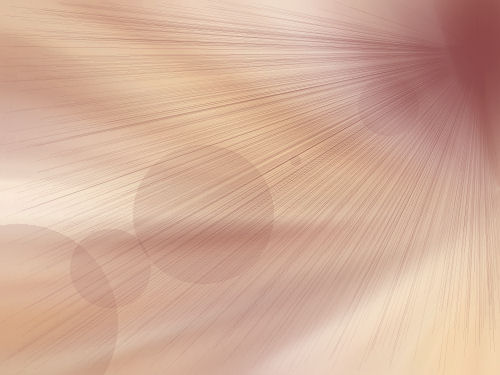
| 5. EFFECTS - Image Effects - Seamless Tiling; default. This would be a good time to save � remember to save often. ADJUST > Blur > Radial Blur with the following settings: Zoom: CHECKED, Strength 50, Horizontal offset 100, Vertical offset 1, Protect center 0, Elliptical UNchecked. 6. EFFECTS > Ilumination Effects > Sunburst. (VERY IMPORTANT) The colour you pick in the colour box will set the tone for the rest of your tutorial. I picked a colour from the woman's auburn hair, a reddish brown (#873f3f). Then the settings are as follows: LIGHT SPOT: Brightness, 91; Horizontal 96; Vertical 14; RAYS: Density 87, Brightness 50; CIRCLES: Brightness 95. Depending on your colours, this is what you should have. (I would save again at this point, and if desired, also save under your templates in case you'd like it as a backing for another project.) |
 |
| 7. Restore your woman-swo tube. Edit / copy, edit / paste as new layer and with your MOVER tool, place in lower left corner of canvas. LAYERS > duplicate, IMAGE > resize 50%, mirror, then place in lower right hand corner. 8. Restore orchid. Edit / copy, copy paste as new layer. With MOVER tool, place orchid to the right of woman's right shoulder and move down till you are satisfied with its placement. LAYERS > arrange > move down, so that orchid is below (or in back of) her right shoulder. LAYERS > duplicate, IMAGE > resize 50% and move over to woman's left shoulder in right hand corner. LAYERS > duplicate, image resize 50%, then using DEFORMATION tool, twist arrows until you have the stem pointing upwards, and place in position in top left corner. 9. ADDITIONAL DECORATION: Using edit / copy, edit / paste as new layer, add jewellery box, rings or whatever hits your fancy and place them where it pleases your eye, using IMAGE > resize menu and DEFORMATION tool. Remember to copy / paste as new layer so that you may manipulate each one of your images on its separate layer to your satisfaction. 10. LAYERS > New Raster Layer. Click on TEXT tool and when menu appears; create as floating, font CHERISH, size 48, stroke 1.0, Bold, Anti-alias: sharp. Set foreground to same colour as you used in step #6 and background in a gold pattern. Click on your TEXT tool again and type your text in the menu dialog box. Click apply, change to MOVER tool and place where you want it. SELECTIONS > select none. |
| 11. On your LAYERS palette, click on layers for parts of the tutorial where you wish drop shadows and apply accordingly. Double check that everything is where you want it as the next step will prohibit you from moving anything. 12. Image add borders white, 2px., select with MAGIC WAND, tolerance 0, feather 0. (You can fill with a bronze pattern or gradient, or: -), EFFECTS > Ulead > Art Texture. Change to FLOODFILL tool. Click Edit, then select Palette #5, click o.k. At next screen, change HUE SHIFT to 340, click bottom right hand pattern, then o.k. SELECTIONS > select none. 13. Add your watermark, (ALT + 0169 on numeric keypad). FILE > JPEG Optimizer and follow instructions from there. CREDITS: I want to thank Bubbles for giving me a place to showcase my first tutorial, Misted Blue Lady. Tubes used in this tutorial; rosebloom (tubed by Tam); orchid tube (tubed by Manon); Woman-swo (tubed by Shera); rings (tubes by ABC tubes; jewellery (Site of Wonders), |