There are several camber kits out on the market. There's Ingalls, Specialty Products, Progress, Skunk2, and I believe some no names. I researched the kits pretty good before making my decision to go with skunk2. Ingalls seems to be the most popular and people are quick to say, "Get Ingalls kit". But, after researching I found if dropped too low with Ingalls camber kit you will have clearance problems. A few people I have talked to had their kit sanded down a little to keep from hitting the inside of the fender. In my opinion that is a garbage product if it has to be modified in order to work properly. So, I went with the skunk2 since I could NOT find anything negative about this kit. Only downfall is the $200 price tag. I've now had the kit on for several months and it's been great. No clearance problems and no squeaking which is aother problem some camber kits come with. When I had my alignment done the mechanic loved the ease of adjustment with the skunk2. Just loosen 4 hex nuts, adjust to correct angle, and tighten them back up. Enough of this, let's see how you install this bad boy!
Tools needed:
--Tie Rod Puller which you can rent from AutoZone
--Tool to remove front tires
--Needle nose pliers
--Heavy duty automotive grease (not necessary, but I recommend it)
...and about 2 hours of time!
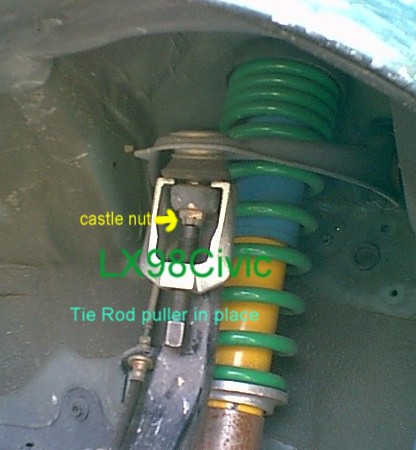
| Remove the front tire to gain access to the OEM control arm. Remove the cotter pin that goes through the center of the castle nut. This is done by bending the 2 ends to a straight position and then pulling the pin out with the pliers. Loosen the nut but DO NOT take it off completely. Once the nut is loosened, attach the tie rod puller as shown in the picture. Tighten the tie rod puller until you hear / see the joint break loose. Now remove the tie rod puller and the nut completely. | |
| Now remove the 2 (14mm) bolts on each side of the shock that hold the upper arm in place. The picture shows you where to find these two bolts. You will have to remove the battery to gain access to the rear bolt on the passenger side. Just disconnect the terminals with a 10mm socket and remove the metal holder that secures the battery in the center. Once you remove the battery do NOT sit it on the ground as this will discharge the battery. Once you have the two bolts out, remove the OEM arm. | 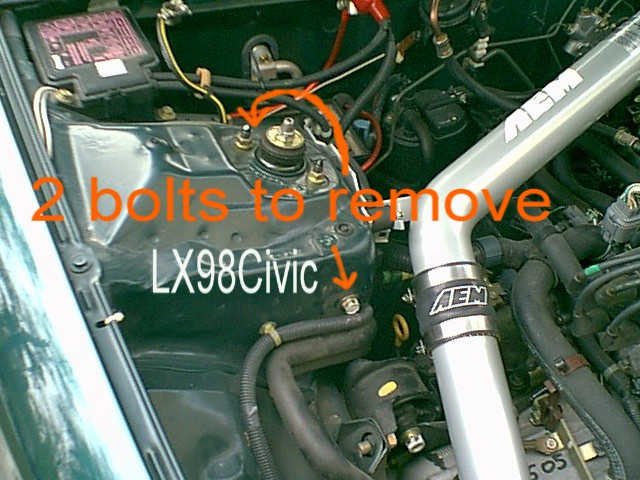 |
| Another good thing about the skunk2 kit is that the ball joints are included (unlike Ingalls) which means it's ready to be installed straight out the box. But, here's where you can put the automotive grease to good use. Remove the black rubber piece that covers the ball joint of the kit. Once removed apply the grease as shown in the picture. This will give the kit extra lube which should eliminate any noises that could arise. The kit is then installed in the reverse order the OEM was taking out. Remember to torque everything back to factory specs: 2 bolts on side of tower 40 ft. lbs. and castle nut gets 32 ft. lbs. | 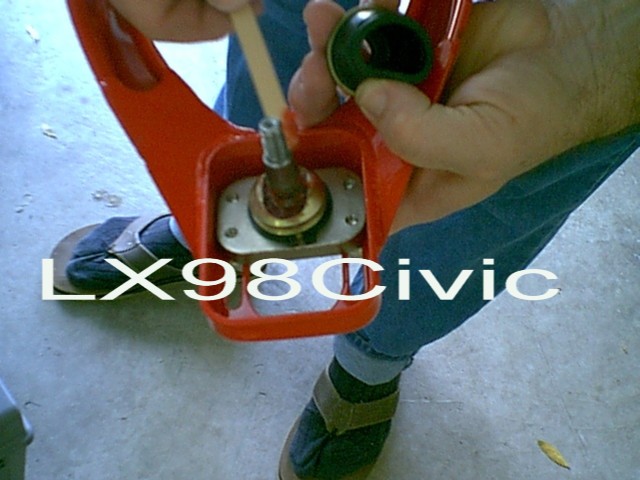 |
| Now that you have the kit installed it's time to adjust it temporary with the eye. Loosen the 4 allen screws shown in the pic. If you are dropped more than 2 inches in the front you are going to want to bring the balljoint closer to the outside of the car. The more you bring the adjustment towards you, the more the negative camber will be corrected. If you are dropped one - two inches I would put the adjustment in the center. Once you get the adjustment set, tighten the 4 allen screws with the provided allen key. | 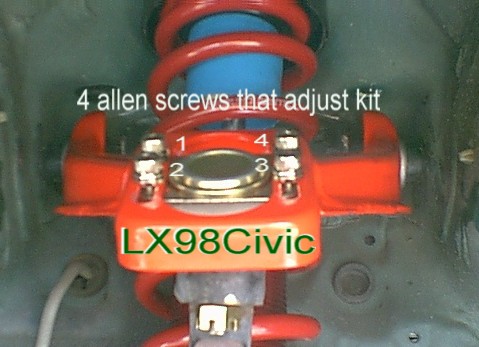 |
