|
|
|
Click here to download exploded views of the carburetors
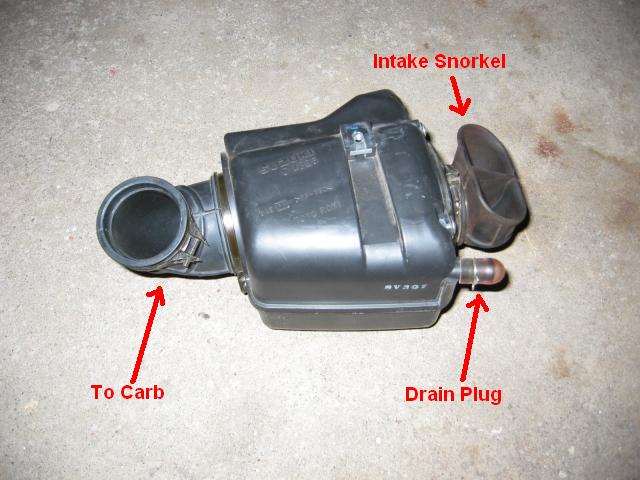
If you are using drop in K&N filters you simply remove the 4 screws from the intake snorkel side and the air filter comes out. Replace with the K&N, reassemble, and set aside the airboxes. Using the K&N drop in filters is the most popular method that requires no airbox modification but in this install I chose the less popular method which is using the clamp on filters. It is more difficult because you have to modify the front intake to accommodate a clamp on filter, and many people do not want to deal with those kinds of modifications. But it gives you more power and that is what i'm after.
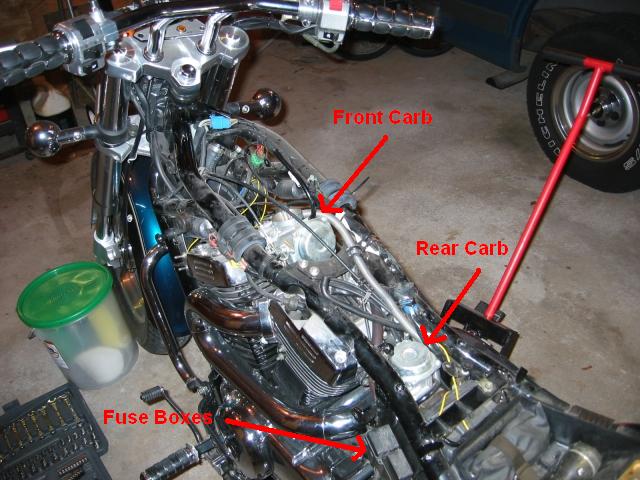
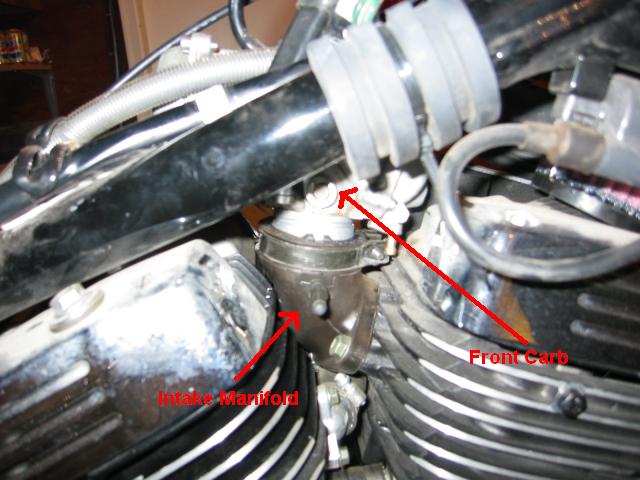
The next step is to remove the carbs from their intake manifolds, all you have to do is loosen a clamp that holds the carb to the intake. The rear carb must have the fuel line pulled off of it to pull the carb out. Frame struts must also be removed to allow the removal of the carbs. Their are two options after pulling the carbs out of their intakes. The first option is to completely remove the carbs to work on them on a workbench which requires the removal of the throttle cables. Carburetor synchronization must be done when the install is complete. The other option is to pull out the carbs with the cables attached and rotate them enough to get at the float bowls. That is what I did, and I think it is a much easier route. You must be careful not to disturb the throttle cables as that might bring the carbs out of sync. Carb synchronization is not necessary with the second option.
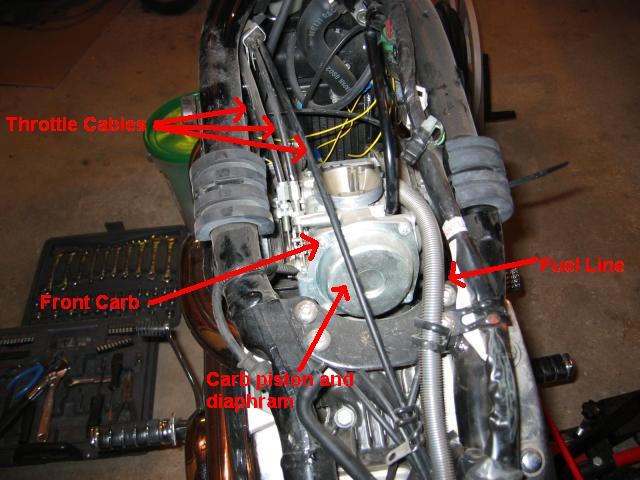
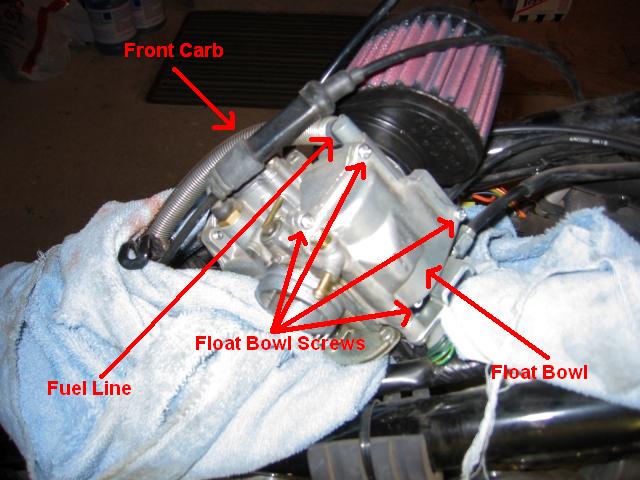
Ok now that you have the carbs out and turned sideways the first step is to remove the float bowl, I started with the front carb. As you can see the throttle cables are still attached, all I did was pull the carb out and turn it sideways. Remove the 4 float bowl screws and remove the float bowl cover. When you remove the cover gas will spill out of the bowl, not much will come out but I suggest having a rag under the carb so it doesn't spill all over the bike.
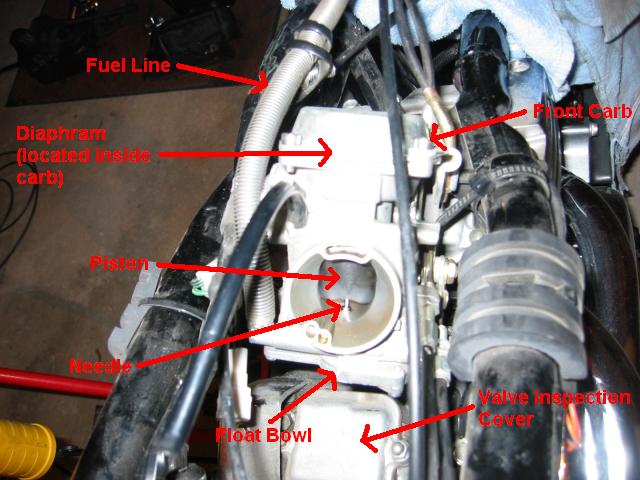
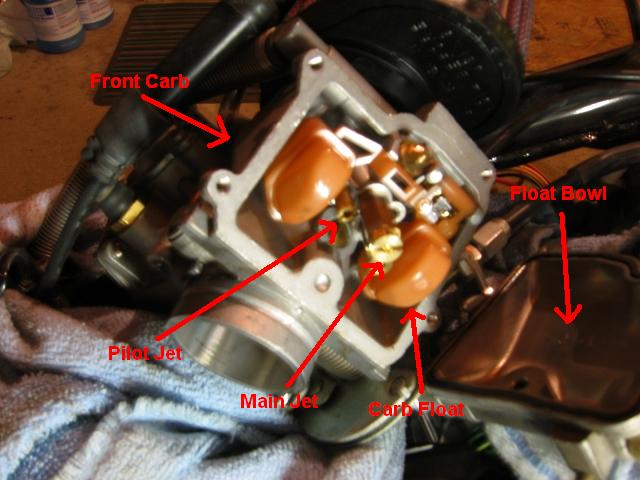
Locate the Main jet and the Pilot Jet (If you are replacing the pilot jet). Remove the stock jets and replace them with your new ones.
The rear carb is very similar to the front, although the jets are in different locations inside the float bowl and the pilot jet looks different then the front. It is not difficult finding them. There ya go, that's all theirs to it. All you have to do is reverse the process and put the carbs back and re-attach the airboxes if you have that setup. After i got my bike re-assembled I started it up, and it ran smooth. Unfortunately it is the middle of the winter here in Wisconsin so i could only bear a ride around the block. The bike performed very well with a noticeable power increase considering it was around 10 degrees that day. This is intended only to serve as a guide to show how the process is done. You must have some mechanical knowledge and be able to identify certain parts on a motorcycle to be successful in doing a stage 2 install. |