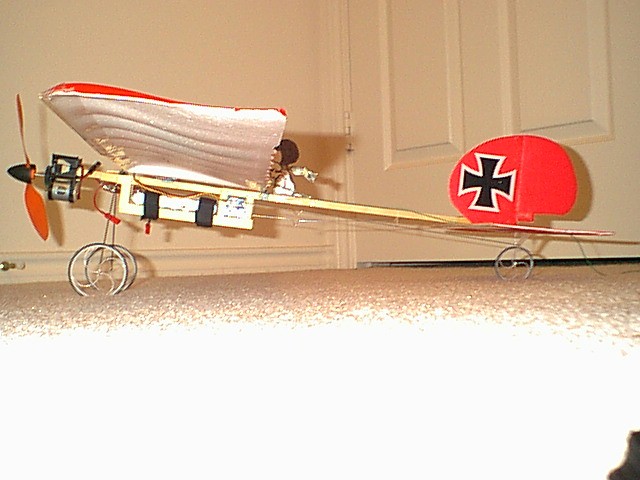
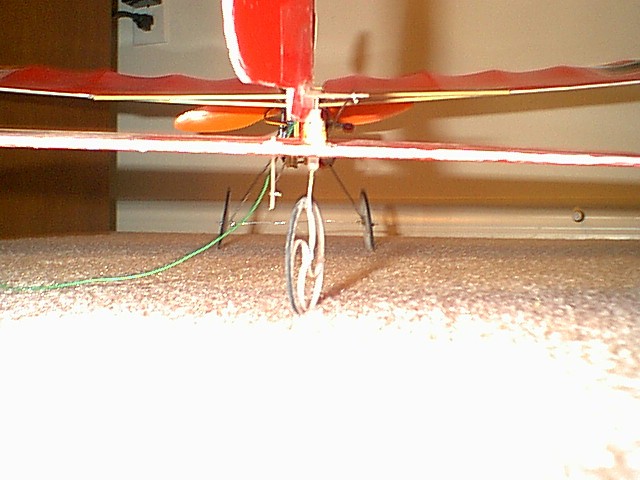
| Introducing my latest LiteStik modification! The Steerable Tail Wheel! This mod is so easy, you've just got to do it... The ground control is amazing. With minimal throttle applied (barely moving), you can drive it with pinpoint accuracy! The fun factor just went through the roof for me with this mod! I've had it out on about eight flights with a few hard landings and no damage yet. There are probably better/sturdier ways to make this modification, mine hasn't broke yet but we'll see. I can drive it down the street and put it exactly where I want it for take off without the "Lean-of-Infamy". DEFINITION: The "Lean-of-Infamy" coined by my flying buddy, Chris Helona - your driving your LiteStik/Pico down the street and you try to take a turn a little too fast causing your Stik to put one wheel in the air and one wing on the ground... You know, put down your radio and start walking..." NOTE: I do have a GWS 280 motor/gearbox installed on my stik, with my setup the extra tailweight is unnoticeable. However, I don't know how this will affect a stock setup. Try this mod at your own risk. |
| The Steerable Tail Wheel Modification |
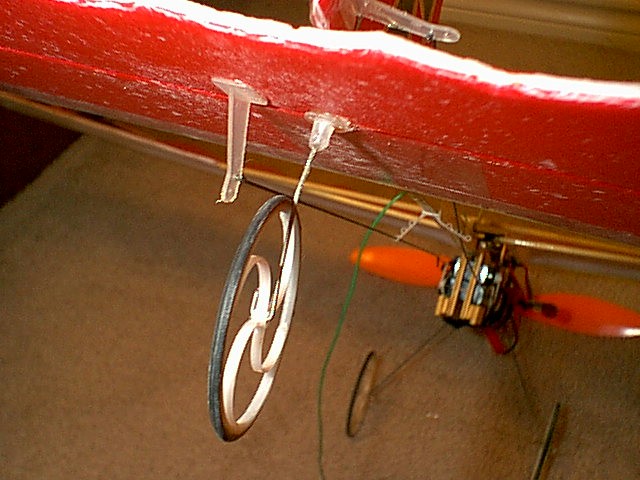 |
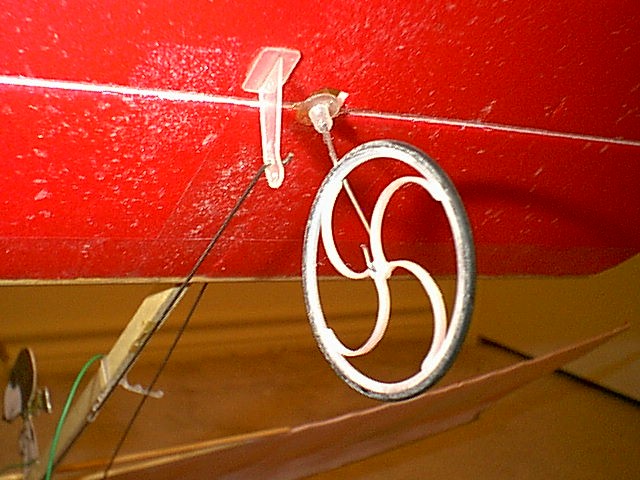
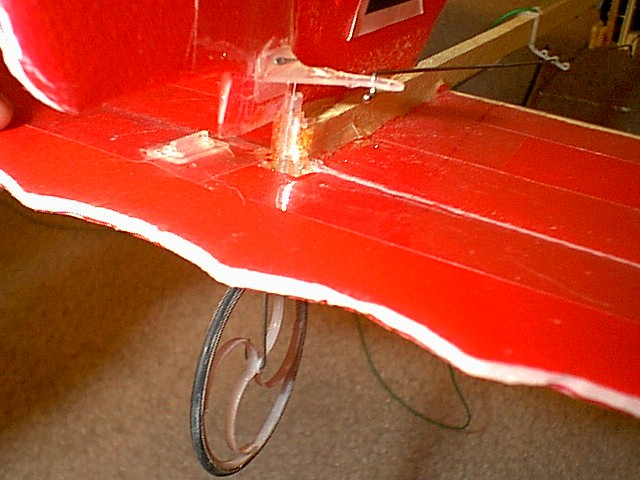
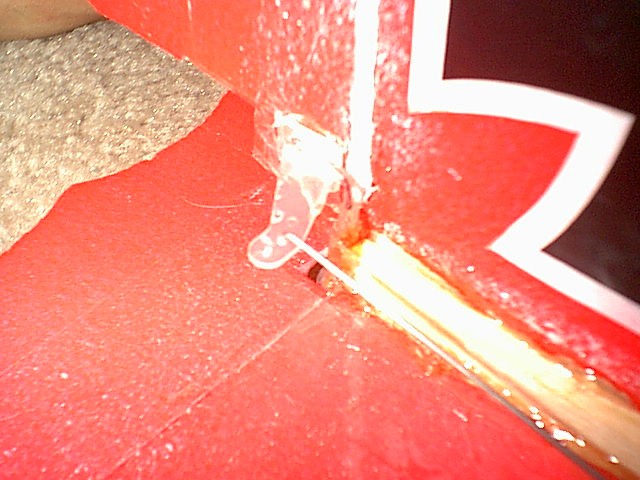
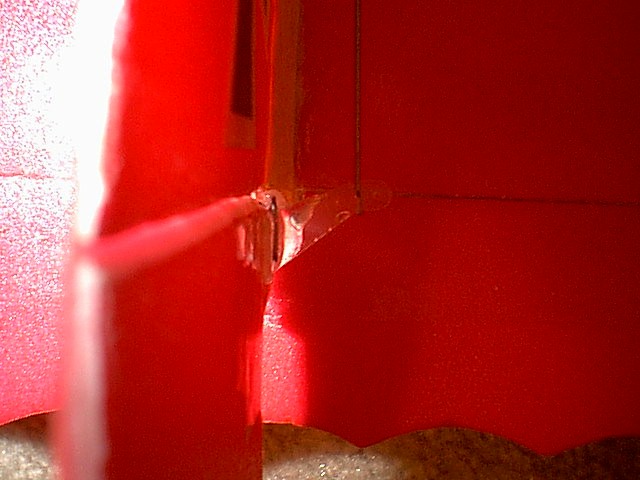
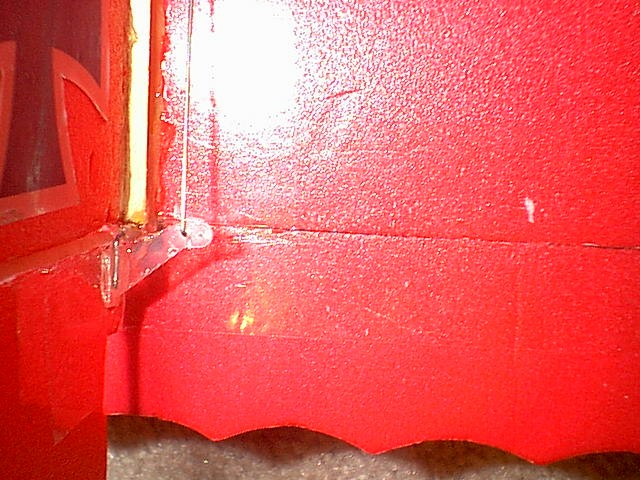
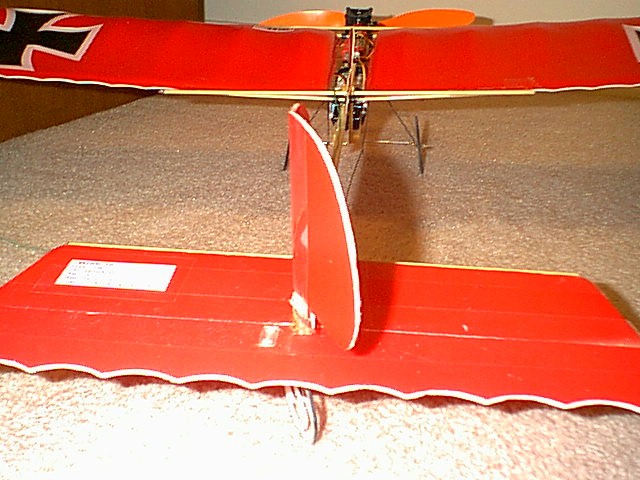
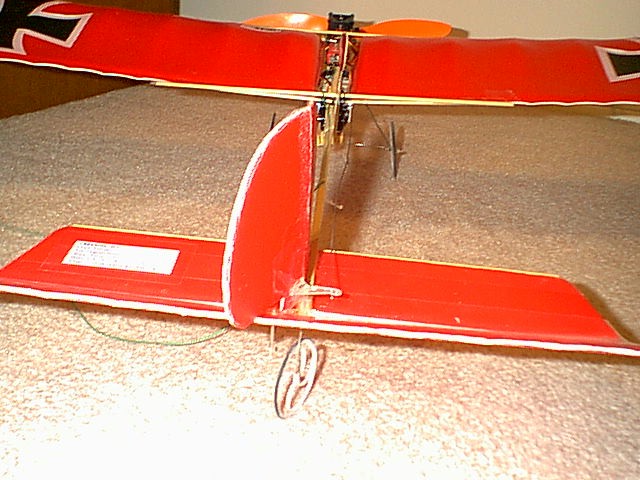
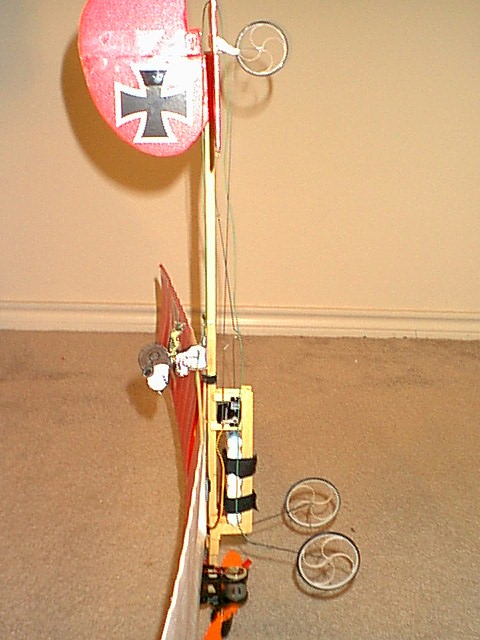
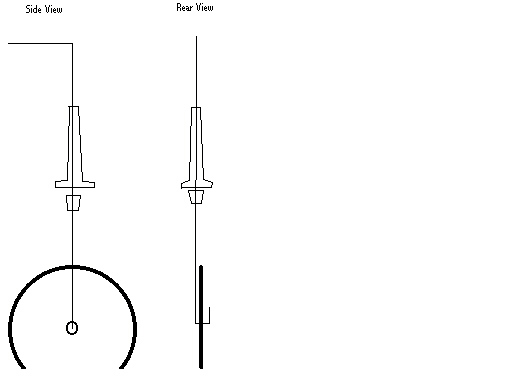
| 1. Cut a small square in your elevator at the very end of the fuse stick. 2. Pull your dusty LiteStik box out of the closet and pull out the "clear" molded plastic parts assembly, you know the one with all the mysterious "other" parts that weren't used when you built your kit. 3. You are looking for two items: a piece that looks like a washer with a 3/4" hollow tube built onto it, and a small landing gear wheel stopper. 4. Remove your tail skid wire and carefully bend it to a straight position and remove the skid curl. 5. Bend a 90 degree angle about 1/2" long on one end. 6. Slide the 3/4" tubular piece on the rod with the flat washer side facing the straight end of the rod. 7. Slide the small wheel stopper on the rod with the larger end facing the washer side of the tubular piece. 8. Take a small slow flyer wheel (I used one of the useless ones that came with the J3 Pico Cub FD) and place it on the rod and bend the rod around the wheel hub in a fish hook configuration. Bend it tight enough to take out as much wobble as possible, but not too tight that it doesn't turn easily. Your now ready to install the tail wheel onto the plane. 9. Insert the 90 degree angle up through the bottom of the elevator and take it all the way up and lay it on the top of the rudder control horn. Take a nice glob of 5 minute epoxy and completely cover the rod on top of the control horn. Let dry... 10. Epoxy the washer tube thing flush to the bottom of the horizontal stabilizer and apply lots of epoxy to the rear of the stick and the tube. Take a strong piece of tape and wrap it around the back of the stick while enclosing the tube at the end. This piece gets alot of force on it so, you want to put it on very well. 11. Adjust the wheel stopper to be right up against the washer part of the tube and drop a nice ball of epoxy around the bottom of the stopper. 12. Bend the wire rod to the appropriate location after everything is good and dry. NOTE: The wheel on mine does lean and wobble a bit but, doesn't hinder its performance. It may even be possible to get rid of the wheel completely and go with a steerable tail skid? As soon as my wheel breaks, I'll let you know... HAVE FUN WITH IT! -Lewis Towner |
 |
 |
 |
 |
 |
 |
 |
 |
 |
 |
 |