 |
|
|
|
|
|
|
|
|
|
|
|
|
|
|
|
|
|
|
|
|
|
|
|
|
|
|
|
|
|
|
|
|
|
|
|
|
|
|
|
|
|
In the beginning... |
|
|
|
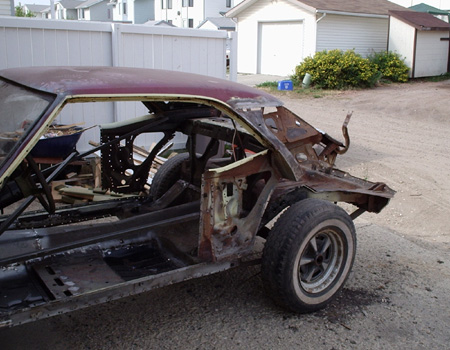
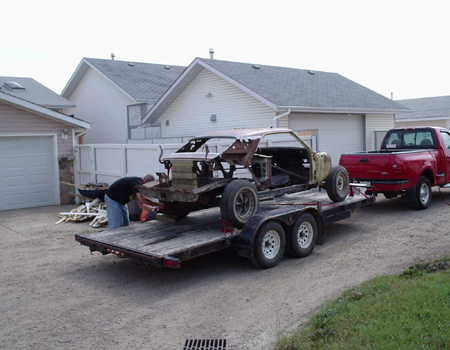
I bought this 1968 Camaro in the summer of 2001 after searching for 6 months or so,and I was amazed at how hard it was to find a car I could work with. I wanted something that required some minor body work, no engine or tranny, and most or all of the interior in place. What I found in my search was that there are 2 types of 67-69 Camaros available. Either a completely restored beauty (read high dollar) or a complete wreck (what you see here). The reason behind the purchase of a wreck was that the mods I had planned for this project were going to require heavy surgery anyway and I couldn't justify cutting up a fully restored or at least very nice Camaro to get the look I wanted. So...... I bought this piece of crap! My dad (Brian) towed it home for me, a round trip of close to 1000 km (625 mi). Good man.
Alot of the stories I have read in magazines about building a hotrod seemed to revolve around one main theme....if you don't have a plan, your project is doomed to fail. So before I even had the car at home I had a plan, not only in my head but all over the walls of my garage. Although the plan was fairly concise, alot of the final details had yet to be worked out. In the end, here's what I came up with.
|
|
|
|
- Built pro-touring/g-machine style
- Fuel injected small block (LS1)
- Manual transmission (T56)
-Corvette IRS
- Upgrade the factory front suspension
- Lowered stance
- Min 17" wheels with a 315 rear 275 front (18's preferred)
- Race inspired interior (roll bar, fuel cell, race seats, 5 points)
- 1/4 mile times in the 11's (11.99 would do)
- Skid pad, knocking on 1g's door
- Over 400hp with 25 mpg |
|
|
|
 |
|
|
|
|
|
With those goals in mind, I got started on what is proving to be a long and tedious voyage. A voyage I wouldn't trade for anything. |
|
|
 |
|
 |
|
 |
|
|
|
|
|
|
|
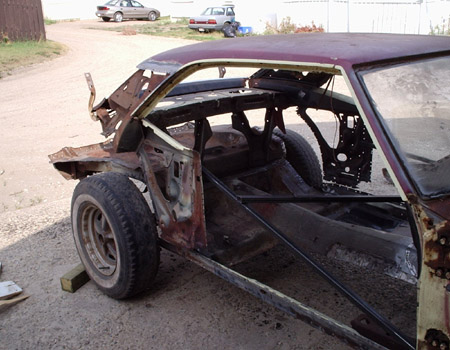
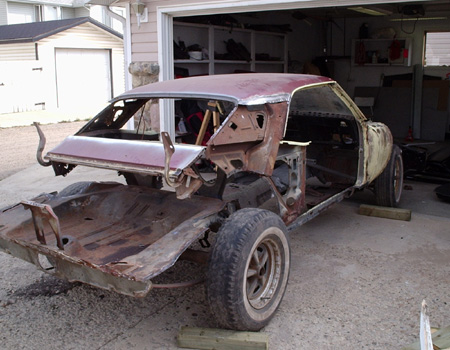
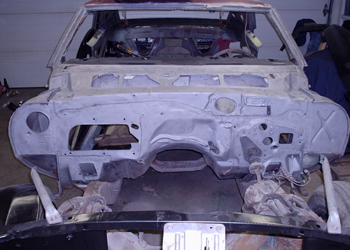
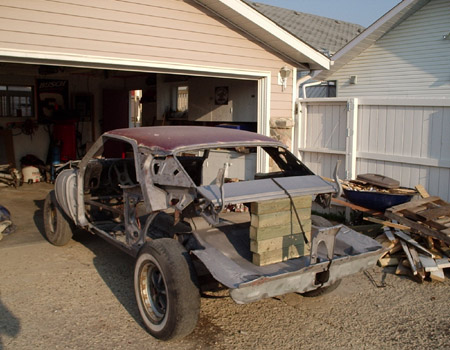
These pictures were taken after an entire winter of working on the car. I only removed what was rusted beyond repair, which as it turned out was everything but the roof and the firewall. This type of work is not for the faint of heart, it took me some time to realise that the sawzall was my best friend for this phase. I was initially trying to remove the rusted metal as complete panels, what a time consuming bit of jacking around that was. Once I pulled out the sawzall things came along alot quicker.
I had no idea how many pinch welds actually hold these cars together, and I can assure you I lost count after the first rocker panel came off. It's a good thing I have a Princess Auto close because at the rate I was tearing up bits I would have spent more time getting bits than using them. My Craftsman cordless drill never gave up on me though and I pummeled the hell out of it, no mercy. A quality piece.
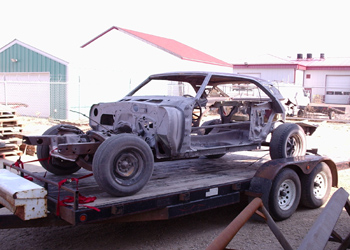
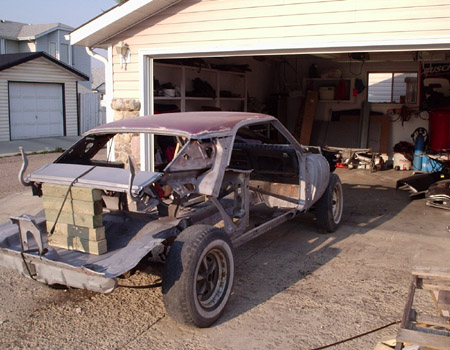
Finally it was time to load her up and get the rest of the rust sand blasted off.One of my best friends, Schafer, lent me his strong back and his time. Thanks bro. You should have seen some of the looks we got driving to the blasting shop. Most of the looks said 'you have got to be kidding me'. I love it, a little motivation if nothing else. By the ticket, take the ride. |
|
 |
|
|
 |
|
|
|
|
|
 |
|
|
|
 |
|
|
 |
|
|
|
|
|
 |
|
|
|
|
|
|
|
|
 |
|
 |
|
|
|
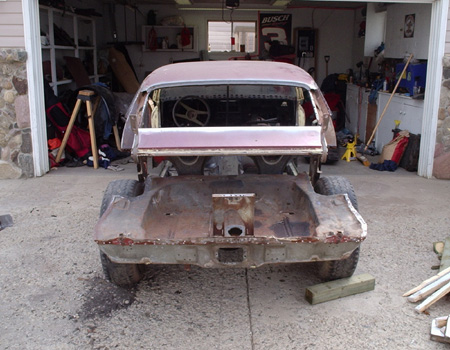
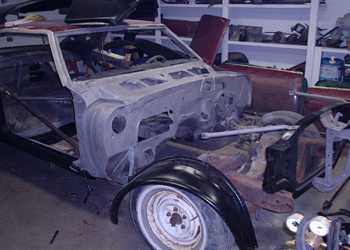
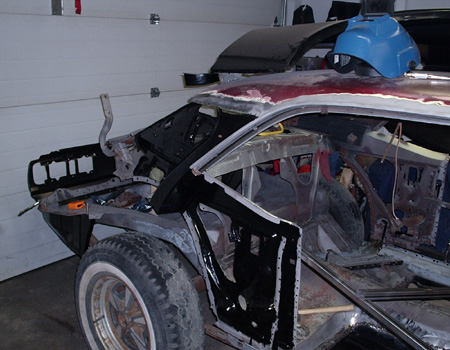
Back from the blasting shop and looking much better. It's so much nicer working on a clean car. You'll notice the roof was not blasted. I didn't want to chance the sand warping the large surface and I was too cheap to have it soda blasted. I will take the DA sander to it instead |
|
|
|
|
|
|
|
|
|
|
|
|
|
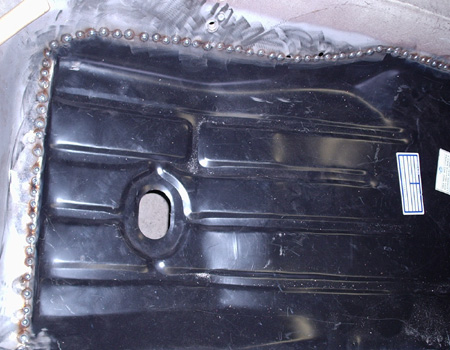
Next I tackled the floor replacement. For those of you who have never tried this, don't. I don't care what company supplies the replacement panels, they're not going to fit worth a damn. I spent alot of time messing around with these and I am still far from happy with the results. This was the case for both the driver and passenger side, althought the drivers side is especially ignorant because of the exrta contours involed where your left foot would rest.
Although I plan on doing the entire floor inside the car with POR15, here I have just started on the inner sail panel. I'm trying to ensure this old girl never ends up in the same state she was in when I got her. I heard alot of good things about POR 15 and had no problem coughing up for it. A word of caution though, whatever it touches, other than the metal, is completely screwed. Brushes, clothes and my skin can all attest. I did find out however that it makes a nice, albeit expensive, workbench coating. Very durable stuff. |
|
|
|
 |
|
|
 |
|
|
|
|
|
|
|
|
|
|
|
|
|
|
Although I don' t have any pictures of it, I had already purchased an '02 LS1/T56 off Ebaymotors. I have now become addicted to that damn website. Anyway, Schafer and myself made the 7600 km (4800 mile) round trip to Chattanooga, Tennessee to pick it up. Now that is what I call a road trip. We made it there and back in under 4 days and we even had time to stop in Bowling Green, Kentucky on the way home for a tour of the Corvette assembly plant and then a tour of the National Corvette Museum. We drove for 38 straight hours to get home. I had never seen them until this trip, but they sell these little yellow and purple pills at most gas stations, wake up pills x 10. The instructions say to take only one every 4 hours or something like that, well I was having none of that, so I ate the whole pack, 3 I believe. It's a good thing it was my turn to drive because for the next 15 hrs I HAD to be doing something. Man, what a buzz and I could have sworn my hair was growing at an alarming rate for about 4 hours as well. Cool road trip with a cool friend. Good times. It's stories like this that I associate with the car, that make this car part of who I am and makes me proud to know I'm building not only the car, but the memories to go along with it. You can't get that from the Autotrader. |
|