

� 6 - 10� x 1� schedule 40 PVC
� 2 - 10� x 1�� schedule 40 PVC
� 2 - 1�� T-connector
� 1 - 1�� X-connector
� 6 - 2� x �� rebar
� 1 - 10� x 20� tarp(heavy duty silver)
� Bungie cords(4' long)
� 20+ - Bungie balls
� Duct tape
Optional shade flap :
� 2 - 10� x 1� schedule 40 PVC
� 1 - 2�� x 1�� schedule 40 PVC
� 2 - 2� x �� rebar
� 1 - 10� x 20� tarp(heavy duty silver)
Preliminary
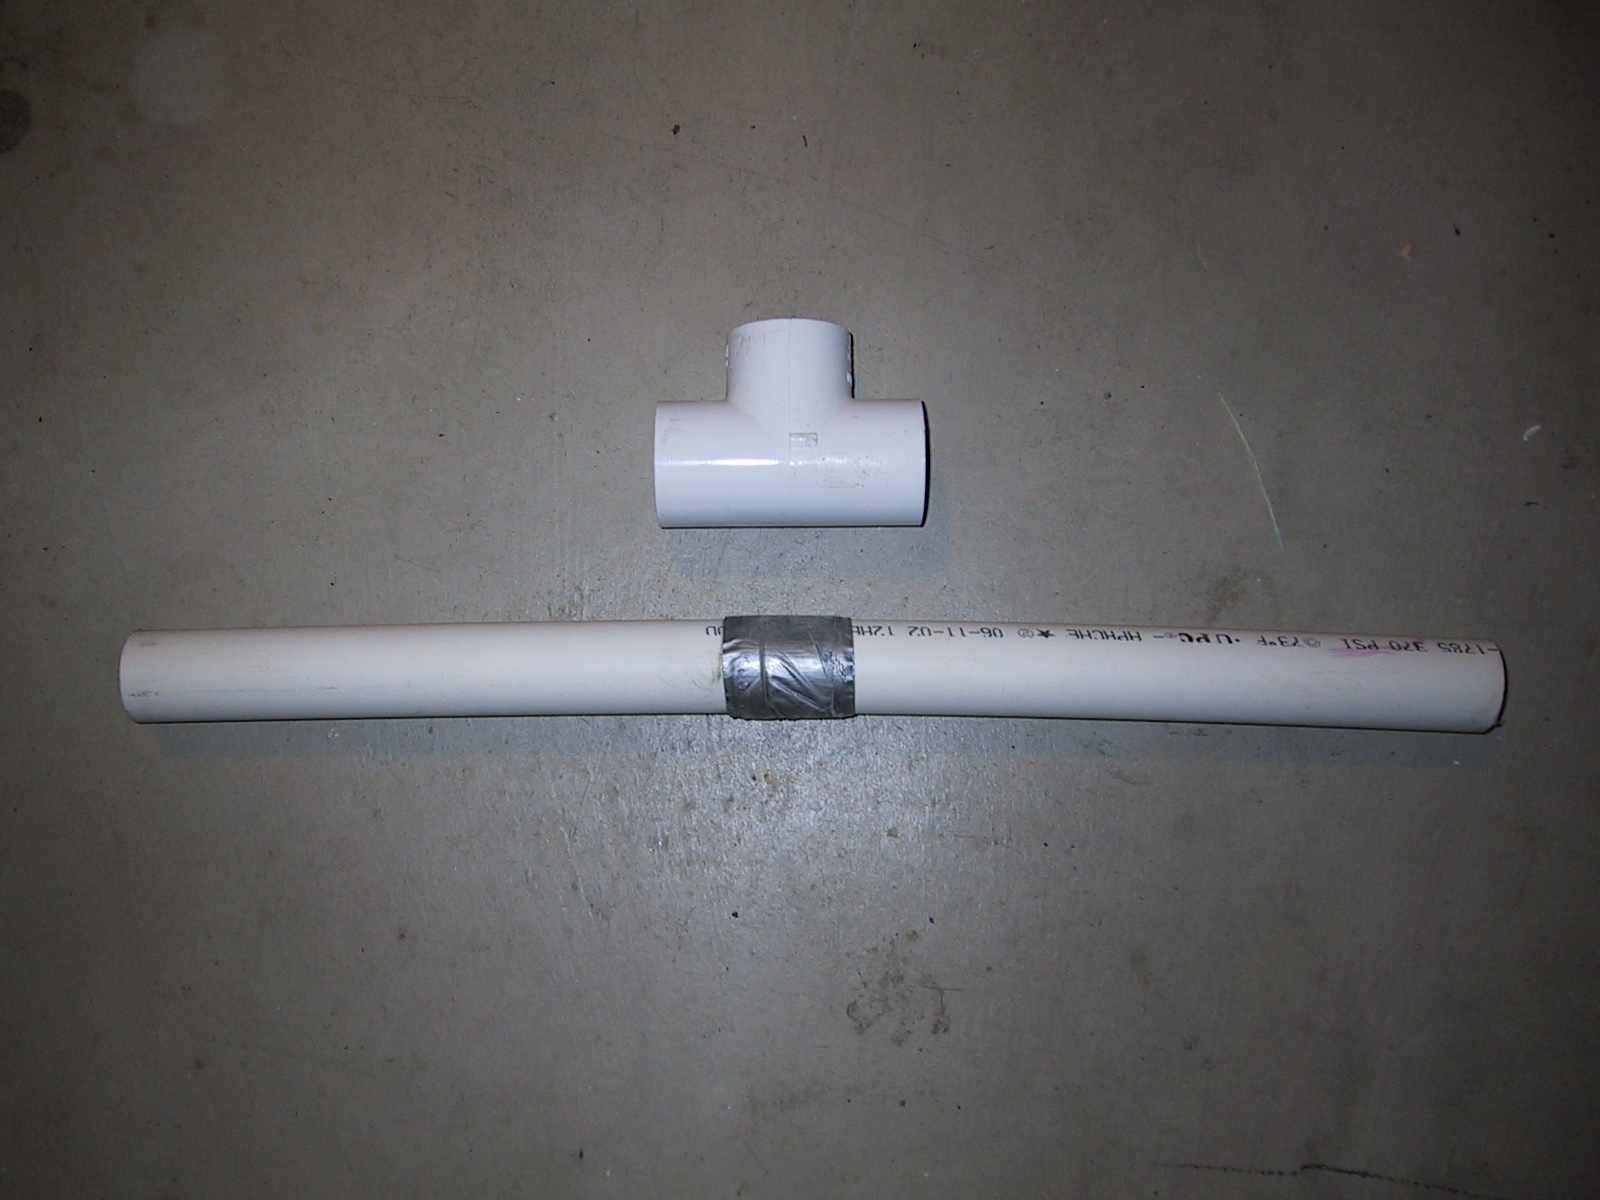
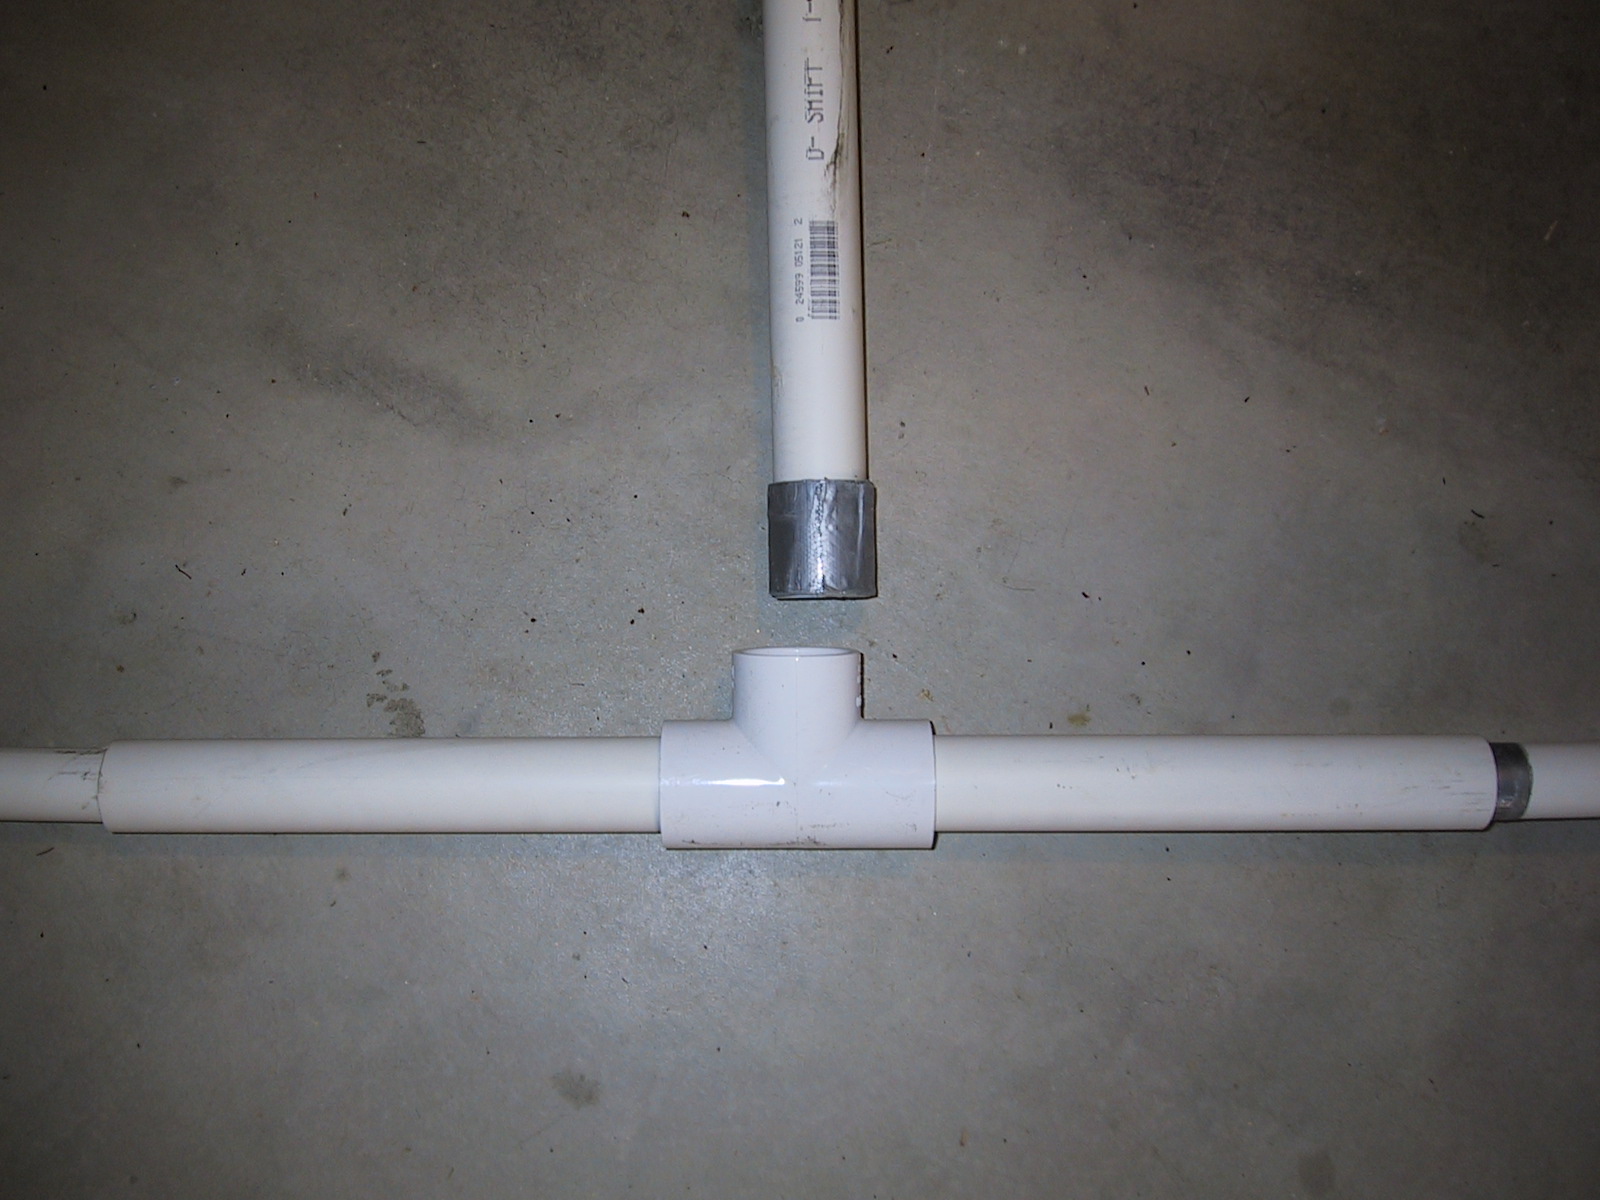
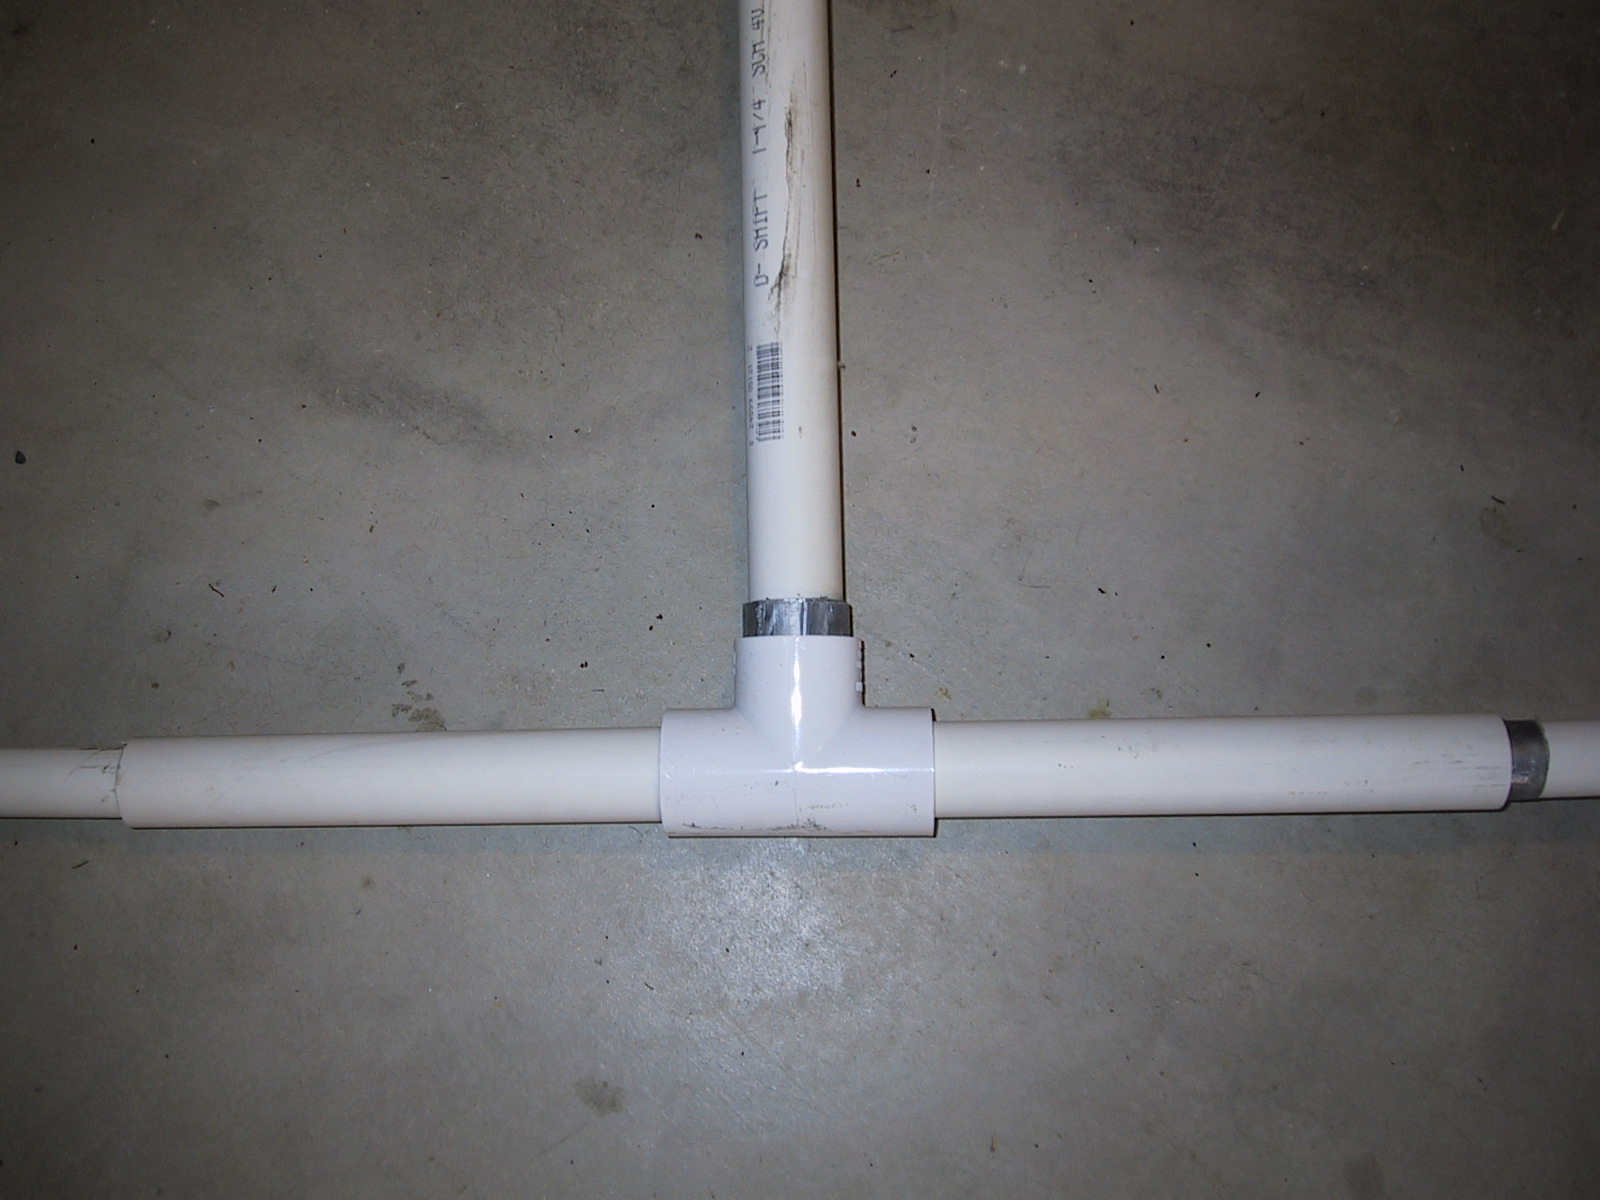
Cut one 10� x 1�� PVC pipe in half. Cut the other into four 2�� pieces. Three of these you�ll use as connectors. Take two of the 2�� connectors and wrap duct tape around their middles as in Image 1a. Slide a T-connector onto each over the duct tape--there should be enough tape to make the fit snug.(see Image 1b.) Repeat this process with the third 2�� connector, this time sliding the X-connector onto it.
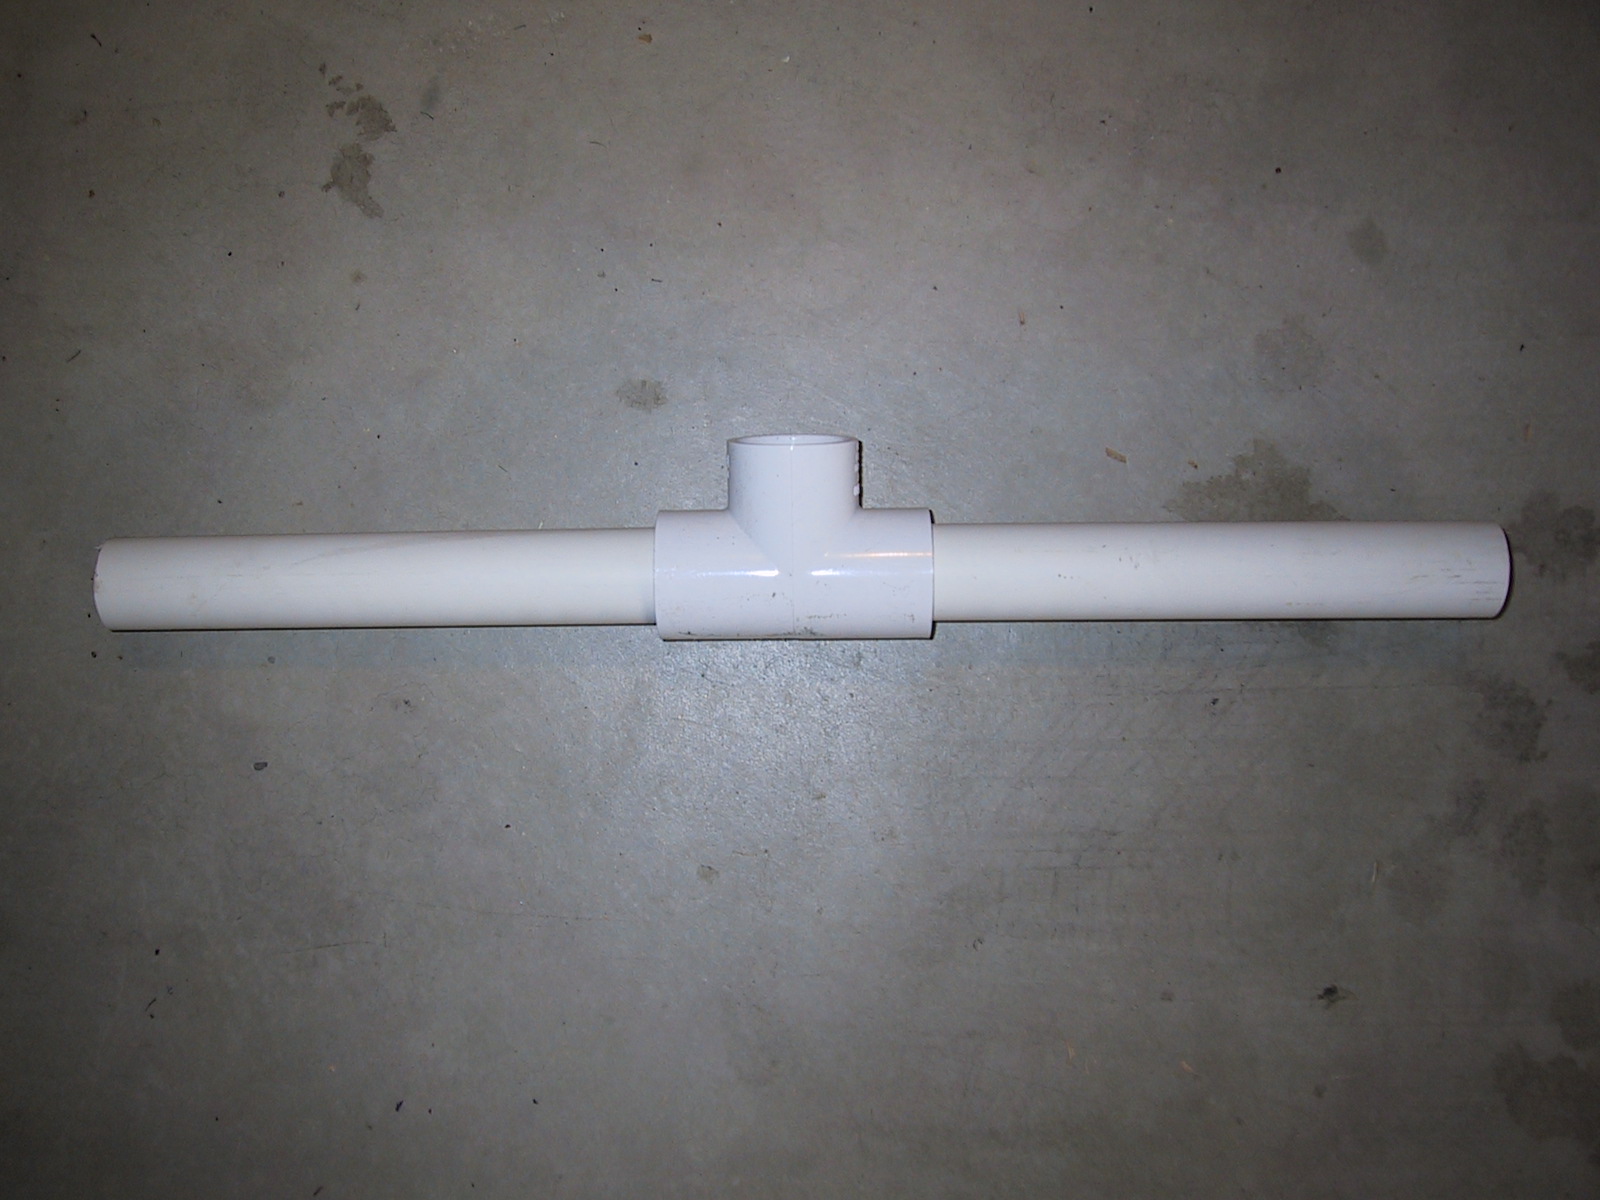
Lay out two 1� pipes end to end. Where they meet, measure out 15� in both directions and, just inside those points, wrap the pipes with duct tape. (see image 2a.) Now slide the pipe connector onto the 1� pipe so its end just covers the tape. It should fit snug. If not, use more duct tape. Take the other 1� pipe and slide into the other end of the connector. (see image 2b.) You�ve made your first rib! Repeat this twice more with the 2 remaining connectors so that you have 3 ribs, each 20� long, 2 with T-connectors and one with an X-connector.
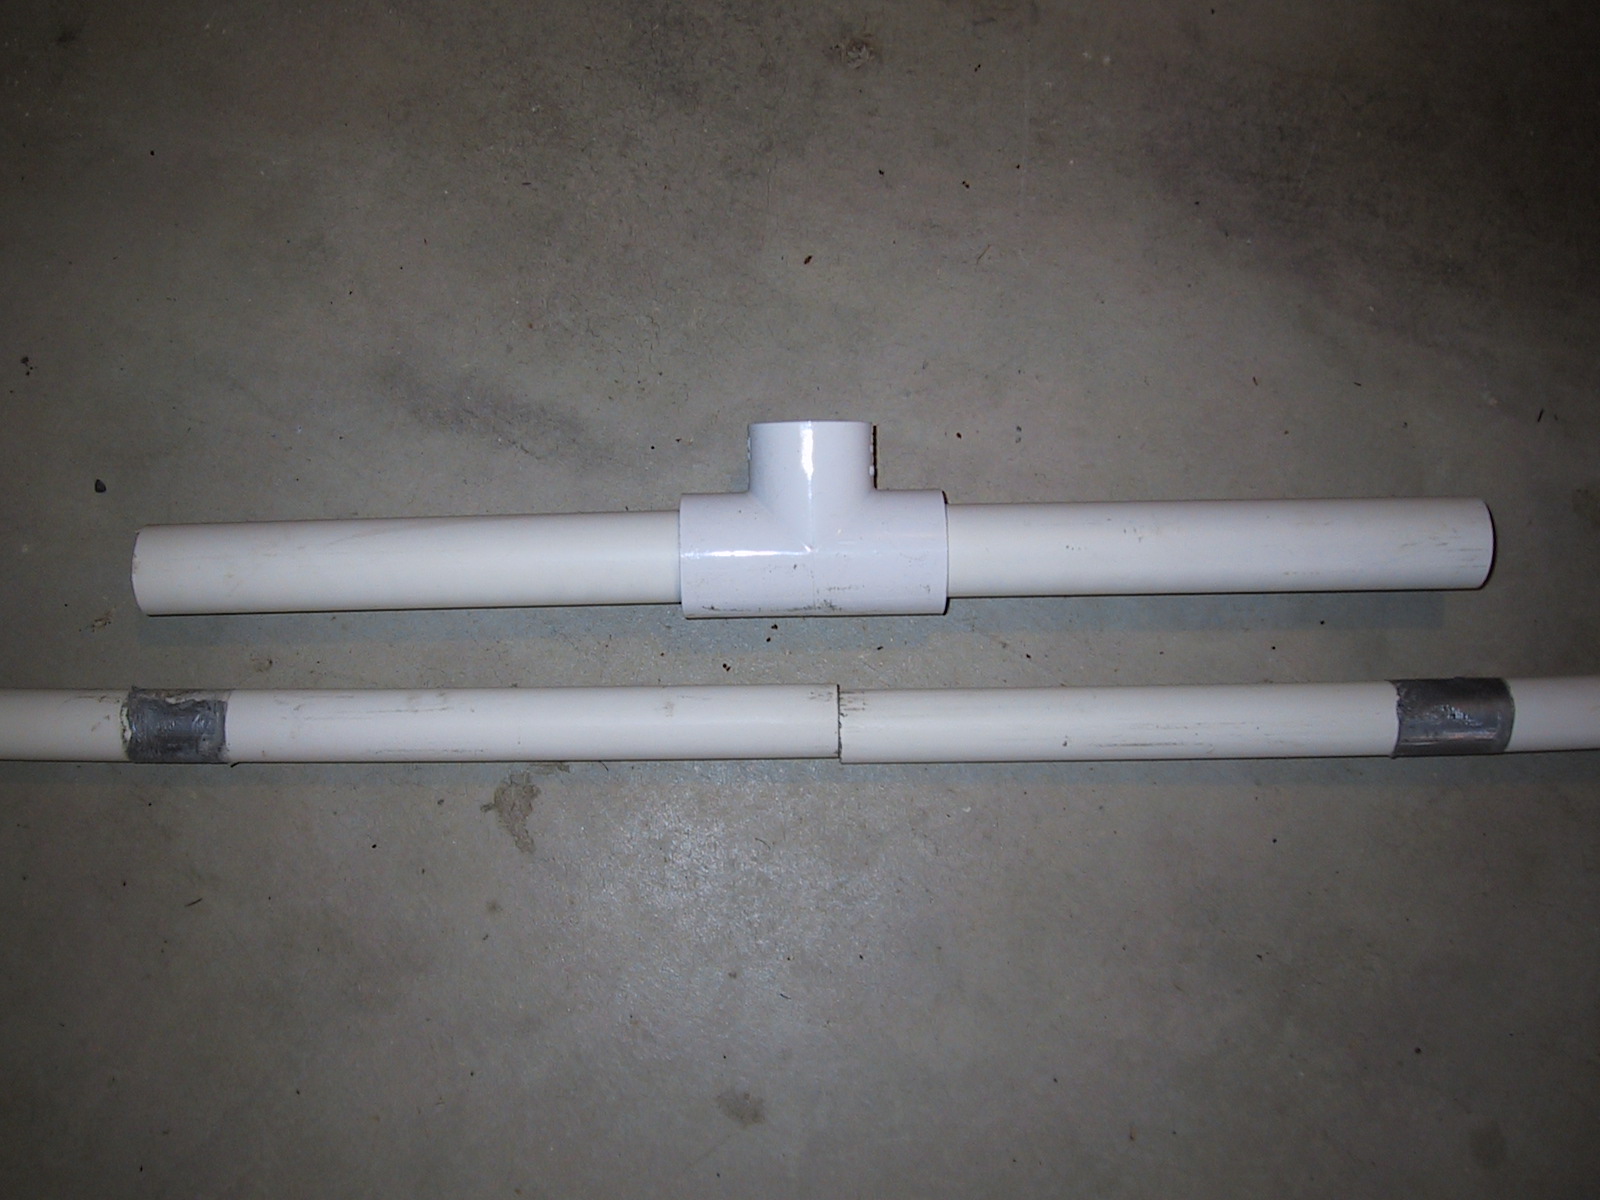
Take the two 5� lengths of 1�� PVC and wrap duct tape around both ends. As the spine, these will slide into the T and X-connectors, holding the ribs in place. (see Images 3a and 3b.)
On Site
Mark out a 10' x 12' footprint. Down each 10-foot side, mark off the midpoint. Hammer in a piece of rebar at these two spots and at each corner of the footprint. Rebar should be one foot deep into the ground.
Take the rib with the X-connector on it and slide one end of it onto one of the midpoint pieces of rebar. Pull the other end of the rib, which is now facing skyward, down so that the pipe arches. Slide this end of the rib onto the rebar on the opposite side of the footprint. Repeat this with the T-connector ribs on the outer sets of rebar.
Use the 5' lengths to create the spine and connect all the ribs. (see Image 4.)
Use the bungie cords to secure the spine. Wrap one bungie around the first rib as close to the spine connection as possible, hooking the bungie onto itself. Pull the other end of the cord to the second, or middle, rib and secure it near the spine connection. Duplicate this from the second rib to the third. The frame should now be stable and ready for the tarp.

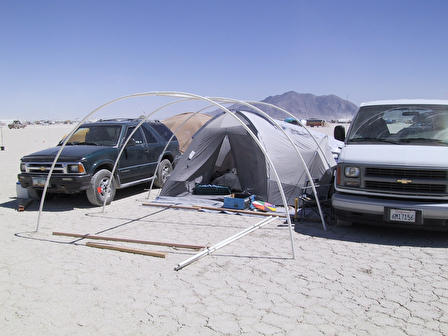
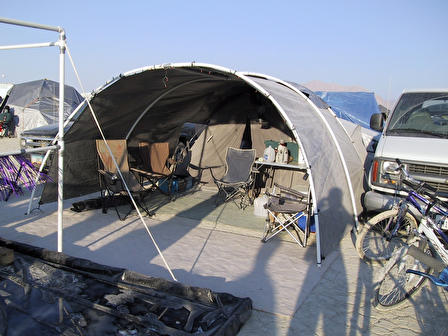
Pull the tarp over the frame and secure it to the first and third ribs with bungie balls. You can also use zip-ties. Either will draw the tarp taut and create solid shade and great protection from the elements.
I recommend paying a few bucks more for the heavy duty silver tarps. These are thick and reflect the sun. Definitely don't use blue tarps. They're too thin and make a great deal of noise in the wind.