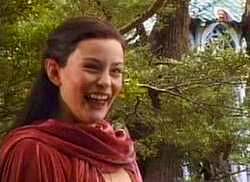
The Rose Dress, I felt in particular, showed Arwen's emotions about travelling to the Grey Havens to start a new life in peace and leaving her mortal lover Aragorn behind in Middle Earth. I thought this because, the deep rose red used on the overdress symbolises love (her love for Aragorn) and death (the age of her people coming to an end).
Because of the use of symbolism I thought it was important to research into patterns, styles and fabrics so I could reflect the same emotions in my dress as well as it's beauty. I analysed information about the dress and tried to design it as I saw it from the help of photos and illustrations.
Fabrics
I took into consideration the type of fabrics it was made from and if or not I found these suitable for it's purpose, after all, I was only making it for my pleasure and not to go out in publicly to the shops, but I still wanted to keep the essence of elvish style; flowing and graceful. Also I had to take into account whether the fabrics it was made out of would be easy to get hold of and if there were substitutes for the fabrics that were cheaper but yet still looked expensive and of good quality. I wanted to keep the richness of the colours and texture that reflected Arwen's emotions at the time she was wearing the dress. Actually, I feel that all of Arwen's dresses reflect how she was feeling when she was wearing them. After all she did have a lot of choices to make, the biggest one being losing her immortality and staying with Aragorn in Middle Earth while her father left for the Grey Havens with the rest of her people.
The fabrics the Rose Dress is made out of are a red crushed velvet, and what appears to be a pink silk, with flowers decorated onto it.
The fabrics I finally chose were a deep red crushed velvet for the overdress, that has a softer texture than normal, and when brushed against it's weave turned to a lighter red, so there would be a variation of shades of red.
I chose a light pink silk for the underdress and a translucent pink organza which was decorated with tiny pink and silver diamantes in the shapes of flowers simlilar to the design on the Rose Dress underdress. It also had a variation of hues, so that as it moved in the light, it would look all shades of pink. See the fabrics I used for my Rose Dress here.
Patterns also had to be taken carefully into consideration as the dress had to look elvish and authentic. The Rose Dress has an empire waistline, two part sleeves in an elvish wrap style and a curved, low v-neckline. The overdress is split from the empire waist down so you can see the underdress underneath. I needed to find a suitable pattern that was identical or similar to the pattern of the Rose Dress. If the pattern was not identical I needed to take into account if the alterations I needed to make would be easy or difficult to do.
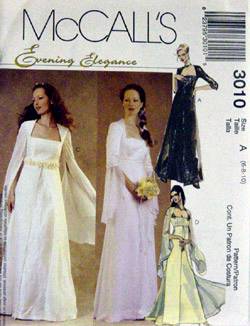
In the end I used McCalls 3010, (on the right) which is actually a wedding dress pattern. It has the two part sleeves, the empire waist and the split skirt, but the neckline is square.
I had to adjust the neckline to make it a curved v-neck, so I took the pattern for the bodice and pinned it to some muslin. Then I drew a rough outline of the actual pattern, unpinned it and drew a curved neckline over the square one. I cut out the front of the bodice, with the now curved neckline, as one piece, but I still had to cut it into two pieces to attach the zipper, which is meant to be invisible, but you can see the top of it poking out on the finished dress. I cut the neckline too wide though so it slides off the shoulder a little.
I wanted the sleeves curved although they are cut square on the actual dress, so I didn't have to make any alterations to the actual shape of the sleeves. The bottom part of them wasn't as long as I wanted it to be, so I made a muslin of that pattern and added another three or four inches to it at the bottom so the sleeves would extend two inches below the fingertips. I made the top part where it attaches to the upper sleeves longer so I could do the elf wrap style.