Hand railings often show a kink at the stanchions. The amount of bending may not be important in an industrial setting. In a residence or shopping mall it would not be acceptable.
The standard measures to control this effect are:
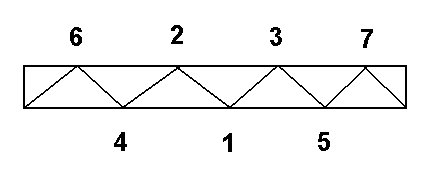
Placing the railing horizontal on saw horses makes welding more convenient however all the welding on one side must not be completed before the railing is turned over otherwise the railing will come out bent to one side. If one joint is going to be completely welded before the next then it is important to start in the middle of the railing and work out from the centre as should be done for a truss.
When tubes meet at right angles to form a tee, the welds that join will apply heat on one side of the long tube.
It is wise to regularly check the straightness of members using a two foot straightedge. A camber over 1/8 inch in two feet becomes easily noticeable.
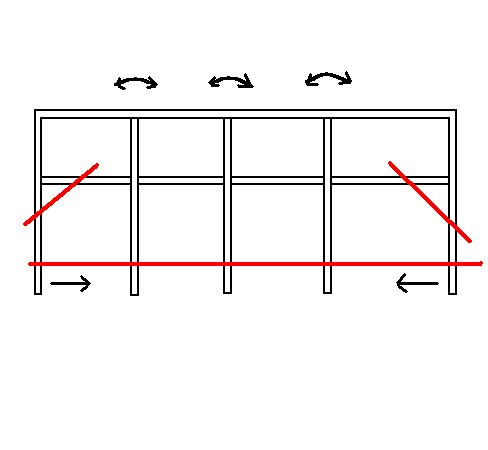
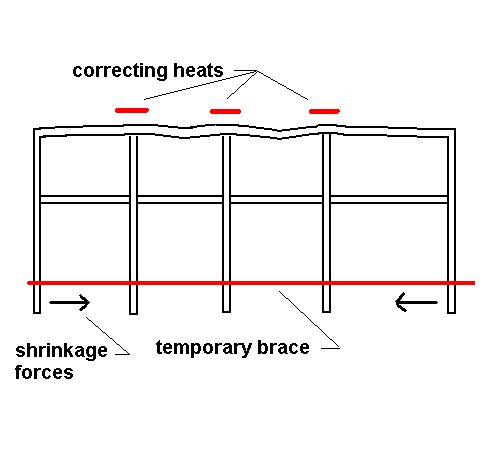
A similar thing happens with permanent braces placed to strengthen and hold a corner connection at ninety degrees. The diagram below illustrates the problem.
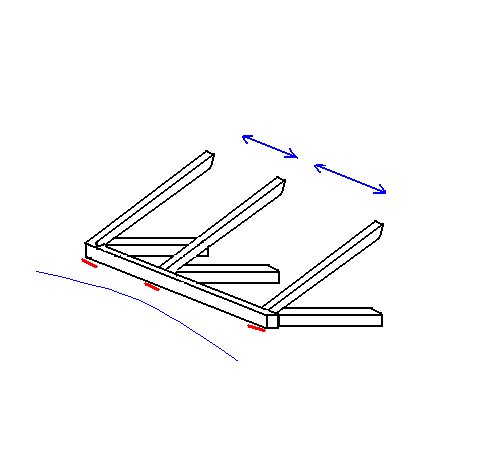
Applying that correct heats to the red areas will pull the tubes back.
One simple solution is to duplicate the welds placed on the inner corners of the tubing with simple weld beads placed on the free corners of the tubing. Heating with a torch to a red heat and letting cool will have the same effect. One must be careful not to apply too much heat. Doing it in two or three stages is prudent until one is sure what amount of heat is required.
Some framing such as a canopy that attaches to a wall over a store front entrance requires additional bracing before welding and sometimes requires further straightening after welding is completed. The blue indicates the forces and resulting distortion. The red indicates the location of the corrective heats. Bracing would reduce or eliminate this problem.
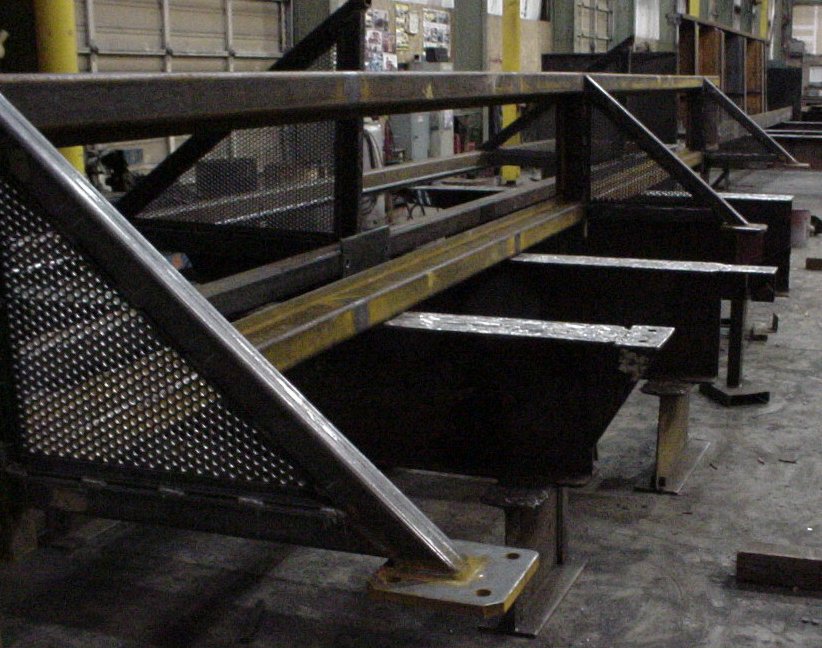
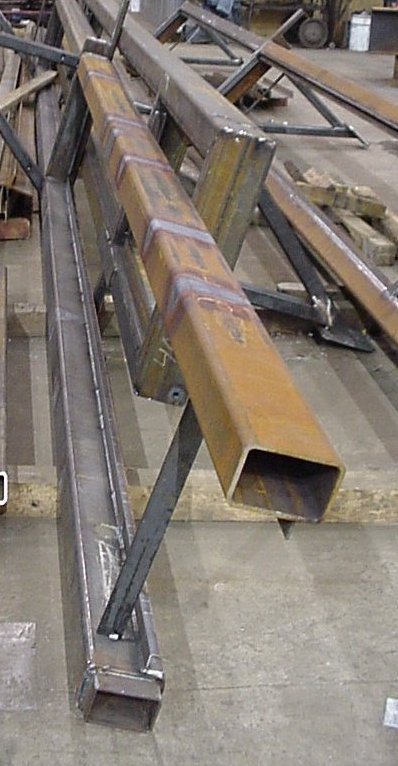
The photos show actual examples of framing. Note that shrinking heats were applied in order to straighten the assembly after it had distorted from welding. The major problem was caused by a little angle that had to be continuously welded on the inside of the tubing.
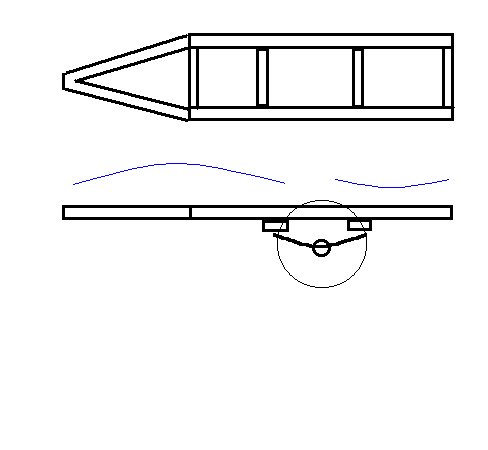
Small trailer frames are usually built on a single plane. By using a sequence one can keep the frame square and straight. If desired, a positive camber between the axle and hitch can be welded in and a negative camber created on the overhang behind the axle supports. If not successful at causing the frame to take a camber after welding is completed, the camber can be created afterward using heat from a torch.
The blue lines indicate a desired trailer camber. This camber is slight in the order of 1/8 in a three-foot span.
Distortion is always a problem when welding. The suggestions outlined here are by no means the only solutions. If one keeps in mind that he may face a distortion problem whenever he welds there is a likelihood that the problem will not become impossible to control.