

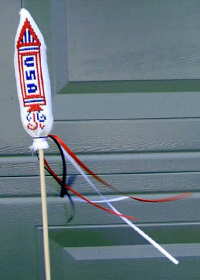
Table or Party Decorations
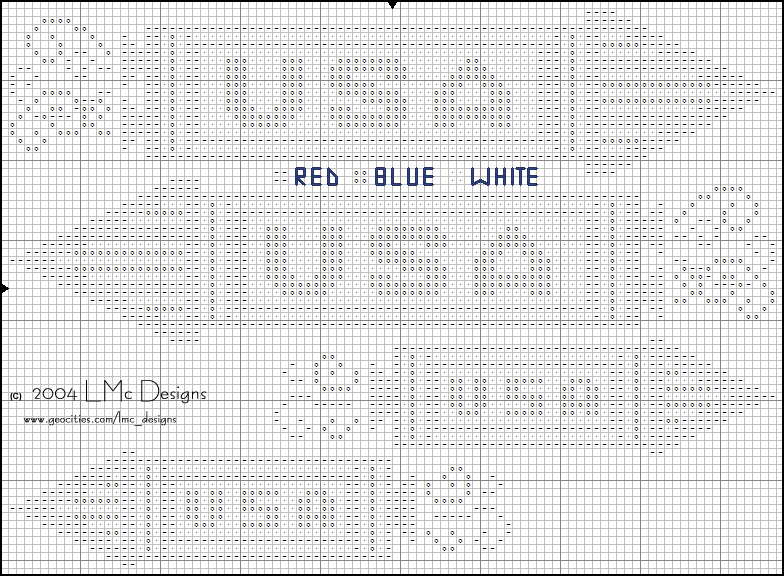
Click here to download BW chart
Project Instructions
Materials: Finished Rocket Cross Stitch
Red / White / Blue 3/16" Ribbon
1/4" dowel
Quilt Batting or other stuffing material
Finished Size: Small Rocket - 5-1/2 to 6 inches plus ribbon and dowel
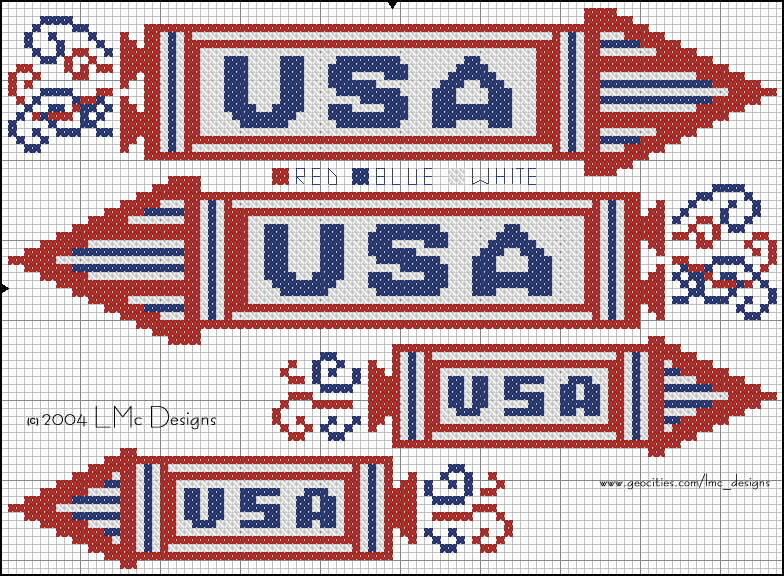
Floss: 2 or 3 strands - if stiched on white or off white Aida, stitching the white is unnecessary
Cross Stitched Rockets:
- Stitch two rockets on one piece of fabric no closer than 10 stitches apart. Leave at least 10 stitches extra
fabric on each side of the outsides of the rockets.
- Roll (do not fold) the finished piece so that the front of the finished rockets are face to face.
- Using white floss, sew the opposide sides of the piece together by making a running stitch up the side of the
rolled fabric 1/2 of the number of stitches you've chosen to separate your rockets by. EX: If your rockets are
separated by 10 stitches, then place the running stitch.5 stitches from the outside of the rockets (count the
stitches from the widest point). When you get to the angled top, adjust the stitching so that the same amount
of fabric is between the seam and the stitches, leaving 3 cross stitch stitches at the top rather than coming to
a full point.
- Trim the seam edges to about 1/4", carefully notching the seam in the angle at the top of the rocket.
- Turn fabric outside in using a blunt object to create the angled tip, and smooth inside seams.
- Use a bit of flat batting to lightly stuff the top of the rocket.
- Stuff the body of the rocket so that it is round. I found rolling quit batting cut slightly longer than the body of the
rocket and rolled to the approximate diameter of the rocket was easiest to work with. I folded a small piece of
the batting over the top of the dowell and used the dowel to push the roll of batting into the body of the rocket.
Do not overstuff nor use too much batting. Too much makes the rocket harder to stuff.
- Wriggle the dowel into the rocket.
- Cut ribbon into 18" pieces, gather excess aida around the dowel under the design, then tie all 3 ribbons
around the dowel and let the ends dangle
- Trim the dowel to desired length. I envisioned the finished rockets to be grouped in a mason jar or
incorporated into another design as a table centerpiece. 1 dowel should work for 3 rockets. A stitcher wrote to
let me know she is going to several on full-length dowels to mark the corners and sides of a picnic space on
4th. Another is going to create bookmarks for charitable projects, including a veterans group. I'd love to hear
what you do with yours.
This item is meant for decoration only and is not a play toy.
WARNING: NOT SUITABLE FOR SMALL CHILDREN. THE FINISHED ROCKET ON THE DOWEL COULD CAUSE INJURY IF MISHANDLED OR AS A RESULT OF AN ACCIDENT. CAUTION AROUND CHILDREN AND INCAPACITATED ADULTS IS REQUIRED.
To save this information highlight above text and copy/paste into your word processor.
If you are interested in using the project for charitable or non-profit purposes, please email me with the details..
Thank yor for respecting my creative endeavors


Upated June 19, 2004