Here's an outline of the steps involved in preparing and storing your unmounted stamps.
|
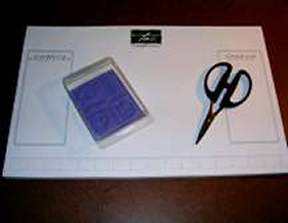
An unmounted set as it will arrive at your door. You will receive the rubber image and foam mounting cushion, unassembled, in a plastic box. |
| |
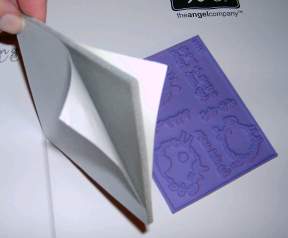
The foam cushion has two sides: a smooth side which you will stick to an acrylic block plus adhesive side to stick to the rubber stamp image(s). |
|
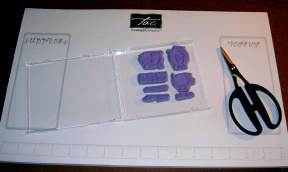
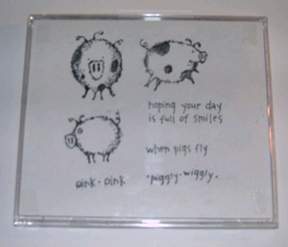
Here's your new stamp set, all cut and ready for use. For cutting your rubber stamps, I recommend the Kai scissors. There are many ways to store your stamps. Empty CD cases (just remove the inner tray) are a popular, easy storage option. |
| |
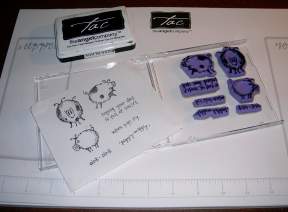
(Optional step) Cut a piece of scrap paper 4 5/8" by 5 3/8. Ink up all your stamps right in the case, lay the paper on top and rub with your hand to make an impression of all the stamps. (You don't need a perfect image). When you're done, be sure to clean your stamps right away! |
| |
I adhere my index sheet to the inside of the front cover using double stick tape. |
|
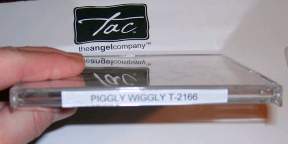
You can label the spine of the CD cover in two ways. One method is to use a label maker. The second method is to print out your stamp information (stamp set name, #) and adhere it with double stick tape to the inside of the spine so that the text shows through the spine. The advantage is that the label is inside the case and can't be rubbed off/made dirty. |
When you're ready to stamp, take out your trimmed image, place it on an acylic block, ink up and stamp away! When you're done, clean your stamp, remove it from the block and return it to the case. Your block is ready to be re-used for more stamping fun!