EVOC 518 Lesson Plan Form - Lesson 1

INSTRUCTOR: Leonard A. Moreno
HOURS: 3 of 24 minimum required
SUBJECT: Vocational - Basic Computer Repair - CD-ROM Drives

The STUDENT PERFORMANCE Objective - (by the end of the lesson students will be able to):

bullet

Condition: Given an CD-ROM drive and a set of step-by-step instructions ...

bullet

Person: each student...

bullet

Performance: will configure and install a CD-ROM drive into a computer ...

bullet

Criteria: that works.

The EQUIPMENT and MATERIALS required for the lesson:

bulletHandout - showing the step-by-step construction process.
bulletComputer - from which the CD-ROM will be installed.
bulletCD-ROM Drive - the material to perform the task.
bulletCables - to connect from the drive to the motherboard.

How INSTRUCTOR will FACILITATE student learning:

Introduction - Anticipatory Set (30 minutes)

bullet

Statement of objective (from above) - (By The End Of Lesson Students Will Be Able To)

bullet

Instructor shows working CD-ROM drive installation.

bullet

Instructor informs of different CD-ROM drive types.

bullet

Tie in the importance of using step by step installation process.

Instruction - Key Concepts (30 minutes)

bullet

Hard drive types (DVD or CD-RW) Digital Versatile Disc / Compact Disc Rewritable.

bullet

Demonstrate each step on the handout (see attached handout).

Checking for Understanding and Clarification (15 minutes)

bullet

Ask students to identify what DVD and CD-RW are, and their difference.

bullet

Ask individual students questions about particular steps.

Guided and Independent Practice (1.5 hours)

bullet

Actual student practice will come after the demonstration.

Conclusion - Closure (15 minutes)

bullet

Reemphasize importance of the step by step process.

bullet

Encourage students to use handout as a guide.

How the students will be EVALUATED:

The student will demonstrate in a lab setting proper configuration of a CD-ROM device. The student will identify which drive is a master and which on is a slave. The student will identify the cable that is used and install it correctly.  The student will install the CD-ROM and configure the cables properly.  The student will have a working CD-ROM drive when the computer is turned on.


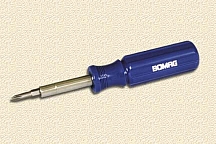
STEP 1: Get out the tools you'll need - Phillips screwdriver.

STEP 2: Ground yourself - static electricity can kill your computer.

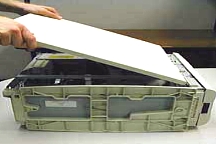
STEP 3: Open your computer case - don't lose the screws or your placement.
 

STEP 4: Just like the hard drive, we must select master or slave to configure.  Since it will be the only CD-ROM, we will select master.

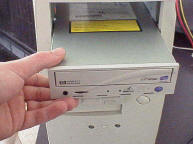
STEP 5: Find one empty big drive bay and install the drive into it from the front, make sure its facing the right way.

STEP 6: CD-ROM's make the disc go so fast that it will vibrate if the screws aren't tightened correctly.
 

STEP 7: Connect the longest end of the CD-ROM cable to the motherboard, and the other end to the CD-ROM drive - remember pin1 is the red line.
 

STEP 8:  What this snake - if you want to hear your music CD's or DVD movies, you must connect this cable from the CD-ROM drive to your sound card.
 

STEP 9: Let get boggy, connect the big power guy to the back of your drive and your ready to go!

STEP 10: Close your computer case - make sure everything goes back.

Hosted by www.Geocities.ws

1