|
EVOC 518 Lesson Plan Form - Lesson
2
INSTRUCTOR: Leonard A. Moreno
HOURS: 3 of 24 minimum required
SUBJECT: Vocational - Basic Computer Repair - Processors
The STUDENT PERFORMANCE Objective -
(by the end of the lesson
students will be able to):
 |
Condition: Given an
processor and a set of
step-by-step instructions ... |
|
Person: each student... |
|
Performance: will
install a processor into a
computer motherboard... |
|
Criteria: that works.
|
The EQUIPMENT and MATERIALS required for the lesson:
| Handout
- showing the step-by-step construction process. |
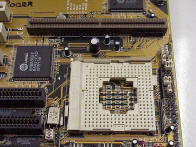
| Computer - from which the processor will be installed. |
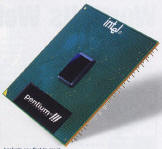
| Processor - the material to perform the task. |
| Cooling - heat sink and fan |
How INSTRUCTOR will FACILITATE student learning:
Introduction - Anticipatory Set
(30 minutes)
|
Statement of objective (from above)
- (By The End Of Lesson Students Will Be Able To) |
|
Instructor shows working processor
installation. |
|
Instructor informs of different
processor manufactures and types. |
|
Tie in the importance of using step
by step installation process. |
Instruction - Key Concepts (30
minutes)
|
Manufacture types (Intel, AMD,
Cyrix) |
|
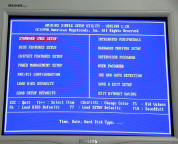
Processor configuration (Slot,
Socket and Slocket) |
|
Demonstrate each step on the handout (see attached
handout). |
Checking for Understanding and Clarification
(15 minutes)
|
Ask students questions about
different types of manufactures. |
|
Ask students to identify what Slot,
Socket and Slockets are. |
|
Ask individual students questions about particular
steps. |
Guided and Independent Practice
(1.5 hours)
|
Actual student practice will come after the
demonstration. |
Conclusion - Closure (15 minutes)
|
Reemphasize importance of the step by step process. |
|
Encourage students to use handout as a guide.
|
How the students will be EVALUATED:
The student will demonstrate in a lab
setting proper installation of two processor types. The student will
identify which processor goes to which type of configuration. The student
will identify where on the motherboard the processor will go and install it correctly. The
student will configure the proper processor configurations on the
motherboard correctly and install a heat sink and fan unit on top of the
processor successfully. The student will have a working processor
when the computer is turned on.
|