Well it's been the
works for awhile. This will be the first in hopefully a long
run of how to build projects. I hope you enjoy them and find
them useful. Click on the photos to enlarge.
This
topic will be about changing those non movable quarter
windows. I found that some fastbacks were fitted with power
rear windows but all others had fixed in place windows. Well,
I like the cool summer's night breeze and I had to get rid of those
fix rear windows. I used the parts from a '72 coupe. This is how I
did it.
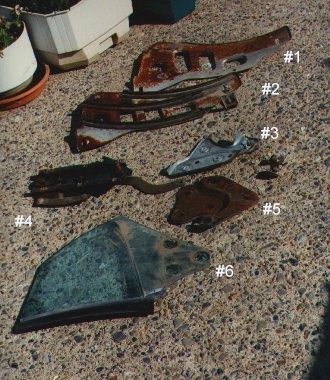
Here are some of the parts in the
project.
1. Old brace that supports the fixed window.
2. Is the new brace with guides.
3. Bracket with rollers.
4. Regulator Assy.
5. Old bracket removed from window. Will
install #3 in it's place
6. Quarter window
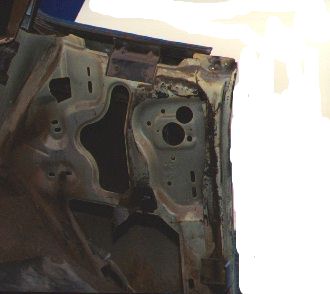
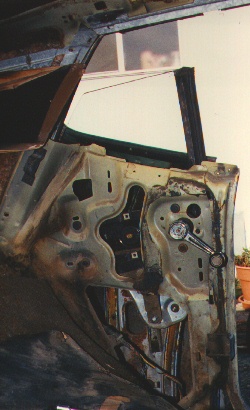
This
is what it looks like after you remove all of the parts. Someone had
used RTV Sealant to seal the window. What a mess to remove
it. Once you pull out the rear seat and remove the panel
you'll have access to the window and it's brackets. I would
pull the parts from the donor car first so you have and idea how
they are oriented.
The first thing I did after removing
the window parts was get the shop vac and picked up all of the dirt
that had accumulated over the years.
This
is a picture of the window stops. One stops the upward movement
and the other stops the downward movement. Make sure you get
them. Also save all of the nuts and bolts from the donor
car. I put them right back on the removed part for security
and incase I don't get around to the project for awhile I'll know
where they go.
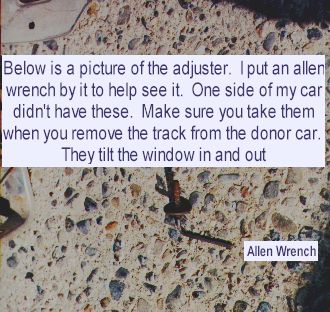
The Allen
type adjuster tilts the window track . Install these before
you install the window track.
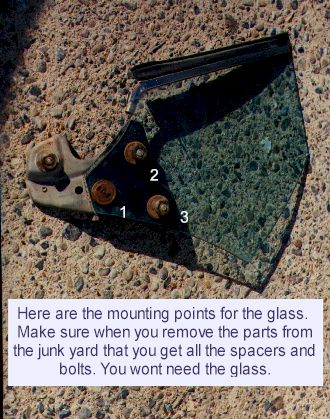
The
old fixed window attachment points have different spacers than the
roll up one's. Remove the bracket from the donor car's window
and make a point to their placement.
You
might find a better sequence of installation, but the steps below
may give you a starting idea.
1. Place adjuster screws in position
2. Set in window track Don't
tighten yet.
3. Slid in window , have a helper hold
it to the top.
4. Install Regulator.
5. Connect arm of regulator to
window.
6. Roll window up and down. Check for
binding and placement in window channel.
7. Make necessary adjustment to Allen
screws and lock the retaining nuts down.
8. Position (door) panel up
to window and mark for hole placement for window
crank. A one inch hole should do it.
That's it, you'll now will be able to enjoy the fresh
air.