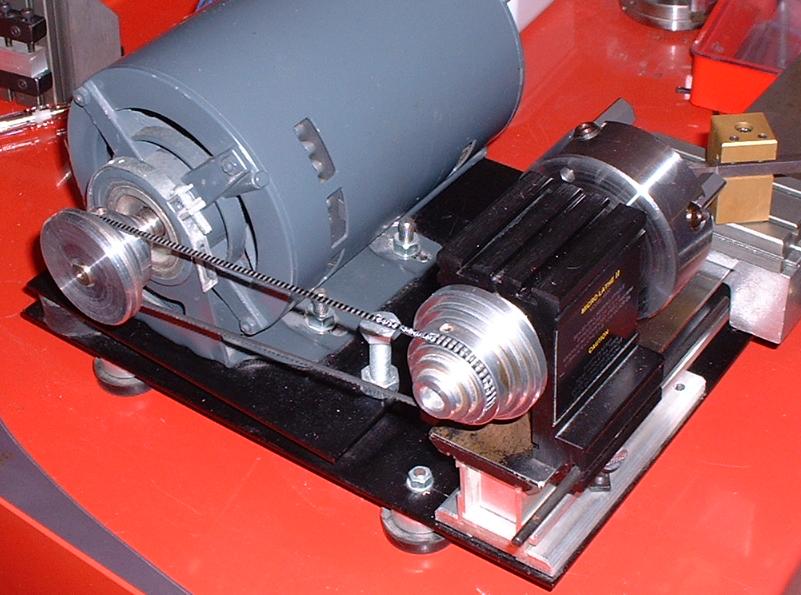
I've always promised myself a small lathe and a milling machine one day. I eventually took the plunge and bought myself a Taig micro lathe, made in the US by Taig Tools and sold as the Peatol lathe by Peatol Machine Tools in Birmingham, UK. I ordered it with the three-jaw chuck and I now have the four-jaw chuck. I also purchased their mounting assembly, 1/2 HP motor, pulley set and drive belt, tailstock, vertical slide (milling attachment), collet set, 1/4" chuck, headstock chuck adaptor, grinding wheel set, tool bit set, fly cutter, and face plate with angle bracket set. I've just bought the top slide, enabling me to turn short tapers.
The mounting assembly is unique to Peatol, consisting of a substantial steel plate about 10" by 13" on which the lathe is mounted. The motor is bolted to a smaller plate hinged on a couple of rubber mounts, with a screw and locknut to set the angle of the motor mounting plate, adjusting the belt tension.
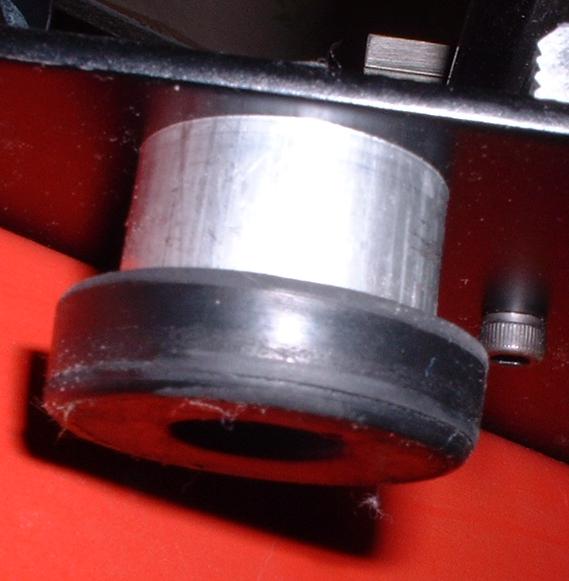
Four rubber feet acquired from my local Maplin emporium, and four spacers made from some round aluminium bar (on the lathe, of course) make the unit nice and stable, and minimise vibration and noise.
First, bore the jaws of the chuck so that they will grip the workpiece properly.
For your first turning exercise, you will need something to machine! I would suggest buying a round piece of aluminium 3/4" diameter and a foot long. Using a hacksaw, cut off a piece about 3" long. Try to get the ends as square as possible, as it makes the facing operation easier. The remainder can be used for further practicing. Adjust the belt on the pulleys to get a rotational speed of approximately 1500 revs/min. Different materials require different speeds at the tip of the cutting tool, and this gives about the right speed for turning aluminium with a diameter of 3/4".
Place your piece of aluminium in the chuck with about 2" protruding and tighten it. It's a good idea to tighten it progressively using the three tommy bar positions, to ensure it is gripped evenly by the three jaws. Remove the tommy bars and rotate the chuck by hand to make sure that it isn't fouling anything, nothing is going to fly off, and that the workpiece isn't off centre. It's very important to always make this check before you start the motor, to ensure that the tommy bars or chuck key have been removed. If left in the chuck they can act as high-speed projectiles and cause serious injury, or contact the lathe ways and damage them.
Mount a round-nose tool in the toolpost, and check that the tip of the tool is at the same height as the centre of the workpiece. If you have the tailstock, you can use the tailstock centre for this check, it'll be more accurate. If the tool isn't the correct height, you'll need to pack the toolholder. Don't have too much of the tool overhanging the toolholder, as rigidity is important. Position the toolholder so that the tool is at right angles to the workpiece. You don't have to measure it, just set it by eye so that it looks right. Make sure that the toolpost screw and the tool securing screws are tight. Position the carriage and cross-slide so that the tip of the tool is at the end of the workpiece and nearly touching it. Move the carriage towards the headstock until it is about 1/2" from the chuck, and position the stop rod so that there is no possibility of anything contacting the chuck when the carriage is as far left as it can go. Tighten the stop rod thumbscrew, move the tool back to the end of the workpiece, and then back to the chuck, checking again that nothing nasty is going to happen when machining the piece of aluminium along its length. Move the tool back again so that the tool is at the right hand end of the workpiece. Turn the chuck (again) and make sure that nothing untoward will happen when you start the motor.
Put on your safety goggles (you have got a pair, haven't you) and start the motor. Make sure the chuck is rotating so that the top of it is moving towards you (clockwise relative to the headstock). Move the carriage to the left about 1/4", and advance the tool until it just touches the rotating workpiece. Note the setting on the scale, back the tool out slightly so that it no longer contacts the workpiece, and move it to the right, just beyond the end of the work. Move the tool in to the previous setting you noted, and a further .010". Now you are ready to make your first cut! Slowly move the carriage to the left. When the tool contacts the end of the workpiece it will start cutting. Continue moving the carriage, trying to keep it moving as smoothly as possible, until you have reached the limit set by the stop. Note the scale reading, back out the tool, and move it back to the right.
Congratulations, you have just turned your first piece of metal!
After a bit of headscratching, I came up with the idea of using the toolpost to hold a DTI when setting up the vertical slide (Figure 1).
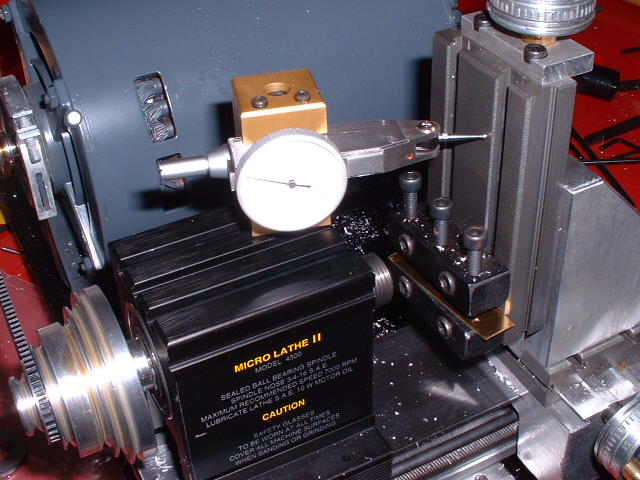
Figure 1. Holding the DTI
The same technique could also be used for setting up the workpiece for milling.
Something I haven't seen discussed is using the milling fly cutter in conjunction with the vertical slide to face the end of a piece of aluminium.
Figure 2. My fly cutting setup
Note the use of a piece of brass strip to prevent the workpiece from being marked by the securing screws on the slide. Also, the workpiece needs to be in front of the headstock so that the cutter forces it downwards, for maximum rigidity.
I prefer working in metric units. If anyone else suffers from this mental aberration, the following tip derived from an article in the illustrious pages of MEW might prove useful. You do all your measuring with a metric micrometer or vernier.
1 mm is (approximately) 0.040" (40 thou) and 0.1 mm is 0.004" (4 thou). Thus, if you need to machine say, .3 mm off a shaft diameter, you multiply 0.3 by 40, giving 12 thou. Since we are taking it off both sides, the cut needs to be 6 thou.
Suppose we now need to take off a further .07 mm, to get it to the correct size. We multiply 0.07 by 4, giving 0.28 thou, and a cut of 0.14 thou.
If it's still not quite right, we repeat the process with 0.01 mm = 0.0004".
This iterative process gets us as close as we like, and is easier and less prone to error than converting measurements from metric to imperial and back again.
Return to Leon's home page: Home