I've recently acquired a couple more caligae references. The Valkenburg style is described in the book, "Romeins lederwerk uit Valkenburg Z. H.". The book is in dutch, but there are plenty of photos and drawings. The nailing patterns were much more varied than what I have been using. "Romische Lederfunde aus Mainz" shows both caligae and calcei finds from Mainz. This book has helped me to understand the unique lacing of the Mainz style. Though I drew my pattern with single straps about the toe, as is shown in Bishop and Coulston, V shaped toe straps were perhaps more common.
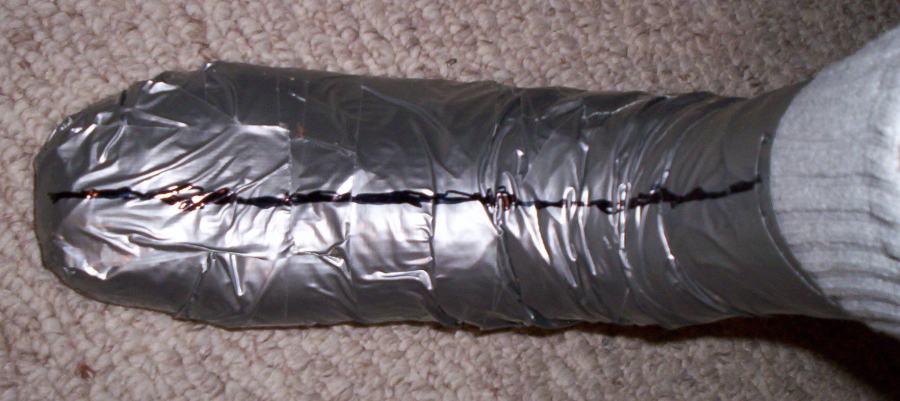
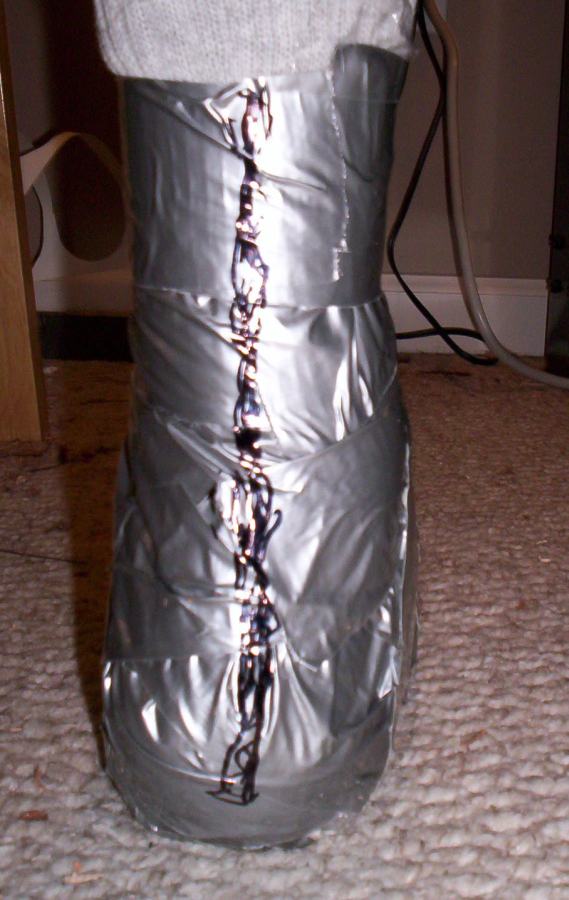
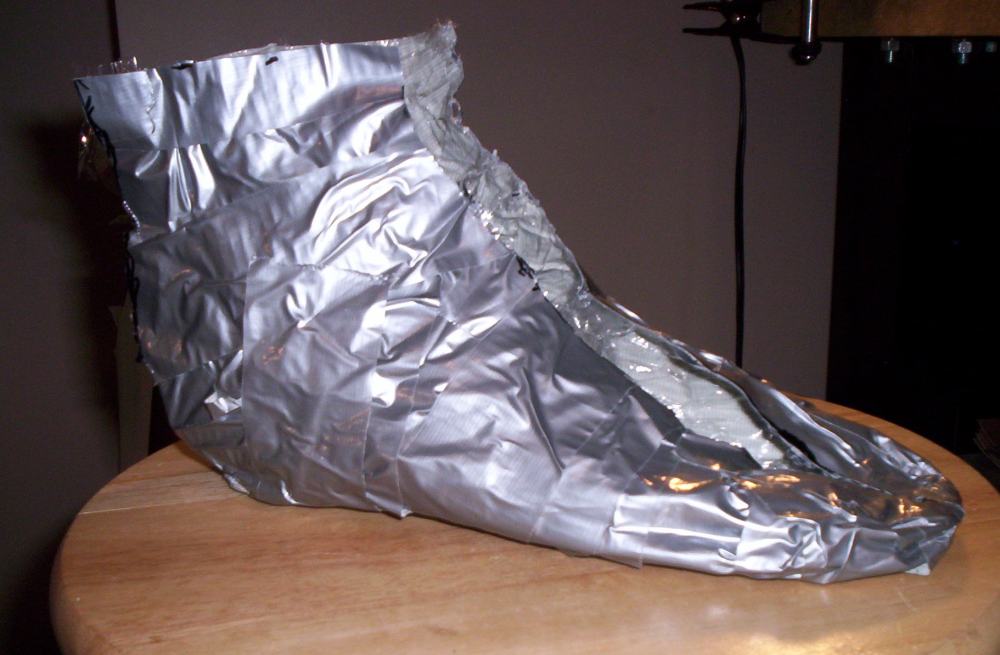
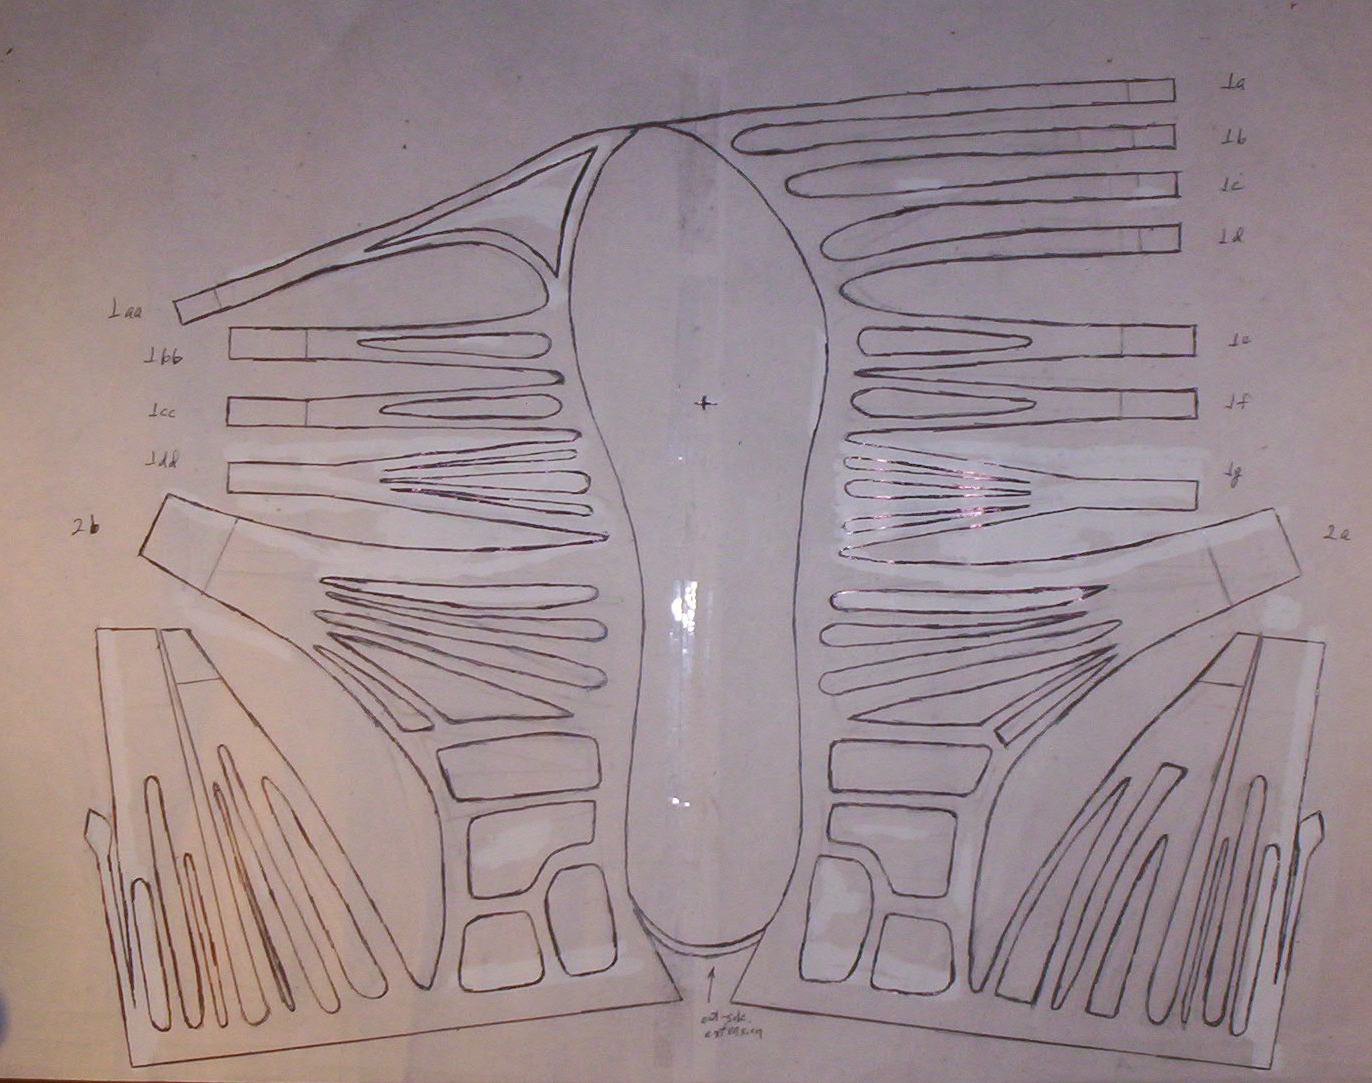
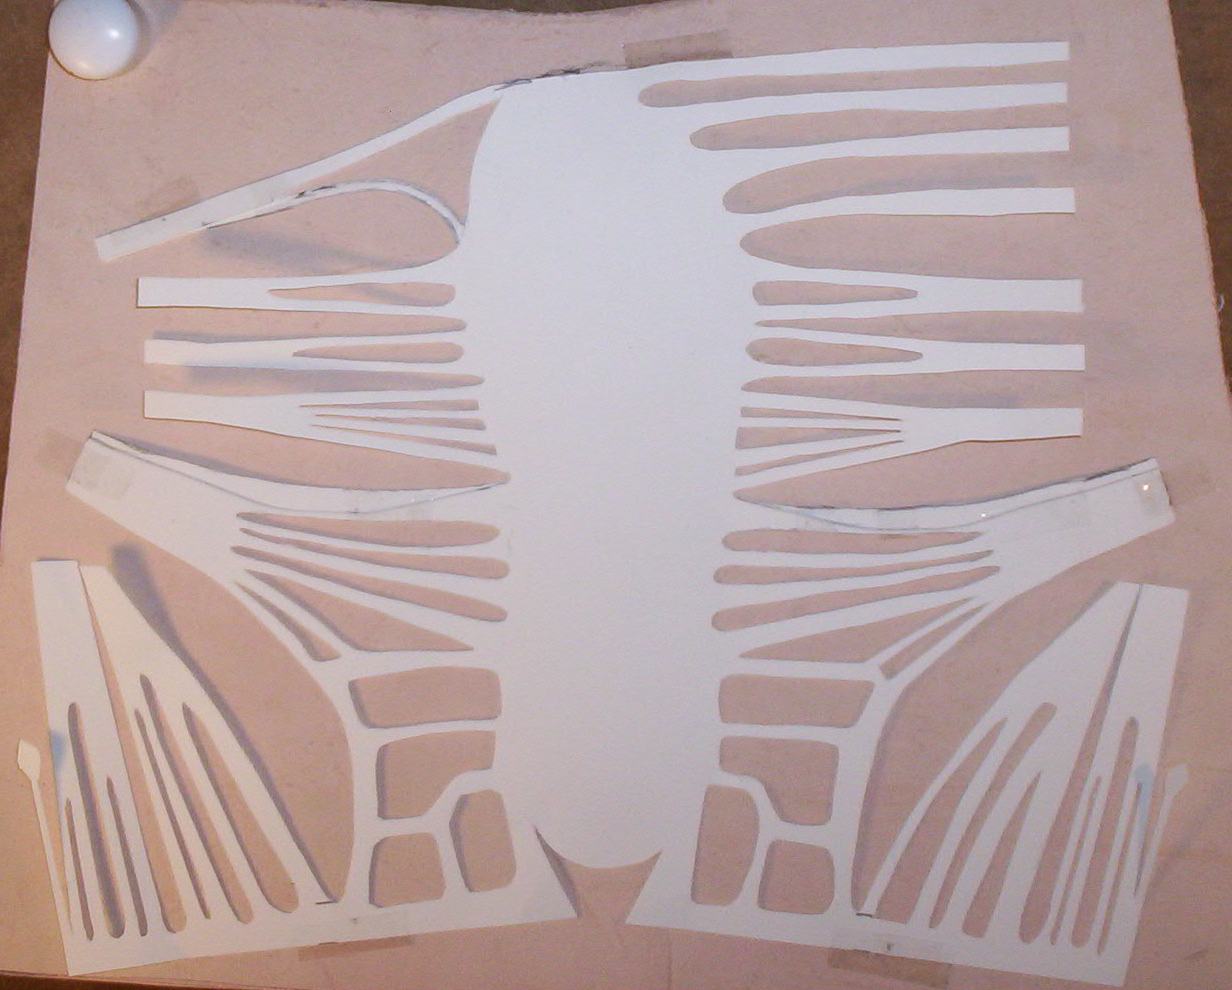
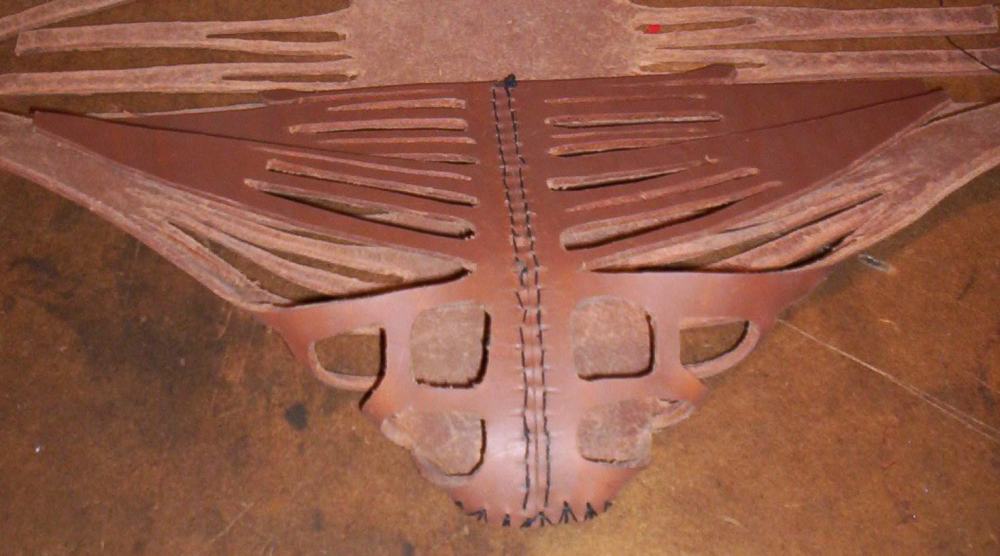
I've just started the construction of yet another pair of caligae. This time I spent more time on the pattern. I finally got around to trying the duck tape over the feet method as described by Florentius. While I did not use his method to make an entirely new pattern, this technique provides a very good way of checking the existing pattern. For my feet an upward curve of the lowest ankle strapes was definitely indicated. Here is my new pattern:
1. Use of thicker leather for the upper. Those located in Europe have the advantage of being able to see close up the genuine article. It is the opinion of those who appear to be more familiar with this topic than I am that the leather of the upper should be in the 3mm to 4mm thick range. My next caligae will therefore use 8-9oz leather instead of 5-6oz.
2. I am going to try Martin Moser's method of stitching the lower back. Stitching together the "keystone", as shown on the original pattern left much too much material behind the heel.
3. Instead of two pieces of 8oz leather glued together to make the outsole I am going to use a single piece of 16oz bends. This is specially compressed leather designed for such an application. This is also more correct as I am told that the calligae found have only a single piece of leather making the outsole.
4. The use of real hobnails.
The outside straps are drawn much too long. This may be remedied by simply delaying the cutting of the strap holes to last. Cutouts that should be done last I've high-lighted in red.
To make sure that the straps come out long enough, I've shown in green where the straps should be initially cut longer.
The first pair of caligae that I made from pattern from "Stepping through time" resulted in shoes with too much material behind the heel. For the new pattern I changed the back. Notice that the notch is gone. The idea is now to simply fold the leather around the back of the heel
First print out the pattern. Then measure the length of your longest foot from the base of the heel to the tip of your big toe. The ratio of this measurement to the corresponding length of the printed pattern gives the required magnification factor. Most copy centers have machines that can make enlargements from magnification factors taken to two decimal places. This gives a cutting pattern scaled to your feet.
From the bends cut out the out-soles. Make sure to do a left and a right! From the 5-6oz leather cut out the insoles. Some people make the insoles a bit smaller than the out-soles. I found that making them the same size worked find.
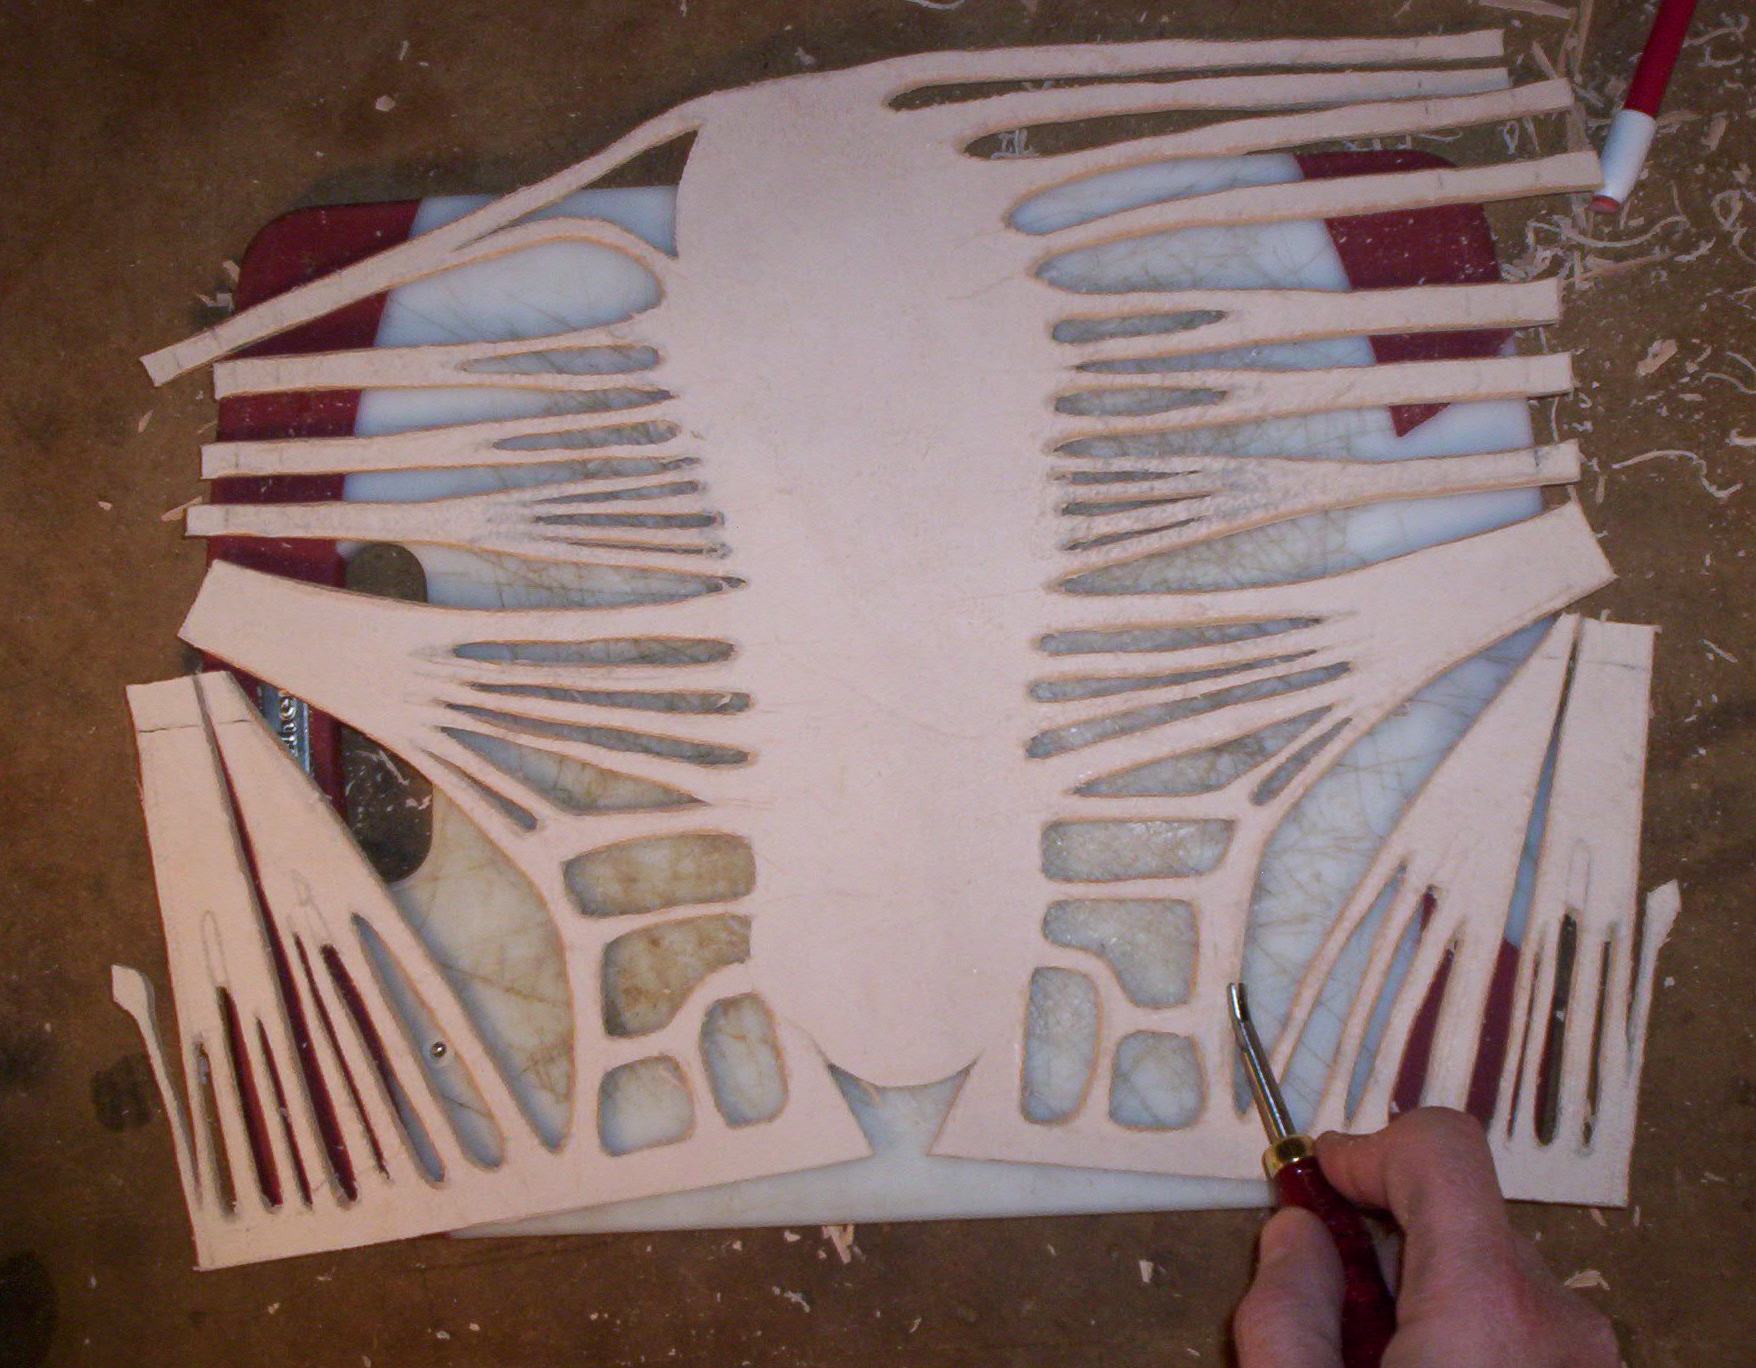
From 8-9oz leather cut-out the uppers. Make sure that you cut a left and a right. Do not cut the red cutouts! Play particular attention to the little semi-circular knobs at the joins between horizontal and vertical straps. Is it my opinion that these are not just decorative, but serve to prevent the tearing of the thin straps. To make these use a 1/8 inch round wood carving tool, carefully working your way around the circumference of the knob. Use an edge beveler to round the inside edges of the straps.
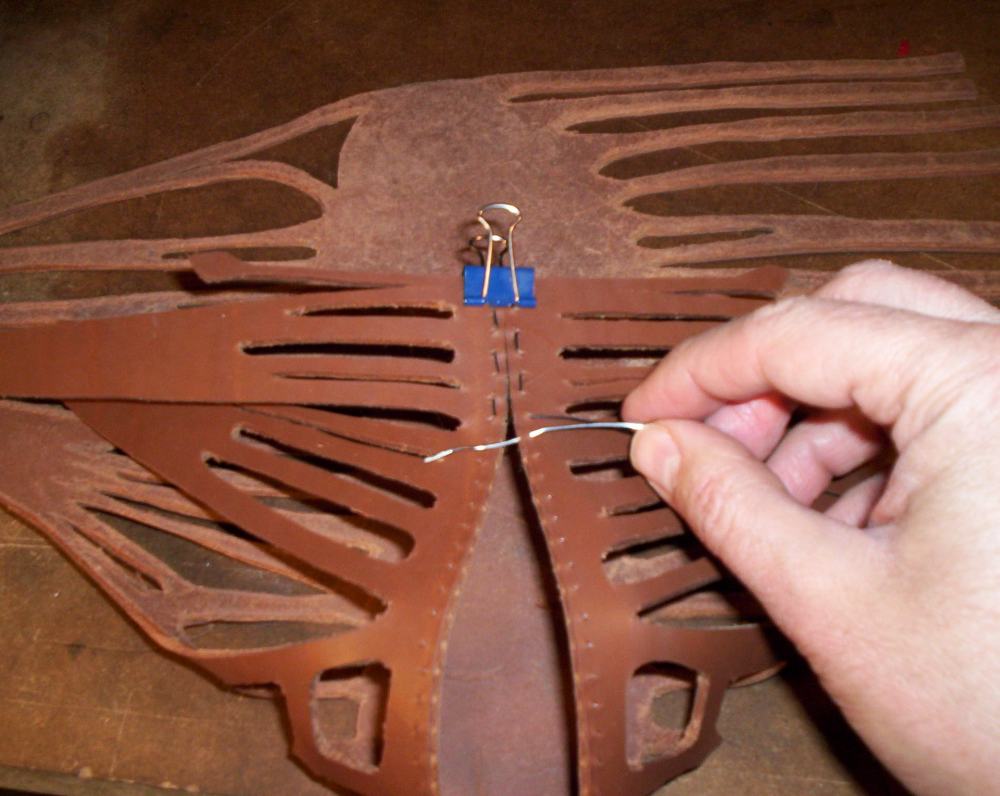
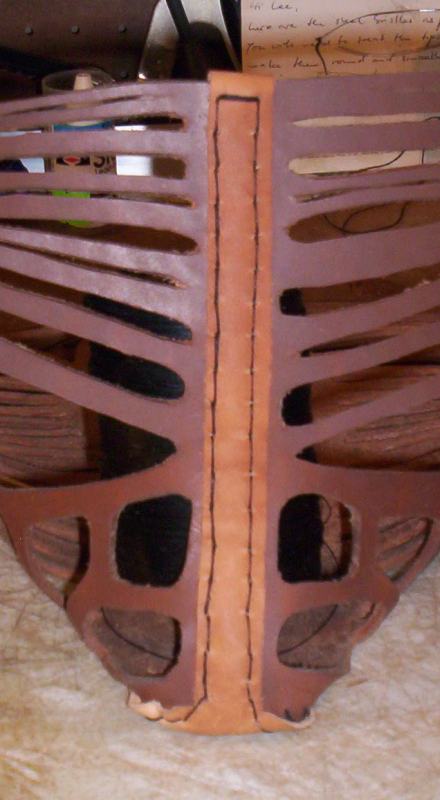
Next stitch together the backs. Many types of stitches are possible, a simple cross stitch is particularly easy to do, but this does not seem to be what the Romans preferred. An edge stitch, reinforced by a tacked-on strip of thin leather, appears to been very common:
I no longer recommend simply glueing the out-sole. While the in-sole may be safely glued in-place, glue by itself, even with hobnails, is not sufficient to keep the out-sole attached to the upper. The out-sole needs to be stitched on using either a tunnel stitch about the edge, the hard way, or by a tunnel stitch between the upper surface of the out-sole and the upper, the easier way. Using a curved awl make a series of tunnels in the out-sole following the edge. An 1/8 inch from the edge is likely a good choice. As the stitches in the upper will be covered by the in-sole a simple tack stitch is fine there. When sewing, use a flexible needle to run the thread through a tunnel, up and down through the upper, and continue until you have the entire stitch completed. You may want to go through a few iterations tighting up the thread till the upper and out-sole assembly is secure. See below for details on the required tools. When glueing in the in-sole use spring clamps to hold everything together. The outsole, upper, and insole form a sandwich through which the nails are inserted.
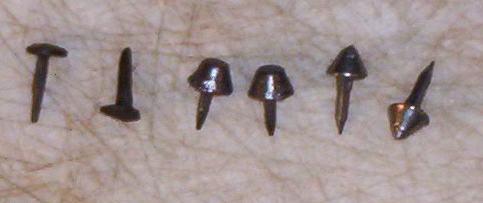
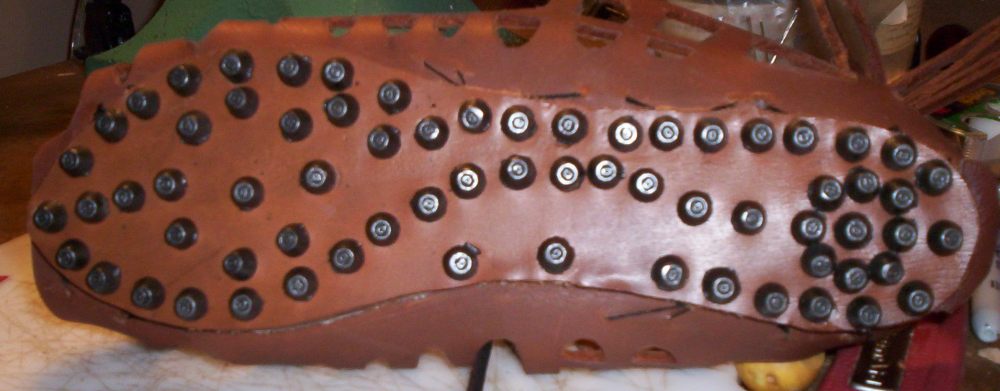
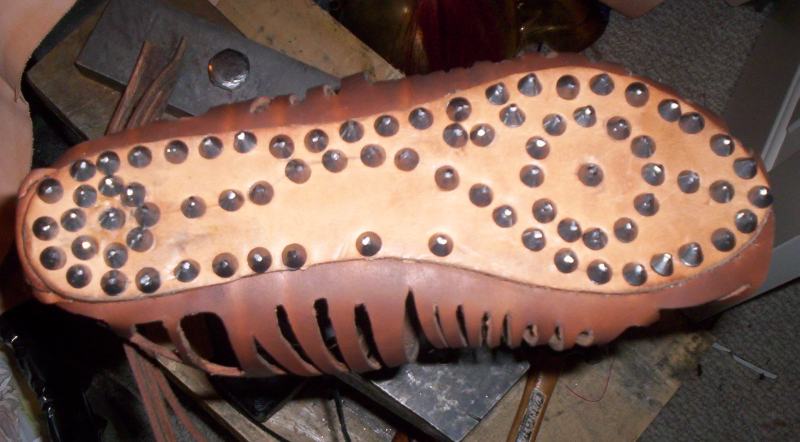
Following the nailing pattern pound in the hobnails. Roman reenactors in the USA have been using 5/8 inch Tremont Cut Nails. Though of the right diameter and much better than say carpet tacks, they look nothing like roman hobnails. Roman hobnails are conical in shape. Recently I discovered a source of almost correct hobnails from Le Prevo Leathers in the UK. My current pair of caligae use these. To apply the nails first draw the nailing pattern on the bottom of the outsole in pencil. I found that the guide holes that were necessary when using the Tremont cut nails was no longer required. The irregular cross section of the Tremont nails tends to cause them to bend in unexpected directions. You need some sort of anvil to pound on. There has been quite a debate on clinching of the nails. Previously I was definitely in the clinching camp, but now I'm not sure. Roman caligae consisted of only three layers, the out-sole, the upper, and an insole. Walking on clinched nail ends is not particularly comfortable. The Le Prevo hobnails come with shorter shanks. Using the layers of leather that I did, 6mm out-sole, 3mm upper, and 2mm insole, gave plenty of room for the nails. The nail shank just poked into the insole without penetrating it.
Having forgone clinching of the nails, some additional means of attachment is a good idea. On the pair of caligae shown below I additional bit of security is provided by a zig-zag tunnel stitch on the outside between the out-sole and the upper. Due to the hardness of the bends this is not an easy operation. I did this about both the heel and the toe. Curved awls and either curved or flexible needles are needed. Flexible steel needles, formed by a piece of thin steel wire folded over into a loop and solder at one end are used to sitich through the tunnels.
We're almost done. Put your feet in your new caligae and pinch the straps together. Mark with a pencil the location where they join together. This will tell you how long the straps need to be and where the lacing holes need to be. Trim the straps and finish cutting the holes.
Finally, finish the leather with a generous coating of Neatsfoot oil.
Caligae are laced in a criss-crossed pattern. Start by threading the leather lace from the outside of the two outer-most straps at the toes. The straps at the toes are an exception. Notice that there is one strap on the inside for four straps on the outside. Just bunch these four outside straps together against the single inside strap. Then simply criss-cross the lace going from strap to strap making tight Xs between the straps. Tie the lace about your ankle as you would any shoe. Be careful when purchasing the lace. Tandy appears to sell lace in at least two thicknesses. You want to use the larger lace that is about 1/8 inch by 1/8 inch square.
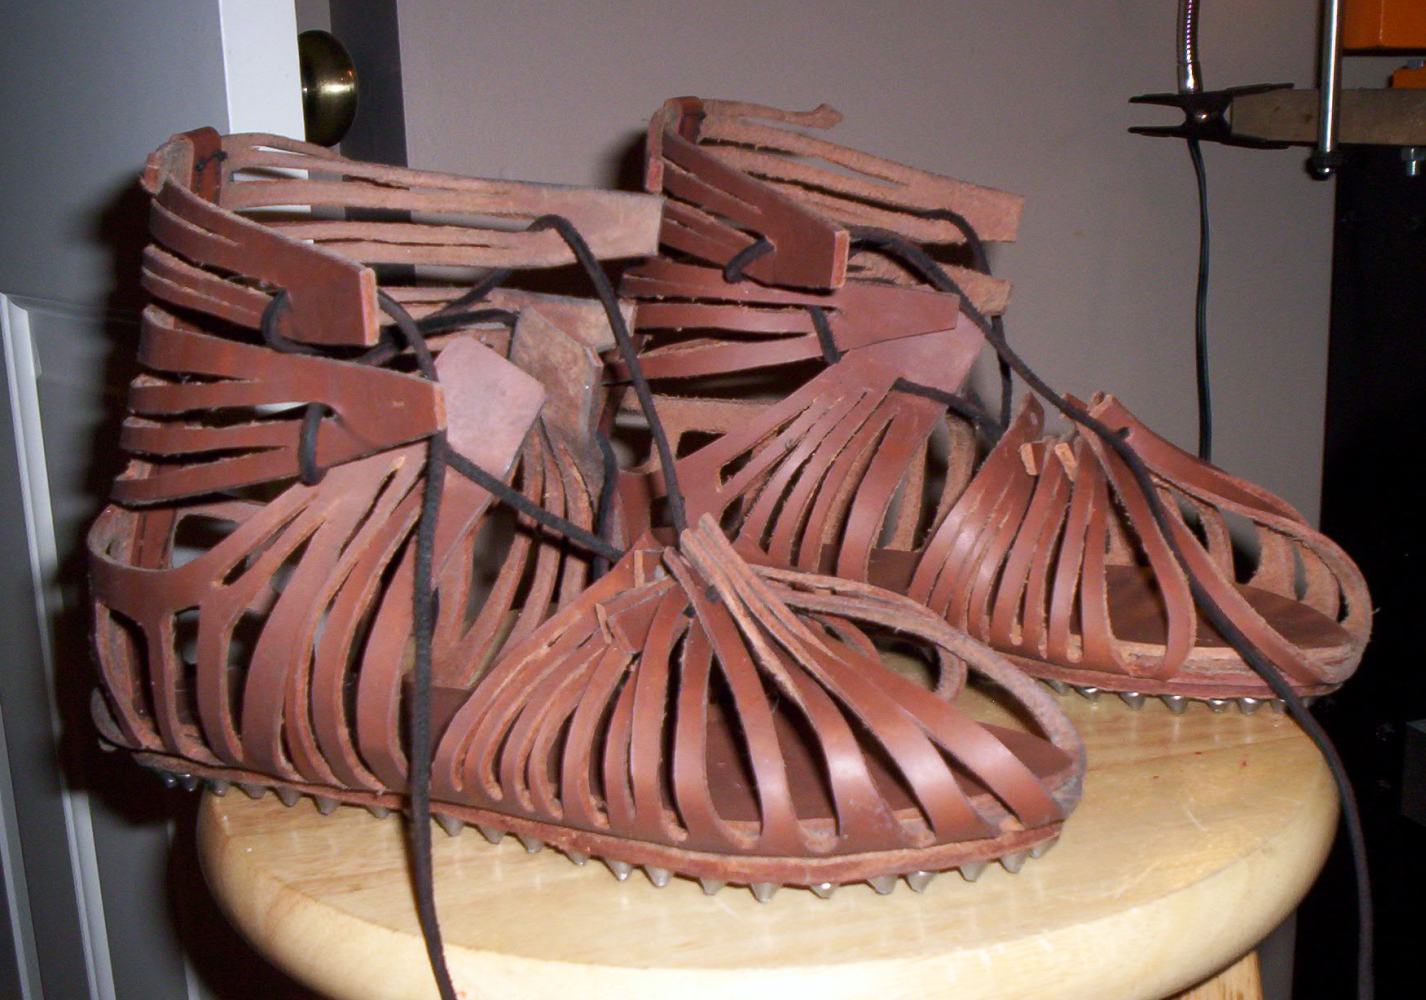
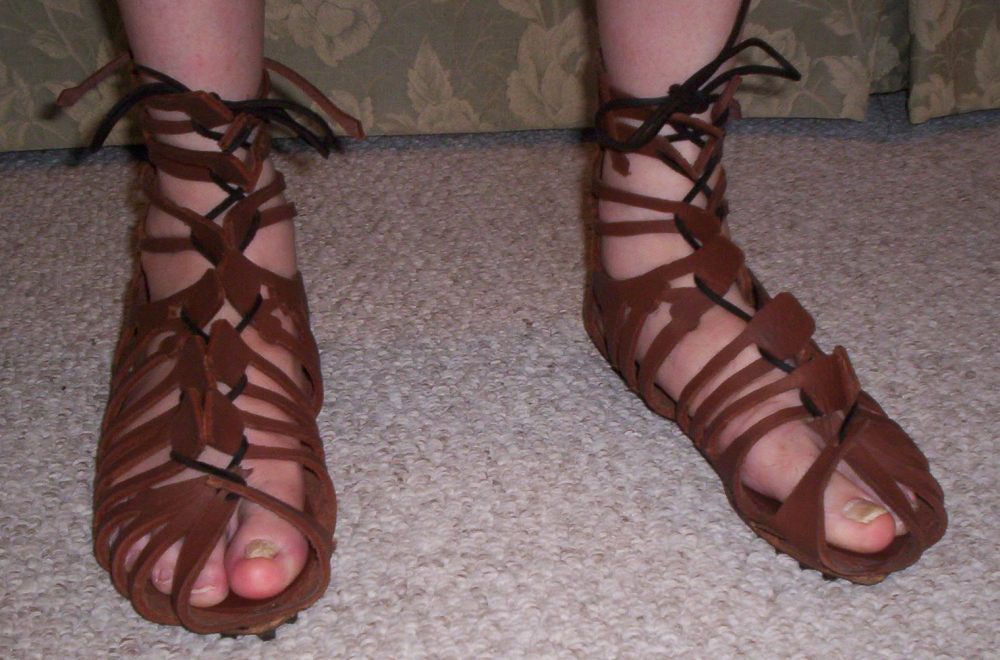
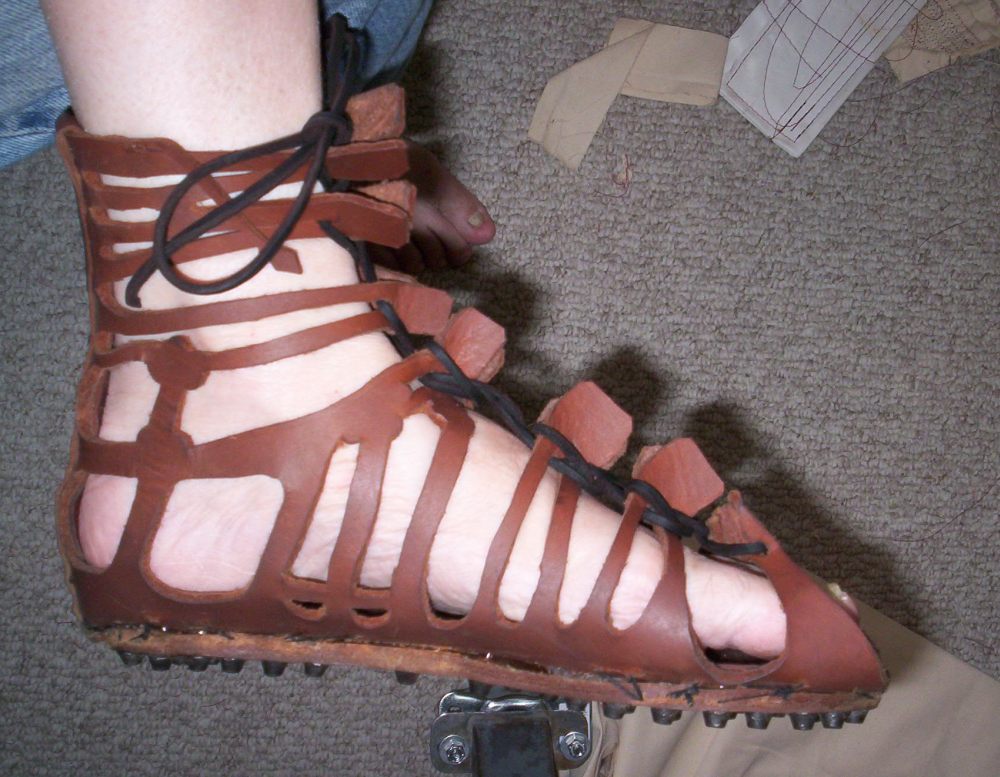
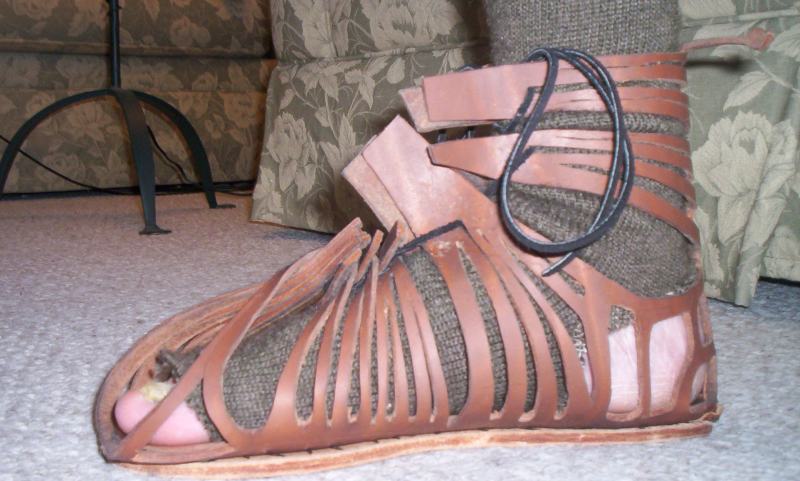
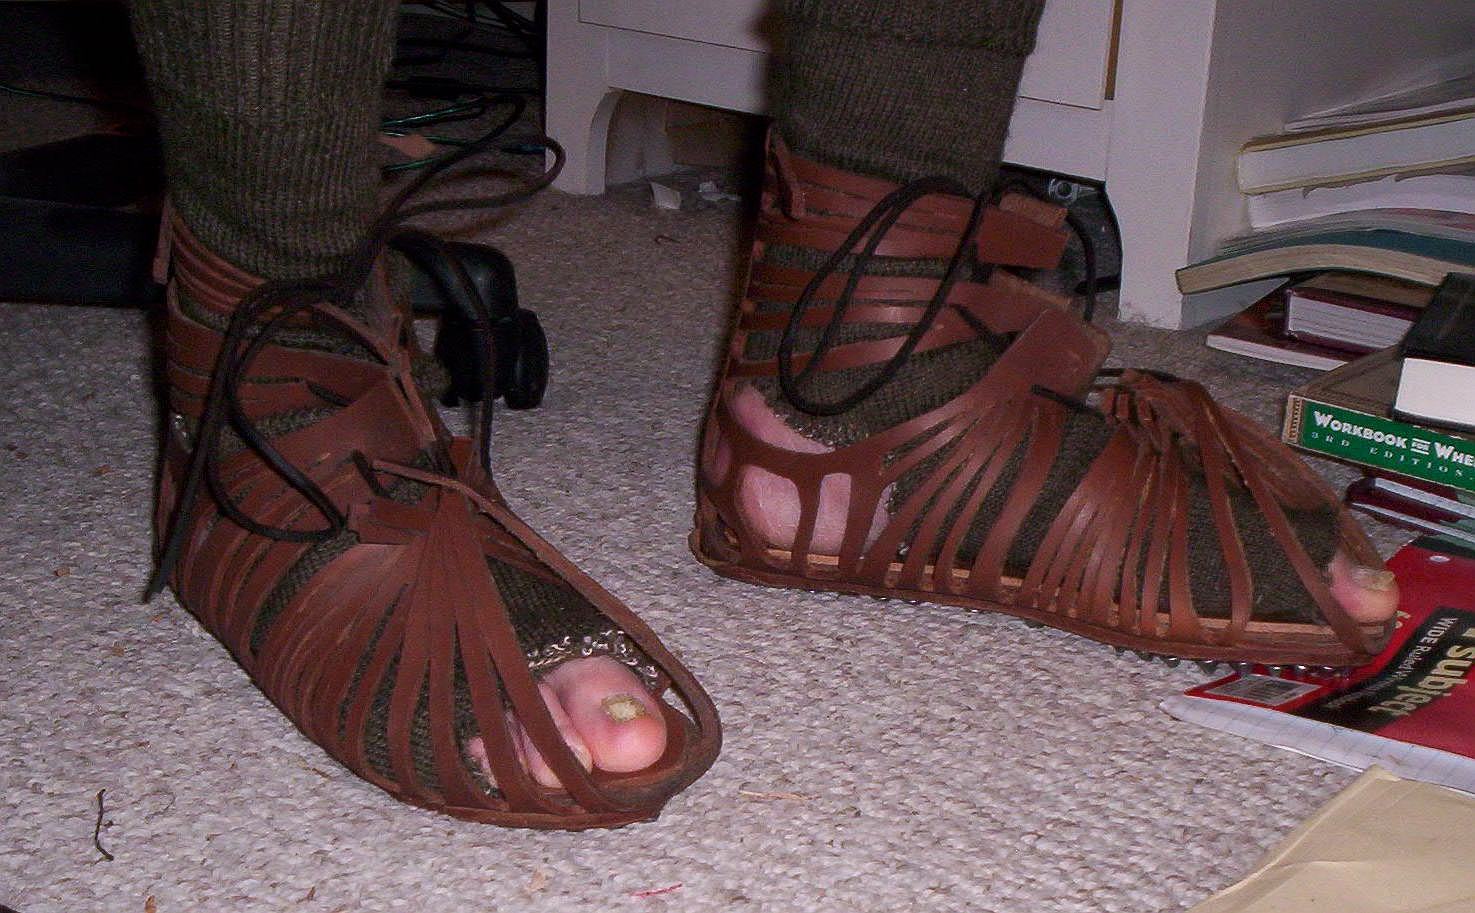
When you're done you should have a pair of caligae like these:
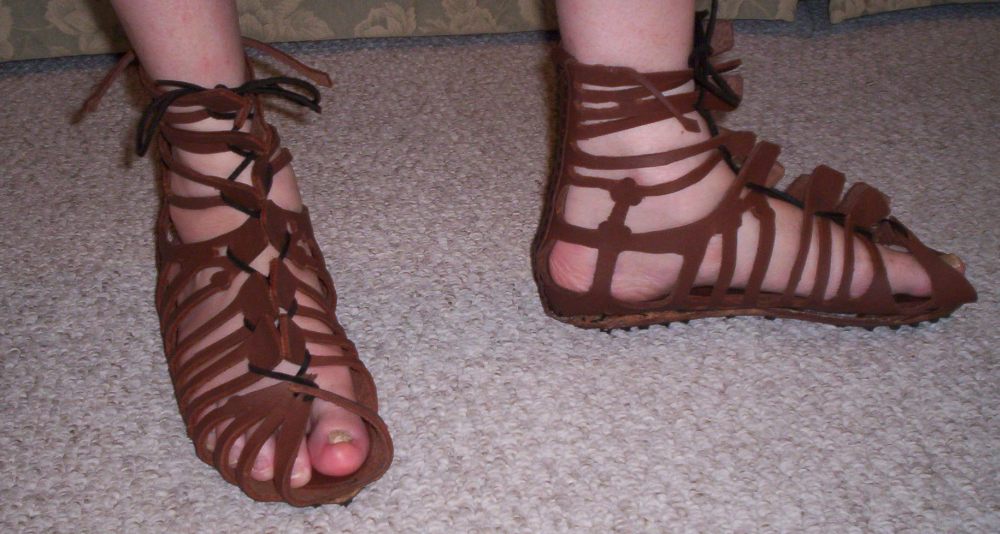
I wore these caligae to the recent Fort Malden roman event in Canada. Overall they worked out quite well. Like any new pair of shoes the leather has stretched out a little bit making them somewhat more comfortable to wear. Two issues though:
1. Some of the out-side tunnel stitching got cut. I had to redo this. It appears that I had placed some of the stitching too high on the upper above the sole. These need to made as close to the sole as possible. Further use does not seem to show any more problems.
2. The lower tabs going about the feet tended to slide back and forth. I fixed this by replacing the laces with longer ones and wrapping the lace around the tabs to secure them. Comfort seems to be improved as well. See the photo below:
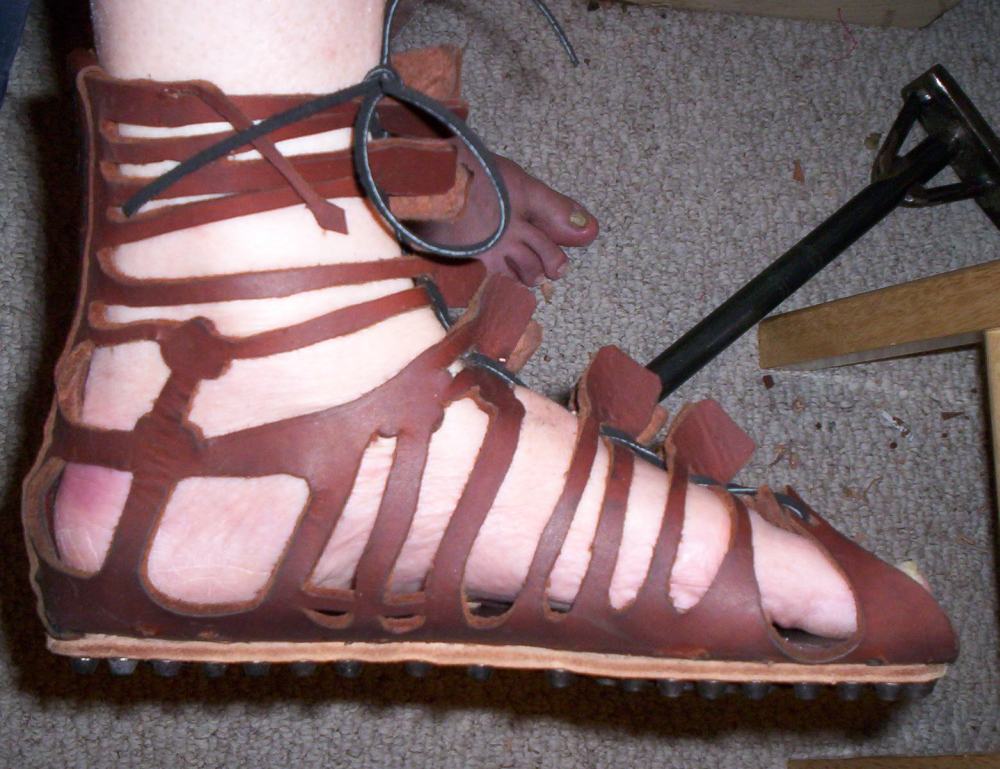
I'm also not sure about wrapping the lace around the tabs. I've found that it is very difficult to tighten the lace after wrapping A simple zip-zag might be the best method after all.
One double shoulder 8-9oz (about 3mm thick) tooling leather is good for a couple of pairs of caligae.
One 16oz (6mm thick) bend for the out-soles
one 5-6oz (2mm thick) shoulder for the insoles, and
one 2-3oz (1mm thick or less) for the back reinforcement.
Waxed linen thread. Recently on Roman Army Talk, RAT, there was described an alternative to waxed thread, coating the thread with something called "shoe-maker's pitch". I'm told that this stuff is available in Germany, but since I have not been able to locate a supply of it here in the states, I cannot say which is better, waxed or pitched thread.
Hobnails
Though carpender's glue would work, I now prefer E6000 (it's also waterproof). You'll find it at art supply stores.
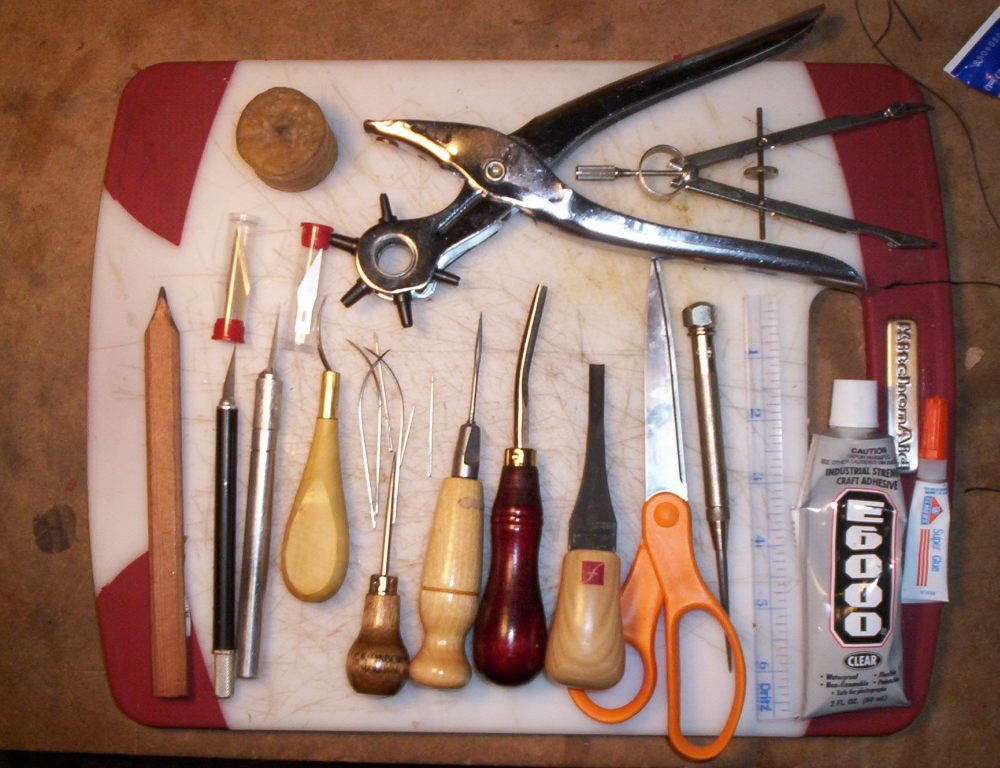
Tools
Leather stitching is typically done with blunt needles. Thread holes are made with a scratch awl. Tandy leather has these.
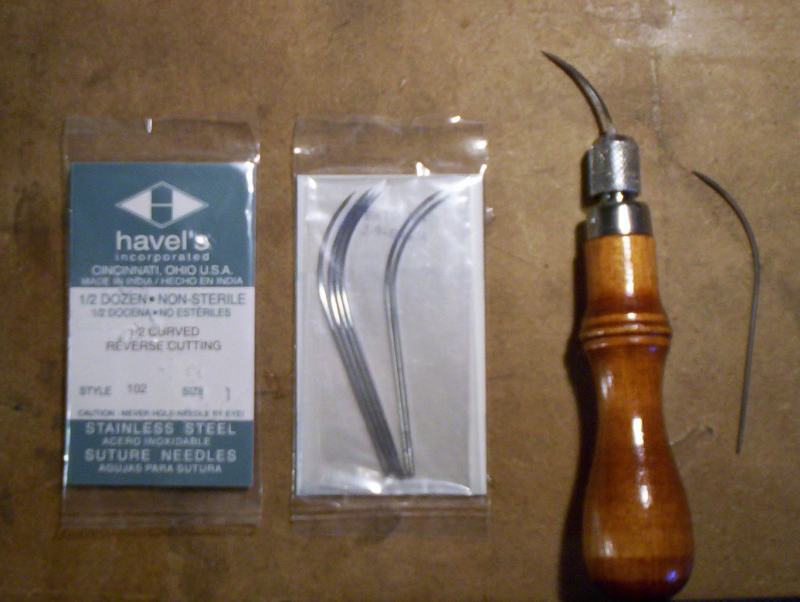
Tunnel stitches usually require a cuved awl to make the holes and either cured needles or flexible needles. I'm told that pig's bristles work as well.
Sharp knives to cut the leather. I like to use an x-acto number 2 blade.
As described earlier, a 1/8 inch round wood craving tool makes short work out of cutting the knobs in the uppers.
Some spring clamps.
A 16oz hammer and an anvil. I recently acquired a shoe-maker's anvil from RLQM. It is supported by the Hardy hole in my large 110lb anvil, but could just as well be supported by a vise.
Here is a picture of my leather working tool set
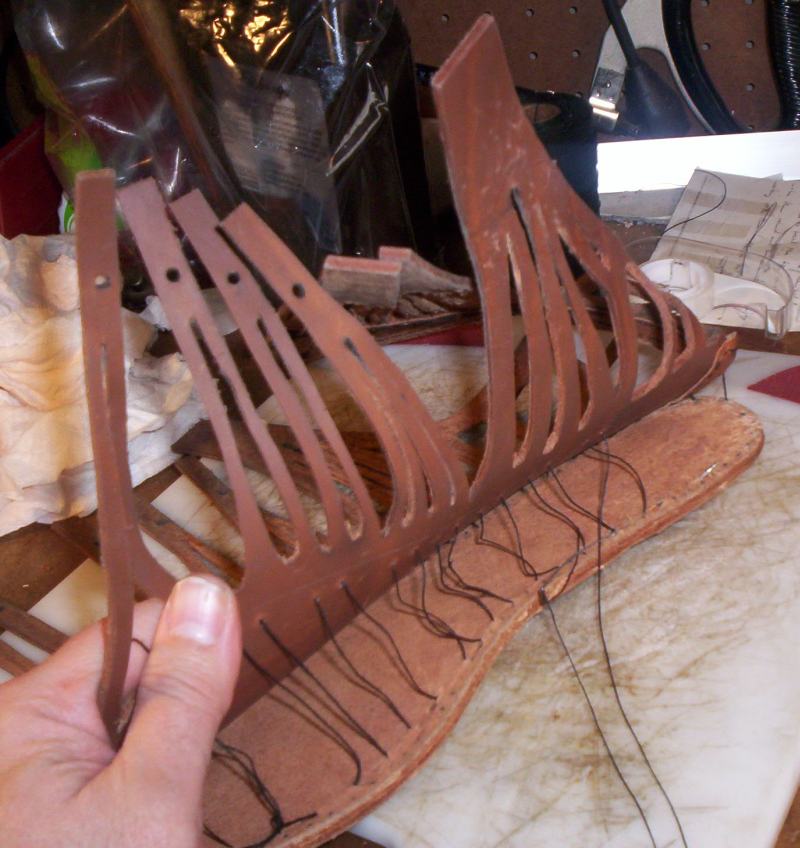
The construction method using tunnel stitching is illustrated below:
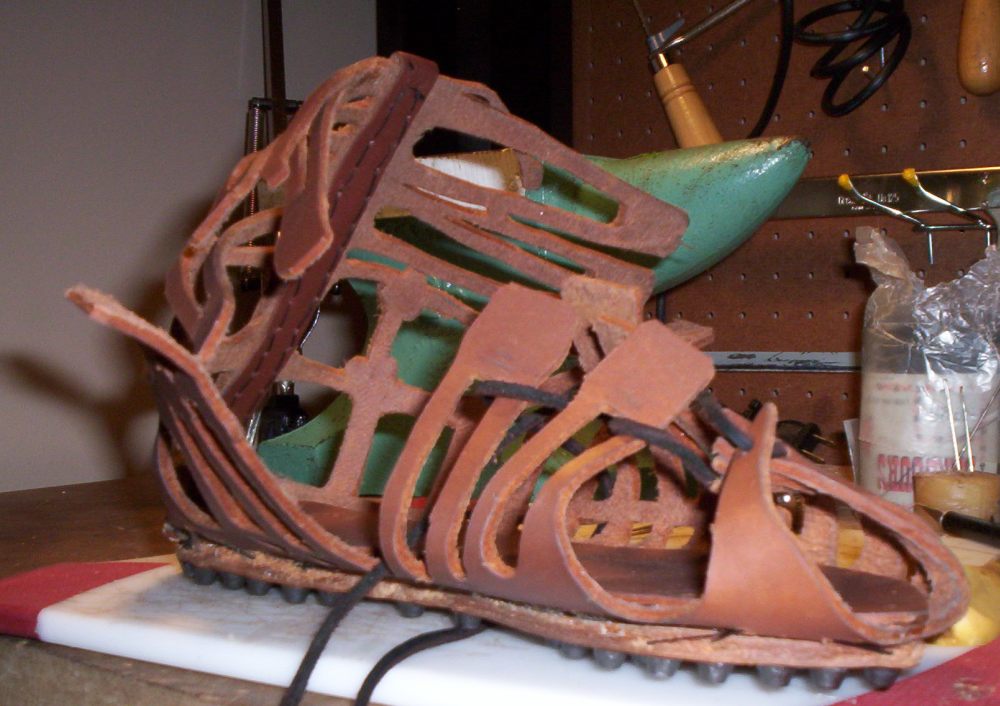
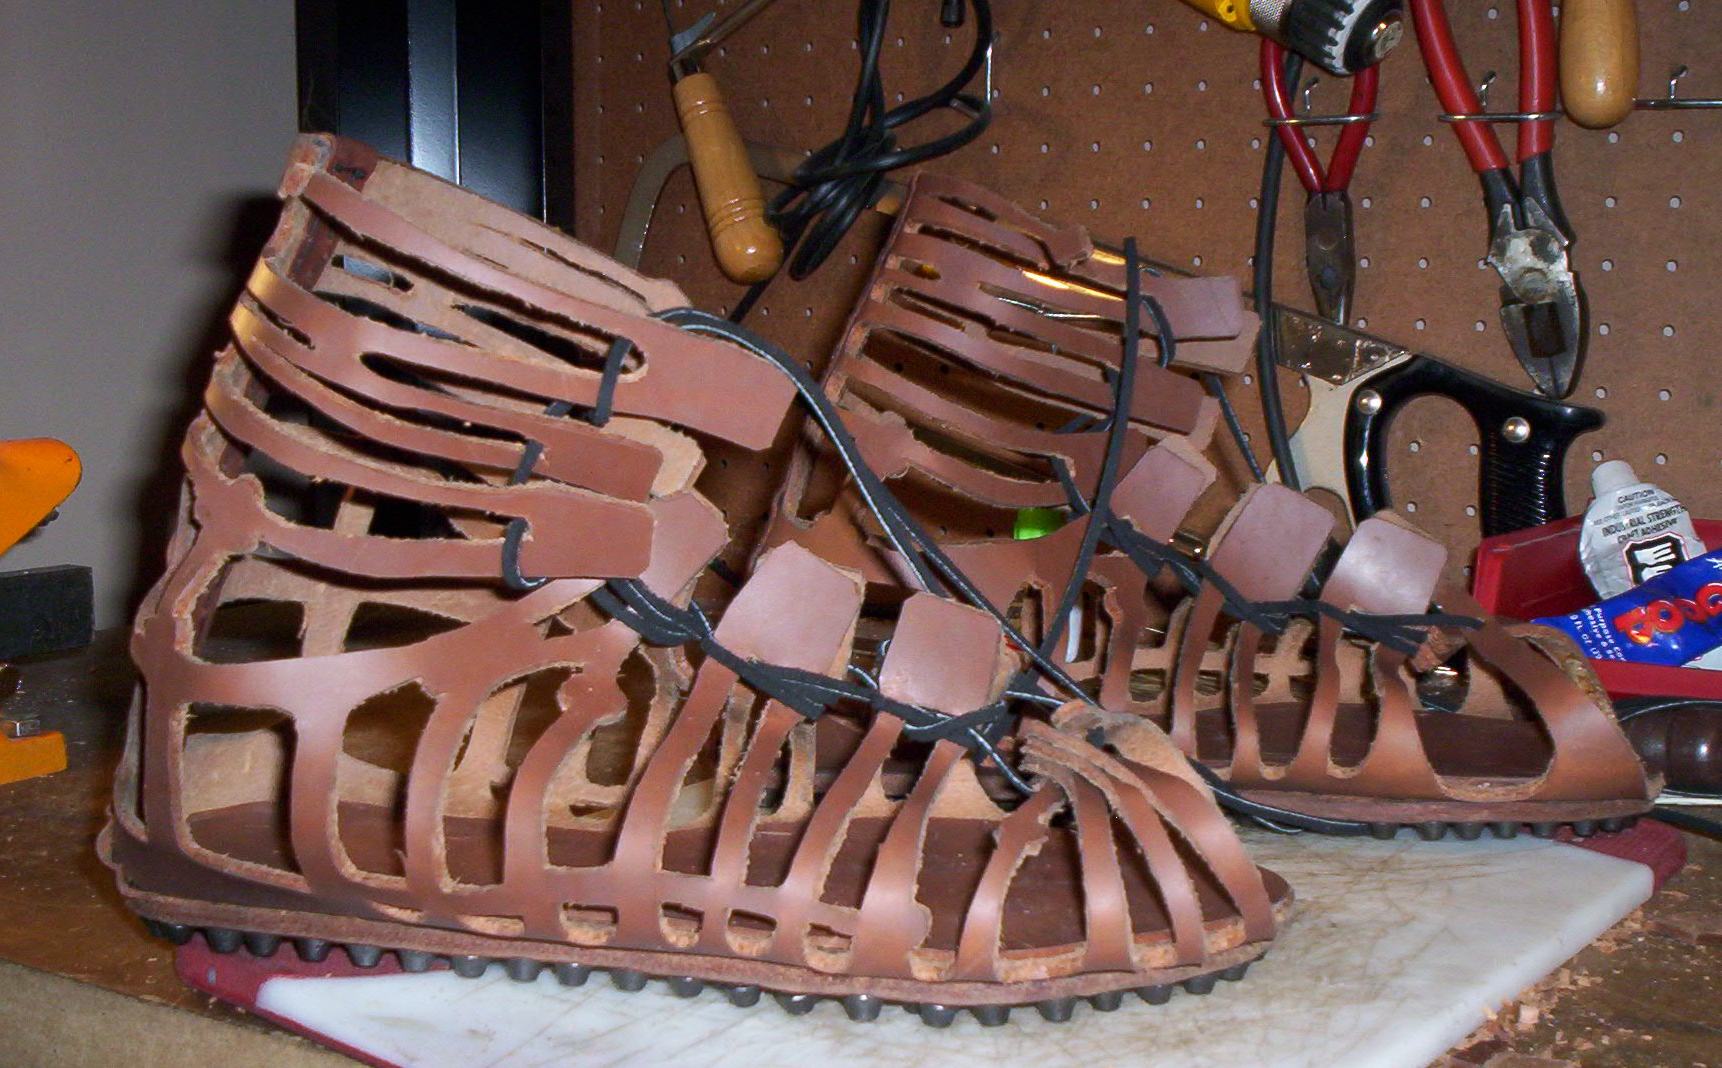
Here are a pair of caligae that I recently made for a friend. These have the out-soles attached to the uppers using the method of tunnel stitching previously described.
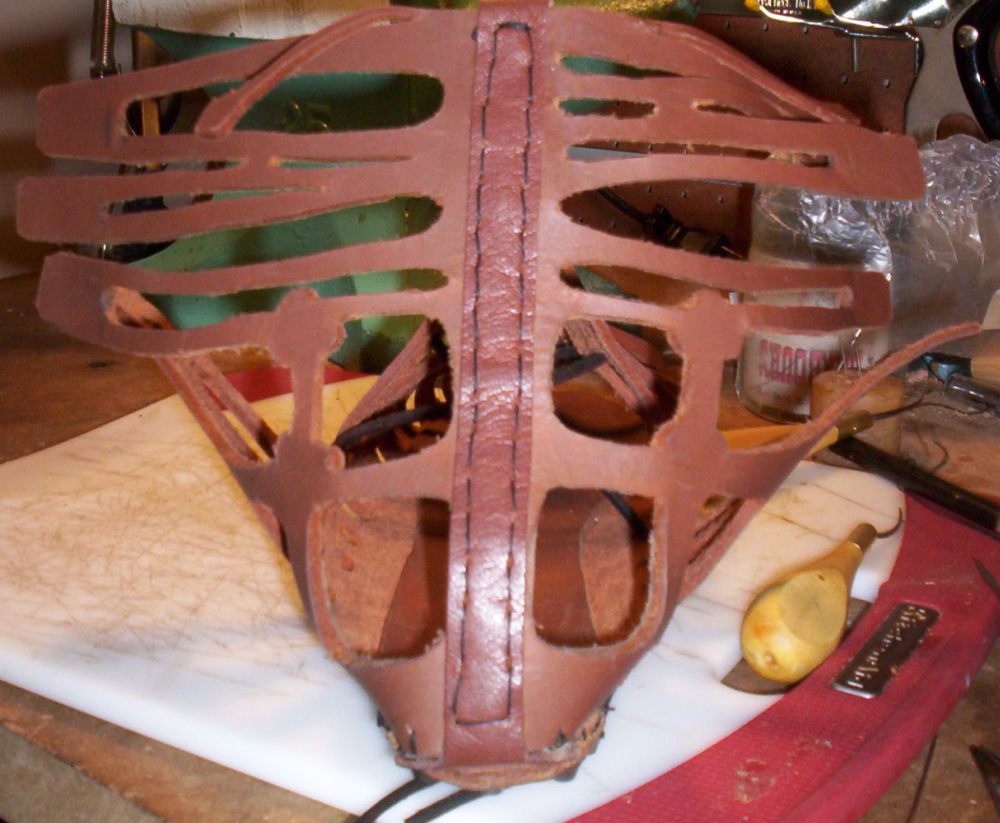
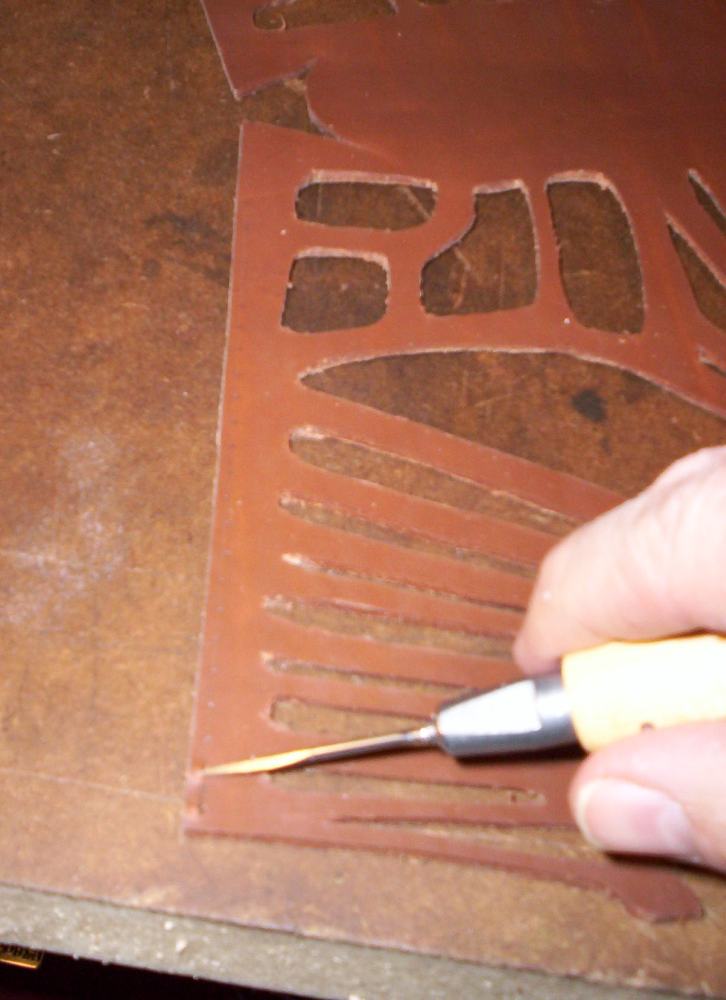
Here is one of the uppers cut out. Always mark the pattern cutouts on the flesh side in pencil. To make the cuts I prefer a #2 xacto blade. Here I am smoothing the edges of the flesh side using an Osborn TL-127 #4 edge beveler. Why round the edges? That's what the romans did.

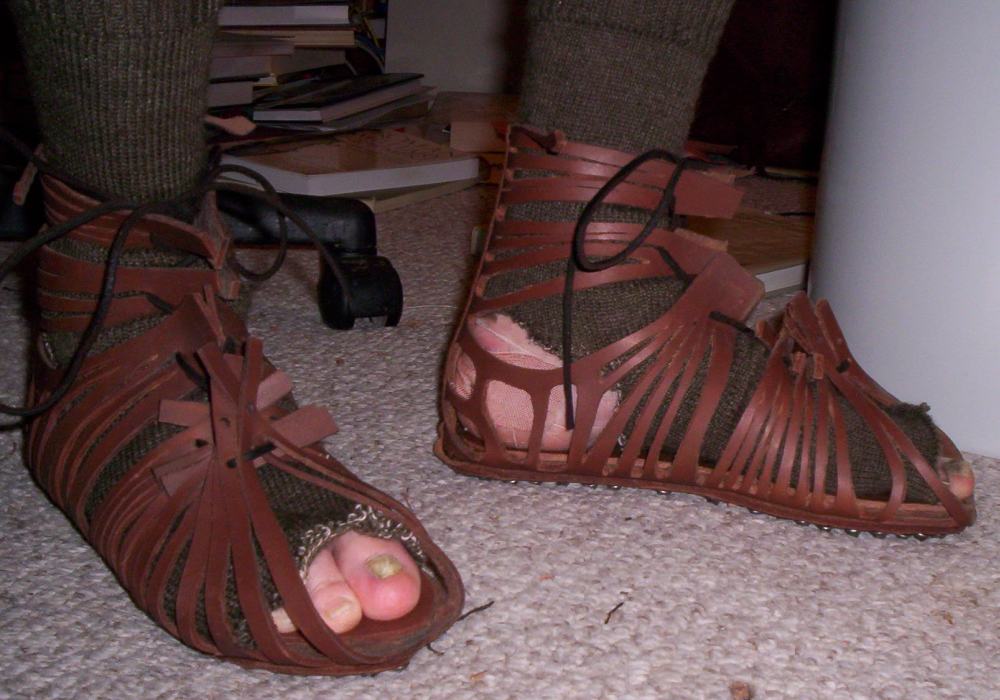
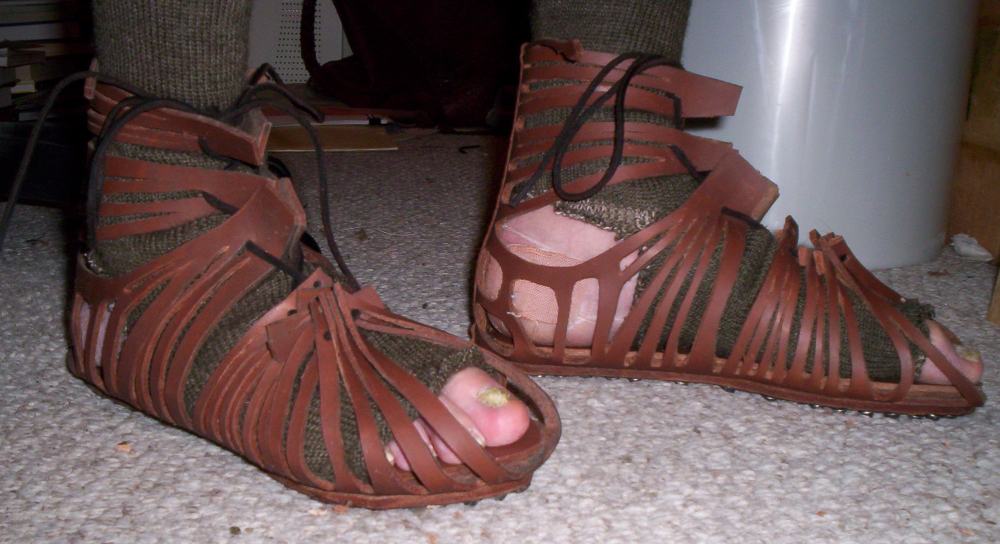
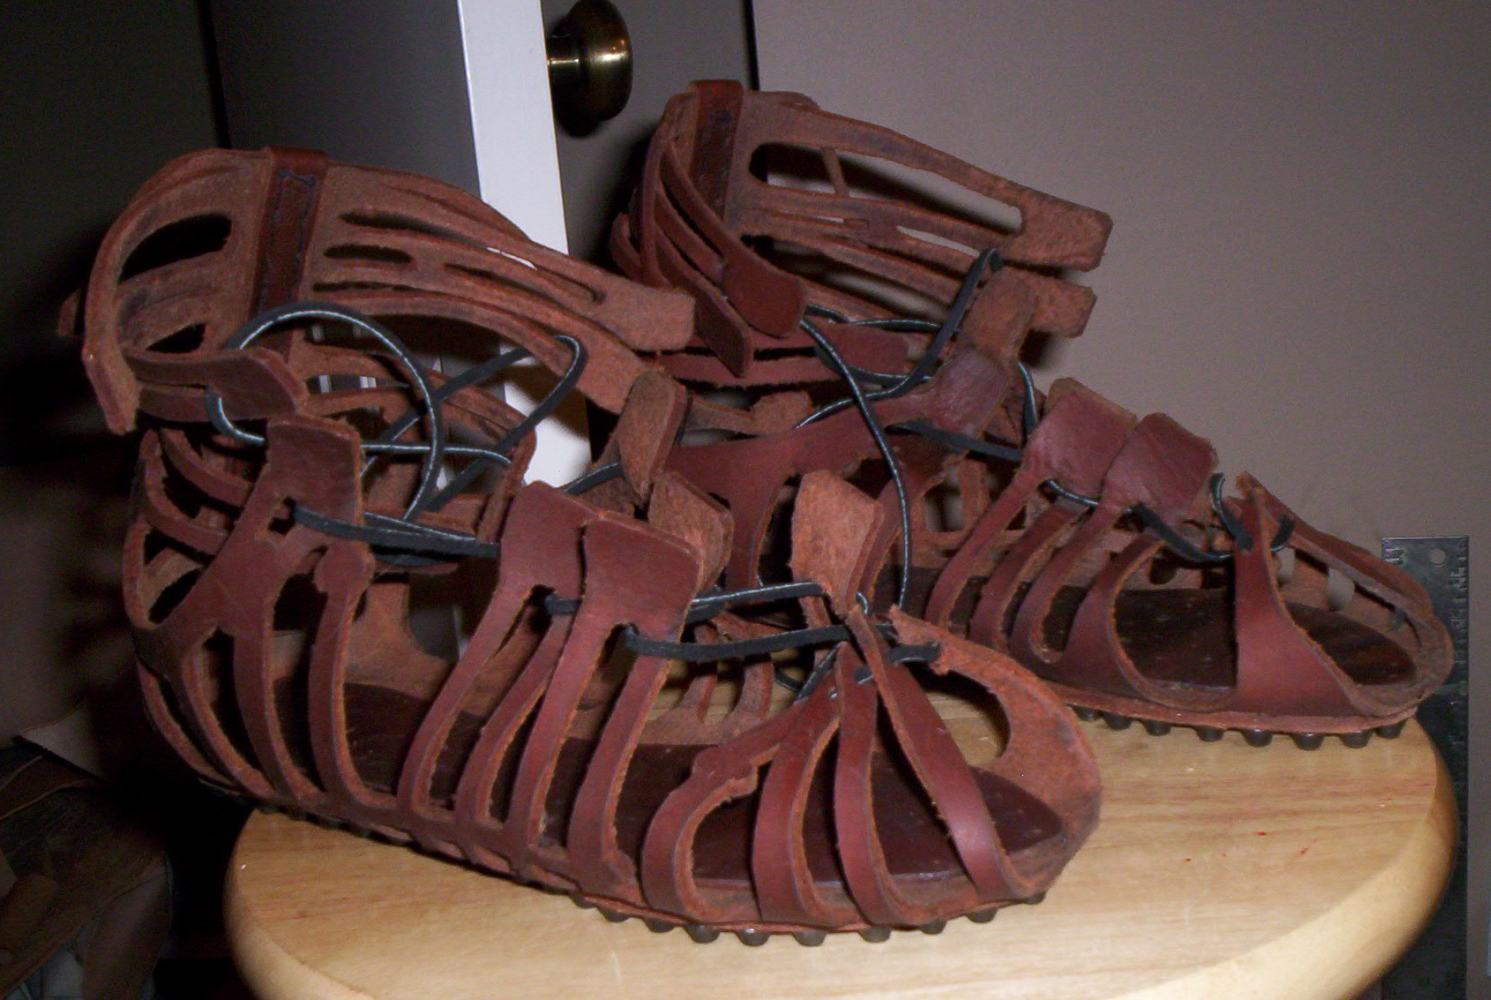
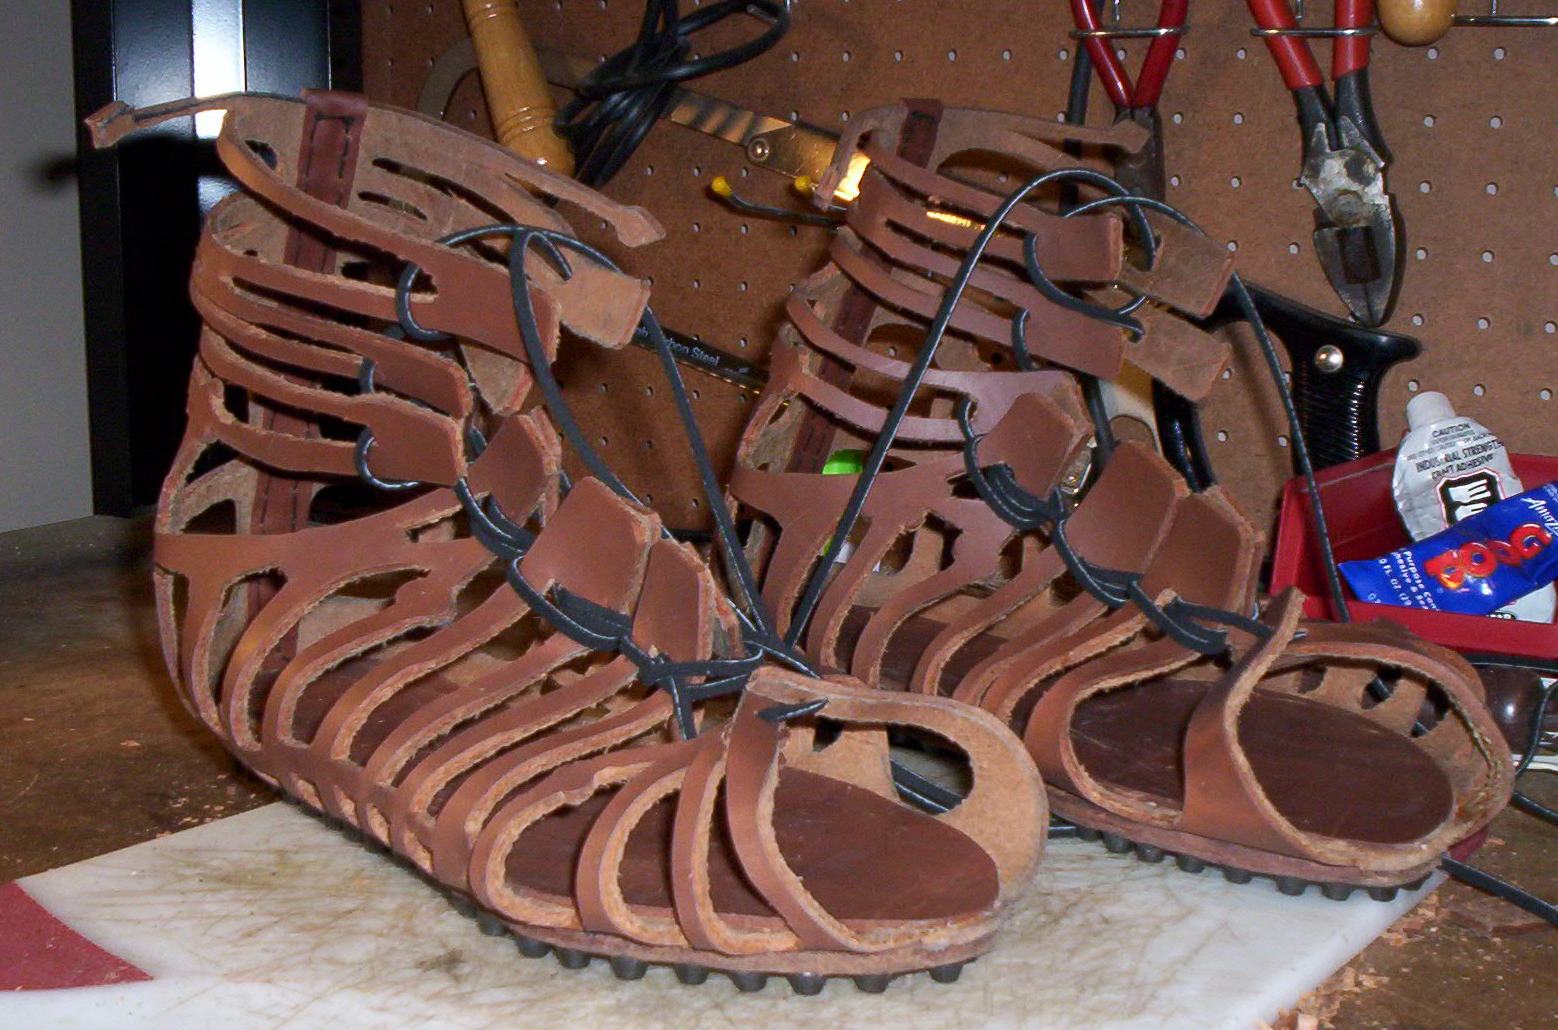
Here is a comparison of the two styles of caligae: