
Ever wish that you could use a roto-scope image as a reference for modeling in Nendo? Well here is how you can make use of those fabulous drawings you have created as a reference.
Here is my finished Roto-scope in Nendo format...ROTOFINL.zip
Part 1:The Roto-scope Image
Gather together the drawings and or photographs you want to use for your roto-scope.
Scan them for into your computer. Open up your photo manipulation program.
Load roto-scope images and position them in your page so that all major features line up with each other as seen in Figure 1.
I had a few differences between my front and side drawing of the face that I touched up in Photoshop.
This could be Photoshop(which I personally use) or any other program capable of resizing and editing images.
Ensure there is some space between your image so that you will have room to work. The reason for this will become apparent later on in the tutorial.
Now that you have your images lined up and positioned as you want them crop the image so you have a small amount of space around the edges as seen in Figure 1.
*Photo Paint, Paint Shop Pro, even the basic windows painting program will all work fine.*
Step 1: Preparing the image for Rotoscoping.
Some things we want to keep in mind:
1.Open up your photo manipulation program.
Load roto-scope images and position them in your page so that all major features line up with each other as seen in Figure 1.
I had a few differences between my front and side drawing of the face that I touched up in Photoshop.
This could be Photoshop(which I personally use) or any other program capable of resizing and editing images.
Ensure there is some space between your image so that you will have room to work. The reason for this will become apparent later on in the tutorial.
Now that you have your images lined up and positioned as you want them crop the image so you have a small amount of space around the edges as seen in Figure 1.
*Photo Paint, Paint Shop Pro, even the basic windows painting program will all work fine.*
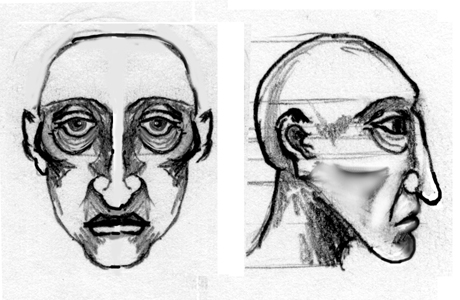
Figure 1
Step 2:Sizing the image for roto-scoping in Nendo. We want to reserve as much memory for Nendo so we can model at lightspeed which means we want our image to be small. *Figure 1 is for example at 3.067"wide by 2"tall....150 resolution....460x300pixels.*
The process of re-sizing an image is slightly different in all these programs but the idea is the same.
I will detail the process of sizing the image in the program Photoshop.
With your image still open drop down the image menu and choose image size. You should see the pop menu shown in Figure 2.
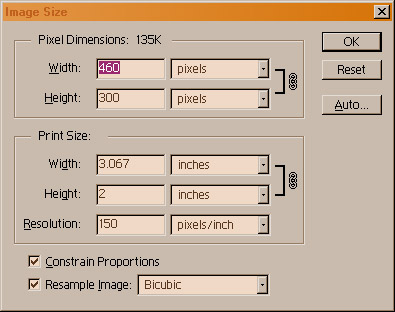
Figure 2
Change the various values for width, height and resolution. Try and keep the file small so that it does not eat up memory that could be used better for Nendo's modeling tools.
As you can see in Figure 2, my image has file size of 135k(its the number next to Pixel Dimensions) this is a decent file size smaller would be better but may result in unclear detail in your images.
If you have a very detailed character and the details have to be visible and clear in the roto-scope you will want a file at least this size. In other words you may need to experiment a little to get an image that will work for
your particular circumstance.
Once you have your image to a satisfactory size and layout you are ready to save it. Nendo accepts jpeg, tiff, png, bmp and ppm.
Make sure your image has no layers and has been flattened. If this is not the case Photoshop will not let you save as any format other than psd which is its native format.
Part 2:Setting up Roto-scope in Nendo.
Step 1:Open Nendo, make a cube... *how?(right click anywhere in the work space, choose cube in the popup by left clicking on it),
you should now have what you see in Figure 3.
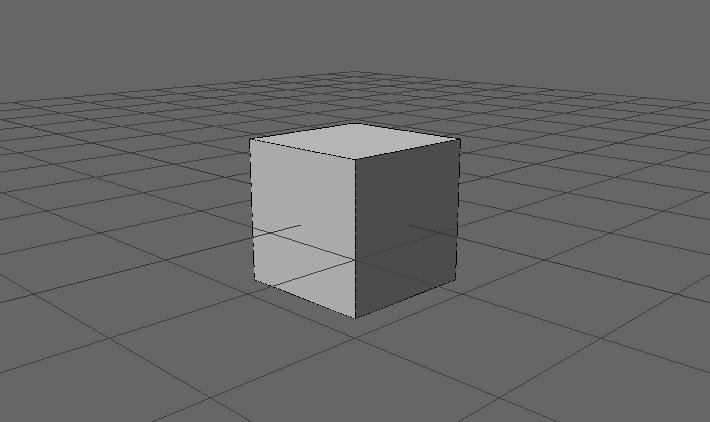
Figure 3
*Tip:In the view menu un-check ground plane and check axes. This will hide the ground planel, as I find it gets in the way in this case, and turn on the axis so you can see the axis in relation to your object.
Step 2:Select the face on the cube which is facing out on the positive z axis as illustrated in Figure 4.
*how?(choose the select faces icon highlighted in Figure 5. Now left click on the face you want to select it will turn green when your cursor is over it and red when it is selected.)
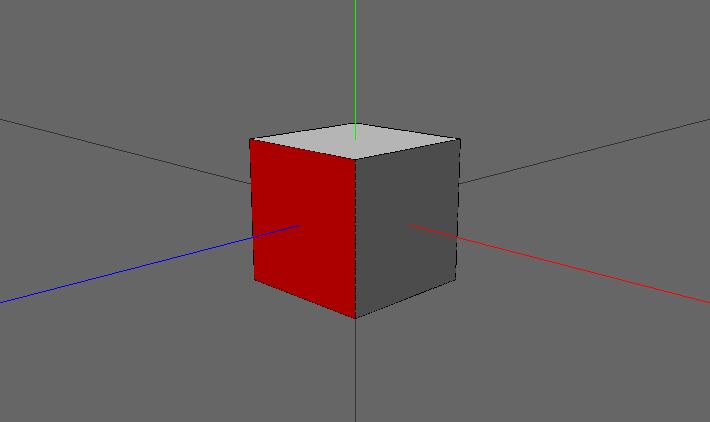
Figure 4
![]()
Figure 5
Step 3:Move the face on the z axis until you have a flattened cube as shown in Figure 6...*how?(
With the face still selected right click in the work space. Choose move and left click on z axis. Now move the mouse until you get the desired result.)
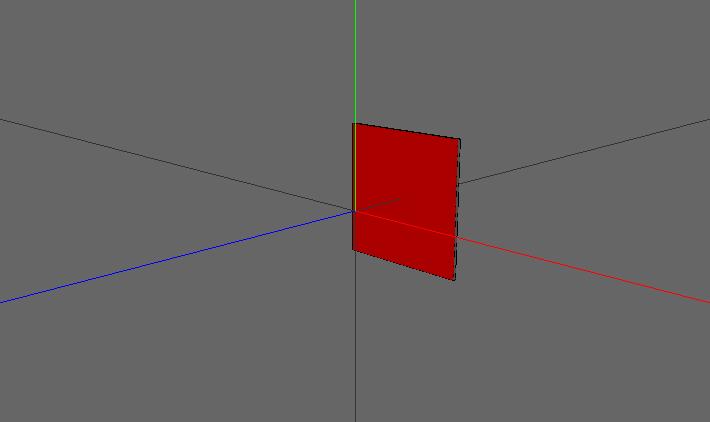
Figure 6
Step 4:Now choose the select body icon. Scale the object on the x axis until you get a flat box like the one in Figure 7...*how?(Click on the select body icon as shown in Figure 8, now left click on our box. Once it is selected right click in the work space and choose scale, left click on x axis. Now drag your mouse until the box is stretched out on the x axis like the box in Figure 7.)
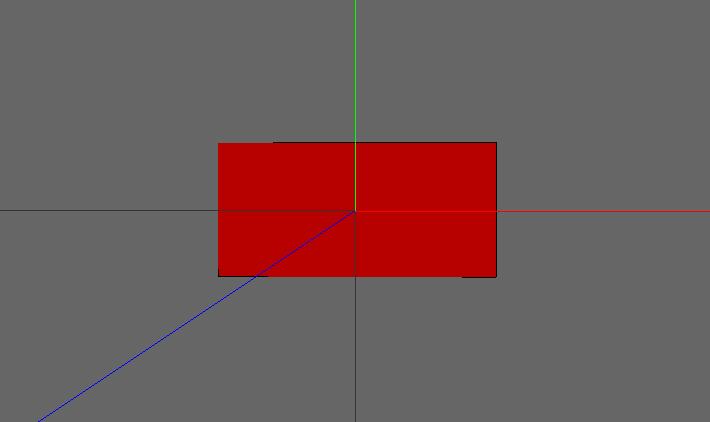
Figure 7
![]()
Figure 8
Step 5:Switch from modeling mode to paint mode...*how?(Click on the paint icon highlighted in Figure 9.)
![]()
Figure 9
In paint mode Nendo should look like this you want your cube to be lined up in the workspace as shown in Figure 10.
Note:Rotating or changing your view is best done before you switch to paint mode.
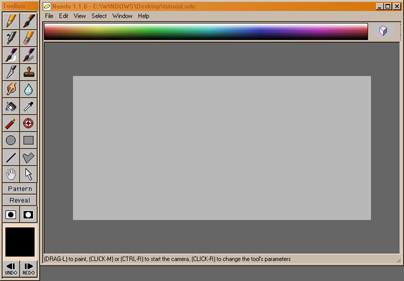
Figure 10
Step 6:We are going to use the reveal tool to paint our roto-scope image onto the object.
Go head and click on the Reveal button in the Paint Tool Box (highlighted in Figure 11.)

Figure 11
When you have clicked the reveal tool button a dialog box will appear asking you what image you wish to use. You should change the file format to the type that your roto-scope image is saved as and select your image.
When you have done this you will see that your image has appeared behind your model. You can still swith back to the modeler to zoom in on your box so that your image fits it better. If you are satisfied with how the image is relation to your model then we are ready to paint it onto the surface.
You will notice that the only tools available are the pencil, airbrush and paint brush. Pick one of them and paint over the top of your image you should see it applying to the surface of your object once you have the whole image revealed click on the modeler button to return to the modeling mode.
You should have something like Figure 12.
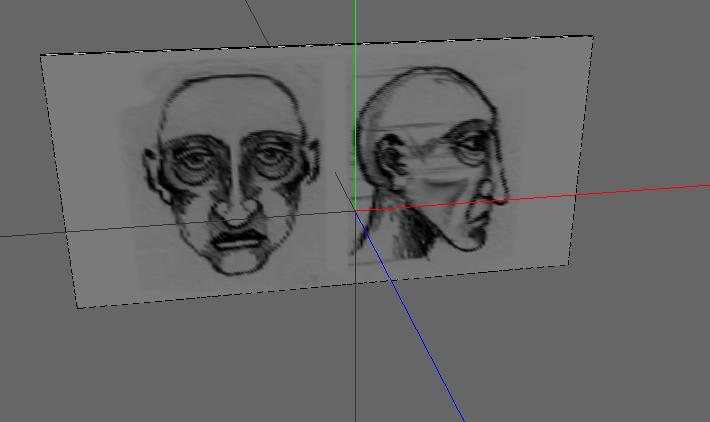
Figure 12
Step 7:Now that we have the image applied to our object we will copy the object and rotate it on the Y axis so that it intersects our first object and gives us something like what is shown in Figure 13.
If we model in between the images we can use them as a reference for modeling...*how?(To copy the object use the body select to select it, right click in the workspace and left click on copy *important do not move your mouse but unstead left click this will set your new object down exactly in the same space as the original then all we have to do is right click and choose rotate and y axis, now move your mouse until the two objects are perfectly perpendicular to each other...see Figure 13)

Figure 13
Well I hope that this has giving you a good starting place for creating roto-scoped images to model with.
If you have any questions please contact me or the other Flights of Fancy administrator.
The next tutorial will deal with the actual modeling of a head. Thank you for taking the time to read this tutorial and I hope you create some great models.

Nichimen Nendo and Adobe Photoshop are Registered Trademarks and Copyright Property of their respective creators and all images contained with in this page and any page linked to this one which makes use of screen shots or images of the interface of either of these two programs is strictly for the purpose of education.
The Administrators of this web page and the server that it is hosted on are in no way affiliated with Adobe or Nichimen. All original images contained with in the root directory of this web page are the sole property of Ely Cannon and may be used for any other educational purpose only.