


Last updated: 26 September 2001
![]()
Last updated: 26 September 2001
|
|
Please Note: This walkthrough is not written so that you can go through the game in one night, it would be no fun! Use it only when you are stuck! Act 1: From the Beginning to the Aliens Landing Act2: From the Aliens Landing to Gaining the Wizard's Diploma Act 3: From Gaining the Wizard's Diploma to Crash Landing a Esmer Shuttle on Citadel Island Act 4: From Crash Landing a Esmer Shuttle on Citadel Island to Getting Sendell's Ball Act 5: From Getting Sendell's Ball to Crash Landing on Otringal Act 6: From Crash Landing on Otringal to Finding the Francos Fragment Act 7: From Finding the Francos Fragment to Getting to the Island of the Wannies Act 8: From Getting to the Island of the Wannies to Getting to Valcano Island Act 9: From Getting to Valcano Island to Leaving Island CX in the Emperor's Shuttle Act 10: From Leaving Island CX in the Emperor's Shuttle to Deafeating Funfrock
Act 1: From the Beginning to the Aliens Landing The game starts with Twinsen and Zoe in the house, Dino-Fly has just crashed and Zoe wants you to find a cure for him. Search the cabinet for a key and open the door. Collect the magic ball, the holomap and the darts and go outside to the downtown pharmacy. Talk to the shopkeeper and she will tell you that they have no cures. The customer says that she knows someone who can help. A thief will come in and steel the customer’s umbrella. Talk to the customer again outside. Walk up to the thief in discreet mode and when he turns around tell him you want the umbrella back, take it to the customer. Go into the museum and talk to Miss Bloop the owner. You will have to climb in through the upstairs window into the museum and unlock the bell to collect your tunic. Now go up to the cliffs to the Weatherwizard’s tent. Talk to the wizard and he will tell you he needs to find Raph the lighthouse keeper. Talk to the grobo outside the tent. You are very near to the cliffs. You can actually jump onto the lower ledge, but you will lose life. The other way is to go into the cave entrance further along the edge and go through until you appear on the bottom ledge. Once in the next cave you will see someone in the prison who will talk to you. Using the magic ball in discreet mode flick the switches. At one stage you will come to a ladder, you need to jump and then press up to climb. Going through the cave, kill the smaller creatures, who will each give you keys and then the Tralu who also gives you a key. Set Raph free and go back. Zoe is waiting for you and you will walk her back to the lighthouse where the Weatherwizard will clear the storm and a movie will play. Act2: From the Aliens Landing to Gaining the Wizard's Diploma
Go into the town and into Master Ker’aooc’s house. Take the gallic oil from off the shelves. Downtown, go to Baldino’s house and talk to him. He will give you a part for your car that Zoe needs to fix it. Go back the way you came and turn right, going away from the sea. Note: for the next bit you will need 120 Kashes (see tips for help). Further up there will be some gates, just to the left of those gates is a little passageway which you can take into the building. Going through the building you will come to some desks. Make your way through them and get the key from the chest, open the gate. Talk to the woman and the Master will come down. Do the blowpipe test first (see tips for help). Take the ferry to Citadel Island. Give the part for the car to Zoe and she will fix it. Buy a ferry ticket and go back to Desert Island. Go back to Baldino’s house and collect the portable radio. Zoe will bring the car over to Desert Island, go and pick it up and go to the School of Magic entrance. Still in the car, carry along the rocks until you come to two marks in the sand. Go up the slope and left along the top. There is a little piece of wood to jump off to the other side. Get the Balsam Flower and take it to the Master. He will give you the healing horn. Go back to Citadel Island, (you can’t take the car). Go to Zoe where she is looking after the Dino-fly. Cure the Dino-fly and take him to the Dome of the Slate. Go through the dome, (see tips for help). When you come out the Master will appear and give you a magic slate. Go back to the School of Magic and the Master will give you your wizard’s diploma. Act 3: From Gaining the Wizard's Diploma to Crash Landing a Esmer Shuttle on Citadel Island For the next bit you will need 50 Kashes (see tips for help). Go and find the wizard flying around the island on his magic carpet, and show him your wizard’s diploma. Buy off him, a wizard’s parade outfit and a false beard. Go to the Hacienda and to the saunas. An alien is waiting, agree to go to his planet. In the shuttle, climb down the ladder and pick up the little round thing. This is a translator, it will translate the Esmer language into Twinsen’s language so you can understand. Watch the tourist information. On landing do what the Esmers want you to do. They will put you in a cell. Joe will come into your cell and tell you what happened. The guards will open the cell door to put Joe in his own cell. Kill the guards and free the Mosquibee in another cell. Go where the Mosquibee tells you to. Destroy the machine and it will blow a hole in the fence. Go along the cliff face and back into the complex via the dog pen. Go into the building opposite the dog pen and down the out exit. This will take you to the launching bay. Run away from the guards and into the control tower. Go up the stairs and steal an itinerary token (see tips for help). Go back to the shuttle you came in and put the itinerary token in the slot, the shuttle will take off and a movie will play. Twinsen crashes the shuttle on the flower circle. Act 4: From Crash Landing a Esmer Shuttle on Citadel Island to Getting Sendell's Ball You will receive a call from Zoe. Go back to your house. To make the next bit easy you will need 102 Kashes. Go to the baggage claim and go downstairs. By standing on the arrows, control the flying robot to take you parcel to the level you’re on. You can either push the parcel, following the arrows or pay the guy lying down 102 Kashes to take it to the top for you. Go and collect the Proto-pack. Go to the School of Magic. Before you go back to Citadel Island, go to the Hacienda. There is an island across from it. Use the Proto-pack to fly there. Once inside fly to the next ledge, but be careful, if a bat hits you, you will drown. Kill the skeletons and push the crates, so that they are in a tower on top of the lift. In discreet mode flick the switch with the magic ball and as the crates are coming up run onto them and jump up onto the next ledge. Go through the cave until you come to a monster patrolling. Kill the two skeletons. There is a slow way of killing the monster with the magic ball, or you can just go for hand to hand. When the monster is dead collect the magic flying round in the corner, this is a protection spell (see tips for help). Fly through the cave, saving often until you come out again. Fly across to the Hacienda. Go to Citadel Island. Go to the Weatherwizard’s tent and read the note. Go back to Desert Island. Go to where there is the Esmer shuttle, near to where the ferry docks. There is an Esmer waiting behind some crates, watch out for him. Behind him there is a little bay. Ring the bell and take a ride inside the cave. Using the Proto-pack fly over the spikes and collect the pearl. Go back to Citadel Island. Note: for the next bit you will need full magic. Visit your neighbour and give him the gallic oil. Look at the plans, (the magic slate will take it down) and go to the Weatherwizard’s tent again. Put the pearl into the mixture, and pull the lever. The grate will open, go through. Run and jump off the bridge onto the secret room. Put the pyramid key into the slot (see magic slate for help) and go into the room. Cast the Lightning Spell and go out again. Act 5: From Getting Sendell's Ball to Crash Landing on Otringal You will receive a call from Baldino. This conversation will put another arrow on your holomap. Jump onto the cluster of rocks and use the logs to get back to the surface again. Go to Desert Island. Visit the Temple Park and go underground. Flicking the switches to change the arrows take the ride car down as far as you can. Jump off it and collect a key from a parcel. Use the key on the door which is down the ladder. There are two ramps, go down the left-hand side one. Don’t go on the boat! On the table there is a little circular thing, listen to it (press the action key). Kill the soldiers and search the bedside table for a key. Use the key on the next door. You can jump up on the crates to get a clover leaf. Go past the shuttle and up the lift. Fly across the electrical bars and kill the soldier on the other side. Get the itinerary token from the sphere on legs and go back (you can turn the electricity off). Go back to the shuttle and put in the itinerary token. A movie will play. On landing you will be asked for your password, give it. Go to the welcoming building, opposite from the main complex on the right. Kill the guards and flick the switches, this will unlock the doors. Look at the screen on the right, which will put another arrow on your holomap, and the magic slate will take down the plan. Go to door opposite the welcoming building. Kill the technician and the guards nearest the switch. Turn the switch and go through the door you just opened. Up the stairs, there are two technicians who will try to shoot you. Kill them and flick the red lever to the left. Go back the way you came, to the turning switch and go through the door to the left. A guard is standing in front of a door, go through that door. Kill the next guard and open Baldino’s cell with the key. Baldino’s inmate (who’s actually a technician) will get killed. Follow Baldino and flick the red lever again to open the door. Once outside, a movie will play. Act 6: From Crash Landing on Otringal to Finding the Francos Fragment Jumping and using the Proto-pack make your way to the harbour wall. Now go up to the main city. Talk to the guy at the pumping station. He will put another arrow on your holomap. Note: for the next bit you will need 100 Zlitos. Go to the man walking up and down the harbour with a wooden leg. Talk to him and take the ride. He will take you to Celebration Island. Go up the mud path to the top of the volcano. Talk to the guy bandaged up.
After this go to the place where you landed and take the guy’s boat to the
Island of the Francos. Buy a pick axe from the bazaar. Go to the pipes outside
the fence jump onto them and then onto the fence and over. Go into the building
in front of you. Kill the technician using the magic ball. Turn of the steam and
run and jump onto the tank. Go through the refinery. You will come to a screen
where there is a key above some pipes which you can’t get to. Go up on the
elevator and from the square next to it, run and jump onto Get back over the fence by jumping onto the barrels. Go to the Burgermaster’s house and talk to his brother. Search the little nook outside the house and use the key on the lock back inside. You will find a riddle. The parasol is the only tree on the island. Face the bazaar and walk forward until you can’t go any further. Turn right and dig in the little bit of grass set aside. You will find the Fragment of the Francos. Act 7: From Finding the Francos Fragment to Getting to the Island of the Wannies Go back to Otringal with your new found friend. Go back to Baldino and give him the gazogem. He will turn your Proto-pack into a Super Jet Pack. Visit the pub and kill a sailor to get into the locked room. Talk to the boss. Go out and up the big ramp to where there is a door and water flowing from underneath it. Fly over onto the path onto the opposite side. Run quickly around the cliff face, being careful to stay out of the path of fire, and go into the Imperial Hotel. Kill the guard and go in. Find Mr. Rockett and talk to him. He will take you to his room and give you his dissident’s ring. Go down the elevator to the lower part of Otringal. Visit the bazaar. The shopkeeper will open a secret passage for you and take you to the other dissidents. Talk to all of them. Next, take a ride to Celebration Island. Go to the top of the volcano and take the path leading round. Jump over using the rocks floating down, saving as you go. Fly onto the little mound at the edge of the pool, (watch out for the sea-monster). Dig at the green crystals and Twinsen will put one into the laser pistol, which will work now. Go to the Island of the Francos. Make sure you have a Nitro Meca-penguin, whatever you do, DON’T USE IT!! Get over the fence the same way as last time. Go into the building on the left. Using the laser pistol, shoot the guards and flick the switches to open the doors. The switches need to be in this order from left to right: Up, Down, Up and Down. Go through the doors. Kill the guards if you really feel the need to use your laser pistol again, but otherwise go onto the big transporter ship. There is a big scary guy waiting for you. He is an assassin working for Dark Monk. Kill him and use the key to go down the elevator. Once down kill the technician and guard with the magic ball and go outside. Welcome to the Underground and, The Island of the Wannies. Act 8: From Getting to the Island of the Wannies to Getting to Valcano Island Kill as many of the soldiers as you can and make your way along the main path. You will, eventually come to the entrance to a cave. Talk to the old Wanny sitting down. Go left down the ladder into the family house. Get the glove from off the stand. Have dinner with them. Get some Fire-fly tart. Go back and give the tart to the Wanny you talked to. Use to key to get into the temple, (watch out for the millions of fireballs). Talk to the monk and go back the way you came again. Talk to the monk’s maid. Take the path back to where there are some buildings. The entrance to the gem mine is in there. Collect as many gems and you can lay your hot little hands on, and get the Wannies Fragment, (watch out for the miners who come and try to beat you up). Go to little shelter with a harp on top and select the Ferryman’s Song (you might want to turn the sound down for the moment, he even makes it rain)! Go to the Island of the Mosquibees. Talk to the Mosquibee flying around, he will give you a lift to see his Queen. Show them the dissident’s ring. They will take you to the test (see tips for help). Get the blowtron and some Esmer soldiers will have landed.
Act 9: From Getting to Valcano Island to Leaving Island CX in the Emperor's Shuttle Using the Jet-pack fly to the other ledges and make your way to the cave at the other end of the island. Talk to the Mosquibees inside. Go back to The Island of the Wannies. Go into the bank. Go to the door with the sensor. Every time you walk through it the other door closes. Kill the soldier and walk a Nitro Meca-penguin through the door you’ve just come through. The other door will open again. Kill the soldiers and flick the switch to open the cell door. Talk to the Mosquibee Queen. She will give a key for the secret passage to island CX. Go back to The Island of the Mosquibees. Go to the throne and use the key the Queen gave you on the keyhole in the throne. Kill the soldiers and go through the door which was guarded by two soldiers. Fly to the ledge and flick the switch to open the door, and quickly fly to the now opened door. Kill the soldiers and climb up the ladder. Run under the cannon on the corner. Kill the two soldiers with machine guns and collect the key. Go into the tower. Turn the wheel switch and go through the door at the top of the stairs. Run past the Imperial Guards, you can’t kill them and turn the wheel, go through the door on the left. Kill the soldier at the top and collect the key. Jump down and kill the soldier guarding the door with a machine gun. Go down on the lift. The Emperor is at the bottom. Listen to what he has to say. Kill him, maybe try out your laser pistol on him, anyway it’s your call. You can’t stop him turning on the reactors, and surprise surprise you can’t turn them off again. Kill the technician and use the key on the chest. You will get the Emperor’s sword. Kill the guard that comes down on the lift and go up again. Do the same thing as before, turn the switch and go in the door at the top of the steps. Kill the Imperial Guards and use the key on the door opposite the steps. Climb up and kill the guard at the top. Grab the itinerary token and go back outside. Go into the shuttle with the open door, this is the Emperor’s. Put the itinerary token and a movie will play. Act 10: From Leaving Island CX in the Emperor's Shuttle to Deafeating Funfrock Kill the Imperial Guards just outside the landing bay and use the key on the
door they were guarding. Go up the rocky path to the other door and enter the
maze, (see tips for help). At the other end kill the three guards and the statue
will smash. Kill the two-headed monster and use the key on the box. Jump up the pillars onto the book and go the same way that Funfrock did. Inside there are tons of groboclones. You might choose the run rather than fight. Go to the four screens with the wizard’s faces on. Turn the screen off in this order from left to right. 2, 1, 4, 3 and flick the switch on the far side of them, this will free them and they will blow a hole in the cage for you. Go up on the lift, Funfrock is waiting. Go back down and jump down the shaft that’s down the steps. Run right and down the steps on the next screen. Get one of the mushroom type things, one of these is a clover leaf. If you haven’t got full magic, get killed and you will come back with full magic. Cast the Lightning Spell and get the key. Go back the way you came and use the key on the bar door. Kill another two clones and jump down the hole. Kill the clone with rockets to get the key and use it on the door. If you kill the clone at the bottom of the next steps, he drops some clover leaves. Let Funfrock cut the rope for the children, don’t worry. Then it’s the same routine, if you haven’t got full magic, let yourself be killed and cast the Lightning Spell. After you have killed all of the Funfrocks, the guy cloned himself, go to the edge where the children were dropped, and the last movie will play.
|
|
If you need any more information on Little Big Adventure 2, Please feel free to e-mail me at any time. Comments and suggestions would be much appreciated.
Copyright © 2001 |
 For
now you can ignore the aliens, they will just stay out of your way. Buy a ferry
ticket and take the ferry to Desert Island.
For
now you can ignore the aliens, they will just stay out of your way. Buy a ferry
ticket and take the ferry to Desert Island.  the twin tank. Jump up the blocks and get the key. Carry on through the
building. Kill the technician and jump into the dog pen, go through the door and
get the gazogem.
the twin tank. Jump up the blocks and get the key. Carry on through the
building. Kill the technician and jump into the dog pen, go through the door and
get the gazogem.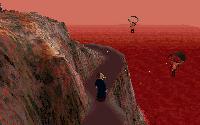 Don’t
bother getting involved in the fighting too much, more soldiers will only come.
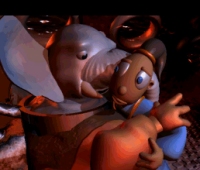
Take the cliff path and go across the wooden bridge. Talk to the Mosquibee and
climb the ladder to the top. When the walrus thing fires fireballs at you send
them back with the Wanny Gloves. When he dies he will drop a key, use it to open
the chest, you will get the Fragment of the Mosquibees. Go to the platform and
sing for the Ferryman again. Go to Volcano Island.
Don’t
bother getting involved in the fighting too much, more soldiers will only come.
Take the cliff path and go across the wooden bridge. Talk to the Mosquibee and
climb the ladder to the top. When the walrus thing fires fireballs at you send
them back with the Wanny Gloves. When he dies he will drop a key, use it to open
the chest, you will get the Fragment of the Mosquibees. Go to the platform and
sing for the Ferryman again. Go to Volcano Island.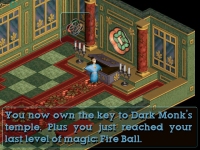 You will get the fragment of the Sups and the last level of magic, Fireball. Go
back the way you came and back to the Otringal docks. Take the ferryman to
Celebration Island, this is the last time you’ll use his boat (sob, sob). Go
into the temple and put the key onto the fire in the middle.
You will get the fragment of the Sups and the last level of magic, Fireball. Go
back the way you came and back to the Otringal docks. Take the ferryman to
Celebration Island, this is the last time you’ll use his boat (sob, sob). Go
into the temple and put the key onto the fire in the middle.