|
|
|
|
|
|
|
|
White Balance Correction Part 2 (White Spot) |
|
|
|
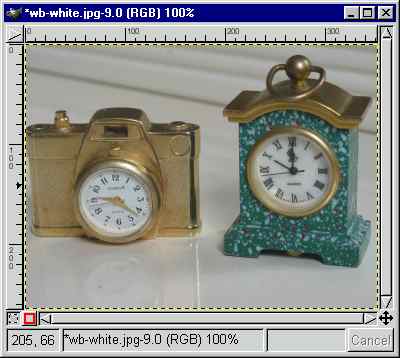
The second part of the White Balance Correction tutorial looks
at another common problem with White Balance settings in digital cameras. Most of the time, what the camera captures as
the white point is not of the correct shade or hue, as shown in the photo below. Using Gimp, it is easy to correct this problem.
|
|
|
|
For this tutorial, we need to install an action script which automates the task of correcting White Balance. The script,
written by the prolific script writer Iccii, can be found here color-wb-balance.scm.
Simply copy it to the usual script directory before starting up Gimp, for e.g. in Windows, it could be C:\Program Files\GIMP\share\gimp\1.2\scripts
|
|
|
|
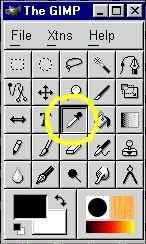
After starting up Gimp with the White Balance script installed, the first step is to select the Color Picker Tool as shown in the Gimp Tool Box below.
Notice the cursor changes shape from the usual arrow to a color picker cursor.
|
|
|
|
|
|
|
|
|
|
|
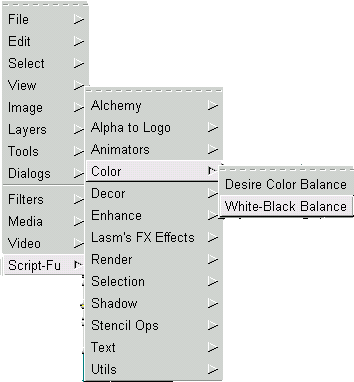
With the cursor inside the image, right mouse click to call up the menu structure and navigate the cursor to Script-Fu->Color->White-Black Balance.
If you have installed the white balance script properly, you will see the new entry in the menu, otherwise you need to copy to the correct scripts directory
(there may be more than one) and re-start Gimp.
|

|
|
|
|
|
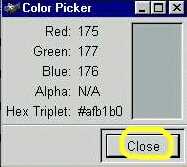
Position the cursor inside the white rectangle box which says "Regard Foreground Color as This Color".
Right mouse click and a small dialog window pops up. Select "Use Foreground Color" and press Enter.
|
|
|
|
Notice the "White" color of the rectangle box changes to the current Foreground color "Grey".
Click "OK" and let the script do the rest of the work...
|
|
|
|
|
|
|
|
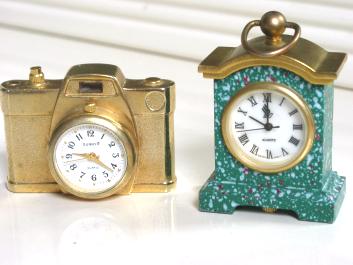
The final result appears as above. Notice the White Balance has been corrected. Right mouse click inside the image window
and click on "File->Save" to save the picture.
|
|
|
Images created with 
Copyright by lasm ©2002
|
|
|
|
|
|