
Images created with ![]()
Copyright by lasm ©2002
|
|
|||
| Fourier Transform Magic | ||||||||||
| In this tutorial we introduce yet another photo manipulation tool in Gimp, using the Fourier plugin. | ||||||||||
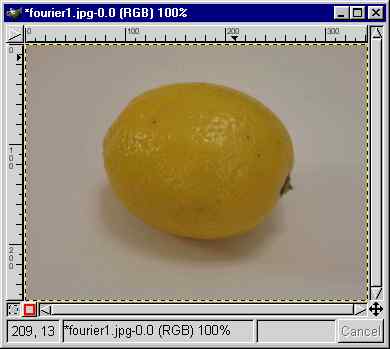
| The fourier transform plugin works particuluarly well if the photo has a lot of yellow color in it, so in this example, a picture of a lemon is used. Click on "File->Open" to open the lemon image. Looking at it, it is obviously under-exposed, and need some color tuning, lightness/contrast adjustment and even white balance correction. | ||||||||||
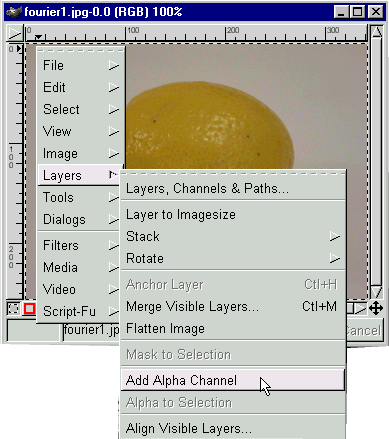
| Let's use Fourier transform instead of doing multiple photo adjustments. First, we need to make sure there is an alpha channel added to the photo. | ||||||||||
|
||||||||||
| Right mouse click to call up the cascading menu and navigate to "Layers->Add Alpha Channel" Click on it to add alpha channel to the current image. | ||||||||||
|
||||||||||
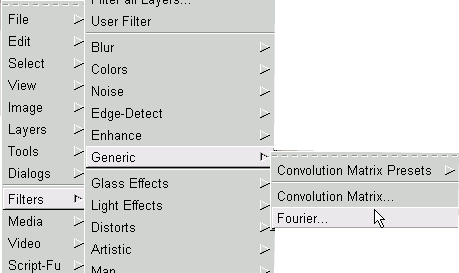
| Now call up the cascading menu again, and navigate to "Filters->Generic->Fourier". Click on it and let the plugin go to work. | ||||||||||
|
||||||||||
| Here's the result after the fourier transformation. | ||||||||||
|
||||||||||
| As you can see, the exposure has been corrected, the colors are more vibrant and saturated and the highlights were restored. | ||||||||||
|
Images created with Copyright by lasm ©2002 |
||||||||||
|
||||||||||