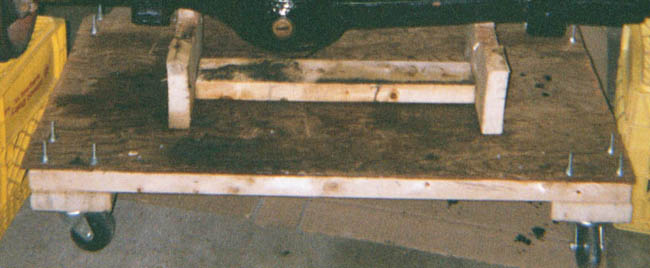
After solving the first challenge of making a truss to support the rear, I set about building and axle dolly to roll them about the shop and into the yard. Well worth the effort!
I think that I pioneered a new dialect of swearing and cussing in getting the old set of rusted springs, plates, and shocks off the old girl. But it was all worth it when the shiny new ones showed up from Ray at Wise Owl, and they are beautiful (and they cut me a great deal, too!)
 Once they came off, it was POR-15 time for everything!
Bushings and shackles were my nemesis, and I think that I pioneered a wide array of freezing, heating, air hammers, threaded bolts, and the like with no success. The only way I got the buggers out was to melt out the rubber, saw two grooves out of the inner bushing, and chisel them out. It also is well worth the time to gently pre-sand the inside before you put the new ones in, as well as put a slight bevel on the leading edge of each bushing before you drive them in.
 Attacking the rear axle
I did sandblast the rear axle and replace all the seals, as well as inspect the diff itself. All seemed to be in order (famous last words?), so some POR-15 and paint, and she was finally ready to slide back under. The installation of the parabolics was a breeze, and the end result was most encouraging to attack the front end!

