Moving the Transmission Mounts
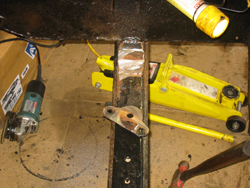
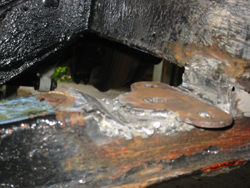
 As evidenced by this picture, the engine needed to come towards the left, or driver's side
(since I am keeping this a right-hand drive). But before I started grinding or cutting, I
busted out the measuring tools and graph paper. I found out that I could only move them 1 1/8"
over before the mounts would not fit any more, but this would almost centerline the engine. The
bigger challenge was going to be the shift in height - as it slid that distance to the right,
the passenger mount would move 3/8" lower, and the drivers side climb 3/8" higher. That would
give the entire transmission (and then engine) a 3/4" net list towards the passenger side.
That would be bad.
As evidenced by this picture, the engine needed to come towards the left, or driver's side
(since I am keeping this a right-hand drive). But before I started grinding or cutting, I
busted out the measuring tools and graph paper. I found out that I could only move them 1 1/8"
over before the mounts would not fit any more, but this would almost centerline the engine. The
bigger challenge was going to be the shift in height - as it slid that distance to the right,
the passenger mount would move 3/8" lower, and the drivers side climb 3/8" higher. That would
give the entire transmission (and then engine) a 3/4" net list towards the passenger side.
That would be bad.
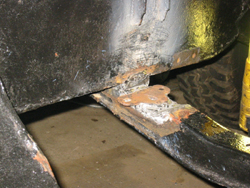
 What I decided to do was move the passenger's side mount on down, and then modify the chassis
crossmember to accept the driver's side mount at the same level with the passengers. It meant
a lot of metalworking, but the net result would be that the entire assembly would sit a net
3/8" lower. I chose this path because that drop would help to compensate for the relative lift
provided by the parabolic springs, and rectify the geometry if only slightly. But even better,
it bought me the space that I would need to not have to modify the bulkhead! Woo hoo!
What I decided to do was move the passenger's side mount on down, and then modify the chassis
crossmember to accept the driver's side mount at the same level with the passengers. It meant
a lot of metalworking, but the net result would be that the entire assembly would sit a net
3/8" lower. I chose this path because that drop would help to compensate for the relative lift
provided by the parabolic springs, and rectify the geometry if only slightly. But even better,
it bought me the space that I would need to not have to modify the bulkhead! Woo hoo!
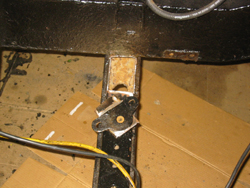
So, I cut off the plate on the passenger side, and a large section of the crossmember on the
drivers side.

 First I clamped the passengers side in its correct position, then re-measured. I then marked
the crossmember cuts, adding an extra 1/4" - I was going to add some serious plating and
bracing to make this section of the chassis even stronger than she was before. It took the
better part of a weekend, but when I was done, it was very strong, if a bit ugly.
First I clamped the passengers side in its correct position, then re-measured. I then marked
the crossmember cuts, adding an extra 1/4" - I was going to add some serious plating and
bracing to make this section of the chassis even stronger than she was before. It took the
better part of a weekend, but when I was done, it was very strong, if a bit ugly.
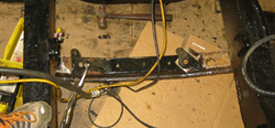
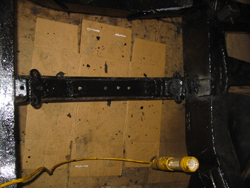 A few coats of POR-15 and black paint, and she was good to go. Another round of dry-fitting
would determine if my math was correct. Fingers crossed!
A few coats of POR-15 and black paint, and she was good to go. Another round of dry-fitting
would determine if my math was correct. Fingers crossed!
Disassembly of the T-18 Gearbox
created and maintained by
Matt Atkins
Back to the Main Page