Build a Lamborghini Countach....
....from scratch!
My Lamborghini Countach project.
Always wanting to own a Countach replica kit-car I started looking and comparing kits. Being located in Australia I was in some way very limited with the choices, at that time there wasn't any Kits available locally worth buying.
Let me just say that there where a few back yard operates. One of these companies was taking orders from the "MOTOR SHOW" all around Australia. These Kits where around the AU$11,000($6,000USD)for the body only. The owner claimed that car could be road registered but it wasn't, a lot of people bought these kits and sure enough they started appearing for sale as unfinished projects without any paperwork for a fraction of the original cost.
Well I decided not to become another statistic in this case.
I looked around some more and found some plans to build a Lamborghini Countach from scratch. That's right you read it right build the complete car from scratch including the body and chassis.
The good thing about theses plans is that you have an option to build the car with a space frame chassis V6 or a V8 configuration, or a cheaper version on a VW type 3 chassis.
You can download these plans from kitcarplans.com click here
Since
I was trying not to spend to much money I decided to build the kit based
around the VW type 3 chassis.
Here
are some questions that you
might have and the answers?
Did
you build the body
or is it a kit?
YES! I built the body from scratch using the plans. It took me 3 weeks
to get the body made and it cost me just under $1500AU. The body is
all hand made.
How hard is it making the chassis?
Well I took the easy option and built the car using the VW Type 3 chassis
and the sub-frame which I built from the plans supplied. I wanted to
have the car on the road as quickly as possible. The plans also give
you an option to build a space frame chassis.
What type of engine did you end up using?
Since I was building the car on a VW chassis I used a 2 litter V6 Nissan
motor. I had to buy a adaptor plate and that was it.
Why the VW chassis?
Being in Australia we have very strict ADR's (Australia Design Road
Rules). If I decided to build the space frame chassis I would have to
under go to many tests and it is more difficult to get the car registered.
How long did the car take to finish?
I worked on the car only on the weekends and I had it finished in 14
month.
What was the hardest part to build in the car?
Working on the doors was the most difficult part but with the plans
explaining what hinges to use and how to cut the out made it more easy
to understand how the doors actually work.
|
|
 The back of the body formers are in place. |
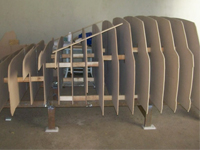 Few more formers where put in place supported by vertical sections to keep all the formers nice and square. |
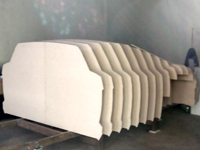
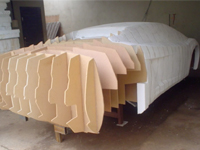 Here the body formers are getting covered in foam. |
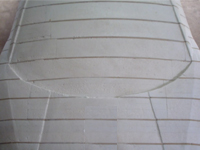 The windshield recess was cut in just perfect. |
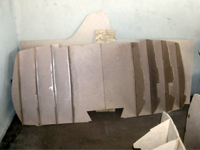
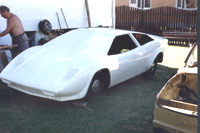
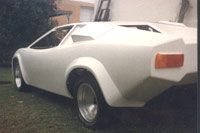
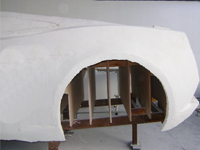 The whole car was successfully covered with plaster and shaped as even and close to the real thing as I could. Then the car was covered with 4 layers of fibreglass cloth and resin. Each layer was left to cure overnight and rubbed back with coarse sandpaper before the next layer applied. I took extra care when applying the last layer of cloth not to get any air bubbles and weave sticking up from the body. After the last layer was cured very carefully the body was sanded back and any imperfections and weave showing was filled with automotive body filler what we call "BOG". This product bonds with fibreglass extremely well as it is epoxy based. |
 The body was turned upside down and the formers removed with the foam as well eaving us a fibreglass body shell. I ended up removing the side skirt after I glassed the body. |
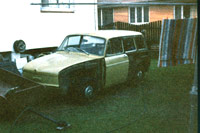 The donor car arrives a 1972 Type 3 VW. |
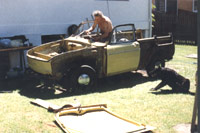 I'm removing the VW body . |
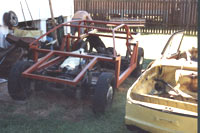 The sub-chassis was built as per the plans and placed on the VW chassis. |
 I put the body over the chassis to see what it looks like and to see where we can glass the body to the frame. |
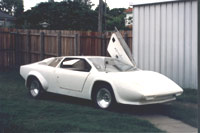
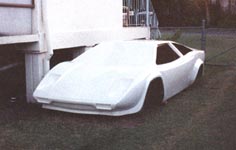
 Wheels are bolted on and some cheap taillight just sticky taped on. As you can see there are no doors yet. |
 It took me some time to draw the doors straight on the body with a felt pen. I wanted to make sure that both sides where even. |
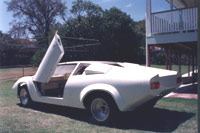 It took some time to cut out the doors. The door ledges I made out of foam the covered with fibreglass. I had taken my time to make sure the doors shut properly. |
|