VALENTINE TEXTS TUTORIAL

SKILLS
Beginner with basic knowledge of PSP and Letter Creator
NEEDED
tube
PSP & Letter Creator
PREPARING:
- choose tube, no longer or wider then 300 pixels
- duplicate tube (shift-D)
- close down your original tube, we will work with the copy
- choose light or bright foreground color from your tube
in your material box
- choose dark background color from your tube in your
material box
- Edit - copy
BACKGROUND TEXT
- File � New Image: settings: 300 x 300: transparant
- Activate your text tool
- Choose a nice font and use a size which suits you.
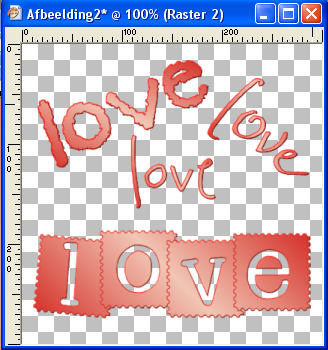
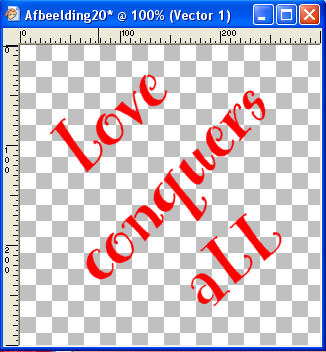
For lose words for instance 72, for a saying for instance
48 or 36. You can turn it in any direction you want and
in different fonts. Just as you like and repeat this until
you have filled your square without touching the edges.
See examples. My advise, play with this and you can have
many different backgrounds.
- Tip after Valentine�s day you can also choose for not �love� texts.
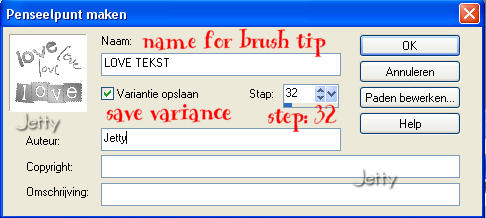
- File � export, chose �custom brush�, give name you can find
back easily, at default settings.
BACKGROUND TILE
- File � New Image: 300 x 300, transparent
- Selections � Select all
- Edit- Paste into Selection
- Selections � Select none
- Effects � Image effects � Seamless tiling: at default
- Layers � new raster layer
- Flood fill with your flood fill tool your new layer using
your foreground color
- Layers � Arrange � Send to bottom
- Layers � Merge � Merge visible
- Adjust � Blur � Gaussian Blur: settings: 25 pixels
- Effects � Image effects � Seamless tiling: at default
- Duplicate (shift � D) your background tile
- Minimize (we will use this copy later for the tube image)
- We will continue working on your original background tile
- Select brush in your toolbox you made: Paintbrush, next to
presets choose your brush.
- Height of no more then 300 steps 32

- Put your brush once in middle of image: right click to
use your background color, left click for your foreground color.
Look what suits your image best. I used my background color.
- Your background tile is now ready, minimize
BACKGROUND
- File � New Image: 1450 x 300
- Go to your background color box in your material box and select
the pattern you just made
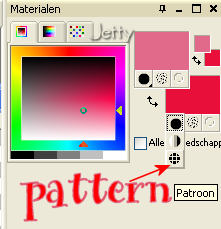
- Flood fill your new image with your pattern (flood fill tool),
settings: corner: 0 and scale:100
- Lower the opacity of your background to make it text friendly
(note down the number of opacity)
- Your background is now ready
TUBE IMAGE
- Activate your copy of the background tile without text
- Lower the opacity to that you used with your background
same opacity).
- Layers � new raster layer
- Choose your preset tools in tool box and choose circle

- Draw a circle on your background tile from the left top
corner, start point: 30 x 30 to 150 x 150
- Layers � new raster layer
- Activate your text tool in your tool box and choose
a nice font, size 18 � 22 to your likings. I chose 18
- When you have your arrow above the circle just at the edge
you will notice an A with half a circle under it. When you see this A
you can start typing your text. Your text will now appear around
the circle you draw before.
- When you are finished go to Layers � Promote to raster layer
- Activate the circle layer in your layer box (not the one
with the text circle!)
- Delete this layer
- Activate your top layer (the text circle layer)
- Layers � duplicate
- With your mover tool (tool box) move your duplicated circle
opposite of the first text circle
- Edit � Paste as a new layer
- Move your tube if you want to the spot you like best
- Close the view of your background layer (click the eye)
- Layers � Merge � Merge visible
- Effects � 3d effects � Dropshadow: settings: horizontal
& vertical: 4, opacity: 55, blur: 12
- Make your background layer visible again.
- Layers � Merge � Merge visible
- Effects � 3d effects � Inner Bevel: with the following settings
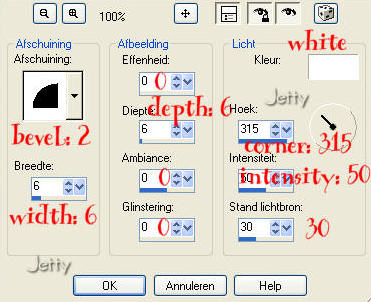
- Layers � Merge � Merge all (flatten)
- Edit � Copy
- Minimize
FINISHING BACKGROUND
- Activate your background
- Edit � Paste as a New Layer
- Move your image with your mover tool to the left corner
- Effects � 3d effects- dropshadow: settings: vertical: 0,
horizontal: 5, Opacity: 60, Blur: 15, shadow on new layer: checked
- Activate your deformation tool in your toolbox
- With your deformation tool you drag with the white double
arrows vertical (on top and down) until there is one black
shadowline without lighter edges.
- Activate your toplayer
- Layers � new raster layer
- Add your watermark
- Layers � Merge � Merge all (flatten)
FINISHING
- File � Export: JPEG Optimize with compression of 25
- In Letter Creator in your Body open your background
- Tile in your body
- In your Footer mention your credits
- Finish
I hope you will have fun doing this tutorial. Please show me your
results as I love seeing my tutorials used and I love
seeing nice letters. So please please please do.
Please give credit to me in your tutorials. Best to put
a link to my group:
http://groups.yahoo.com/group/IMtutorialsbyJetty
or if you belong to a group where that isn�t allowed
please add my email: [email protected]
For members of the creatorscommunity link to my website:
http://www.geocities.com/ladyluna37/index.htm
If you want to use this tutorial groupswise or include it in lessons
please ask my permission. I probably won�t refuse but I would
like to hear when it is used.
If there is any resemblance to another tutorial it is purely
coincidental.
Thanks to the women who have thought me more about
Paint Shop Pro and Incredimail and to the women who test for me.
Without you I couldn�t have done it.
Hugs
Jetty