TEXTURIZED WHIRL TUTORIAL
LEVEL:
Beginner with knowledge of PSP and filters
NEEDED:
- PSP
- Letter Creator
- Tube of your choice
- IC Net Software, Filters Unlimited 2.0, Distortion Filters, Whirl
http://www.icnet.de/filters_unlimited/download.html
PREPARING:
- Chose tube (height no more then 280)
- Chose two colors from tube: lighter color for foreground,
darker color for background
- Duplicate Tube (shift D)
- Close your original tube
- Edit � Copy
BACKGROUND PATTERN:
- File � New - New image of 300 x 300
- On the tool task bar chose the Selection Tool
with the
following presets:

- Chose custom selection with the following
settings:
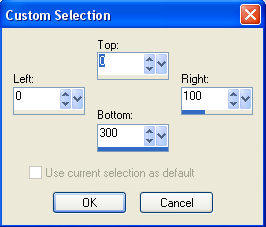
top: 0
left: 0
right : 100
bottom: 300
- Floodfill your selection with your light
foreground color
- Selections � Select none
- Layers � New Raster Layer (transparant)
- On the tool task bar chose the Selection Tool
with the same settings as before
- Chose custom selection with the following
settings:
top: 0
left: 200
right : 300
bottom: 300
- Floodfill your selection with your darker
background color
- Selections � Select none
- Layers � New Raster Layer
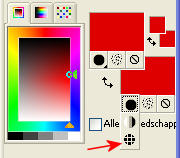
- Chose another color from your tube for your
backgroundbox in the materialbox with your dropper tool
- Selection Tool with the following settings:
Top: 0
Left: 100
Right: 200
Bottom: 300
- Floodfill your selections with your new
background color:
- Selections � Select none
- Layers � Merge � Merge visible
- Filters � IC Net Software � Filters Unlimited 2.0
� Distortion Filters � Whirl: settings: 32
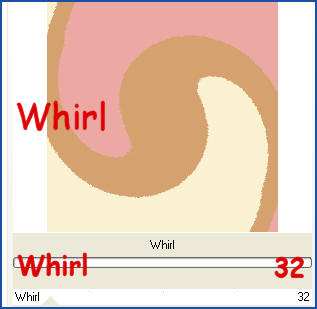
- Your background pattern must now look
similar to the above image
- Effects � Image Effects � Seamless Tiling:
at default
- Layers � New raster layer
- Floodfill with your light foregroundcolor
- Lower opacity of your new layer to 50-80 to your
likings. I used 64.
- Layers � Merge � Merge visible
- Effects � Texture Effects � Blinds: width 4,
Opacity: 58, your color must be your background
color, horizontal must be checked
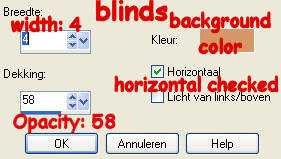
- Effects � Texture Effects � Blinds: width 4,
Opacity: 58, your color must be your background
color, horizontal must NOT be checked now
- Optional: lower opacity of your image to make it
more text friendly
- Layers � Merge � Merge all (flatten)
- Your background image is now ready
- Minimize for now, we will use it later
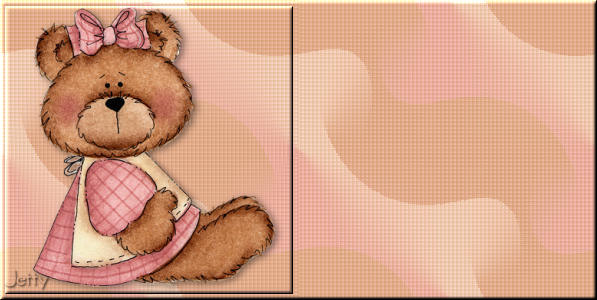
BACKGROUND
- File � New Image: 1280 x 300
- In your materialbox, change background color to
pattern: settings: angle 0 and scale 100.
- Chose your just created background pattern here
- Floodfill your new image with your pattern
- Minimize for now, we will use it later
TUBE LAYER
- Activate your (minimized) background pattern
- Edit � Paste � Paste as a new layer (your tube
will be centered on this square
- Effects � 3d effects � Dropshadow: with the
following settings: horizontal & vertical: 3,
Opacity: 45, Blur: 15 (or your preference)
- Layers � Merge � Merge visible
- Selections � Select All
- Selections � Modify � Contract: settings: 6 px
- Effects � 3d effects � Inner Bevel: with the
following settings:
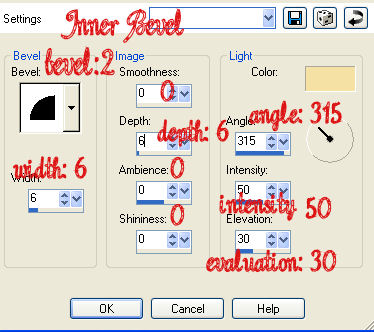
Bevel: 2 , Width: 6, Smoothness: 0, Depth: 6,
Ambience: 0, Shininess: 0, Angel: 315, Intensity: 50,
Evaluation: 30, Color: white/light foregroundcolor
- Selections � Select none
- Edit - Copy
- TIP: use this as tag
- Close down
BACKGROUND
- Activate your background
- Edit � Paste � Paste as a new layer
- With your mover tool, move this to the far left
making it fit with the patterns
- Layers � New raster layer
- Put your watermark on your new layer
- Layers � Merge � Merge all (flatten)
- Your background is now ready
FINISHING
- File � Export: JPEG Optimize with a
compression of 25
- In Letter Creator in your Body open your
background
- Tile in your body
- In your Footer mention your credits
- Finish

I hope you enjoyed making this letter.
I would love to see the results. You can reach me at:
[email protected]
Please put a link to my group:
http://groups.yahoo.com/group/IMtutorialsbyJetty
Or to my website:
http://www.geocities.com/ladyluna37/index.htm
My tutorials can be found in my groupfiles.
http://groups.yahoo.com/group/cuteIMlettersandtagsbyJetty
or
http://groups.yahoo.com/group/IMtutorialsbyJetty
or at the earlier mentioned homepage
With thanks to the brilliant women who have given me
lessons in PSP and Incredimail.
Many things I learnt have been used by me in creating.
Any resemblance with other tutorials is purely coincidental.
And special thanks to my testers for their testing.
You are free to share my tutorials. If you want to use them
for lessons or a groupshare please ask me and please
awknowledge it as my tutorial.
Hugs
Jetty
Tutorial created: February 2007 by Jetty, Netherlands