SPOTTED SQUARES TUTORIAL

NEEDED:
- PSP
- Letter Creator
- Tube of your choice. Largest side no longer then 340 px.
Best is a tube larger then wide.
LEVEL:
Advanced Beginner with basic knowledge of paint shop pro, letter creator
and plugins / filters.
PREPARING
- Open tube
- Duplicate tube (Shift D) and close original
- Chose a light color from tube and select it as foreground
color in the materialbox
- Chose a dark color from tube and select it as background color
in the materialbox
- Minimize Tube
BACKGROUND
- File � New � New image of 200x200 pixels
Variation: use a rectangle of 100-150x200 pixels.
- Flood fill your image with your light foreground color
- Image � Canvas Size: settings: 400 x 400 placement top � left
- Layers � Duplicate
- Image � Mirror
- Image � Flip
- Layers � Merge � Merge visible
- Layers � New raster layer
- Floodfill your new layer with your background color
- Layers � Arrange � Send to bottom
- Layers � Merge � Merge all (flatten)
- Chose another colour from your tube as new background colour
- In your toolbox chose Ellipse Tool
- Presets: Mode: circle, create on vector
- Optional: In your materialbox lock your foreground color.
Just push on the transparent button under the color. It looks like
a circle with a stripe in it.
For a variation you can leave the foreground color unlocked,
so you will get an edge.
- Draw circles at random on your background on the top left square.
- Layers � Duplicate
- With your mover tool move your spots to the top right square.
Or you can do instead: Image � Mirror. The spots are then opposite
instead of the same. Try and chose what you prefer.
- Layers � Duplicate
- Move your spots to the square below. Or for opposite: Image - Flip
- In your material box change your foreground color in a new
tube colour
- In your material properties box of the new color note down the Hue
And Saturation number

- Adjust � Hue and Saturation � Colorize. Change Hue and
Saturation into the numbers you noted down.
The spots on the right down square should now change in your
new colour
- Layers � Duplicate
- With your mover tool move to the left down square. Or
again do it opposite: Image - Mirror
- Layers � Merge � Merge visible
- Lower the opacity to your likings
- Layers � Merge � Merge all (Flatten)
- Edit � Paste
- With your mover tool move to a nice spot if necessary
- Effects � 3d effects � Dropshadow: settings:
Horizontal & Vertical: 4, Opacity: 45, Blur: 15
- Layers � Merge � Merge flatten
- Effects � 3d effects � Inner Bevel to your liking..
I chose: bevel 2, Width: 5, Depth: 5, Smoothness, Ambience
and Shininess: 0, Angle: 315, Intensity: 50 and Elevation: 30
- Image � Canvas Size: 1280 x 400, placement center left
- Layers � New raster layer
- Floodfill with one of the colors you used before.
- Layers � Arrange � Send to bottom
- Optional: if you�d like you can add spots again as you did
before. You might need to lower the opacity then.
- Activate your top layer
- Effects � 3d effects � Dropshadow with the same settings but
now check the possibility �shadow on new layer�
- In your toolbox select the deform tool
- Drag the horizontal edges of the separate shadow layer
upwards and downwards to have a smooth shadow line.
- Select your top layer
- Layers � New raster layer
- Add your watermark
- Layers � Merge � Merge all (flatten)
- File - Export � JPEG Optimizer � compression of 20-25
FINISHING
- Open your Letter Creator.
- In your Body open your background and tile
- In your Footer mention your credits
- Finish
VARIATIONS:
- You can change it into a rectangle instead of a square
- You can as well try this with another form instead of circles<
- You can change the colour of every square or even every set
of spots
- You can change the colours of every square and use the same
colour of spots
- You can play with edges and no edges� lots of possibilities
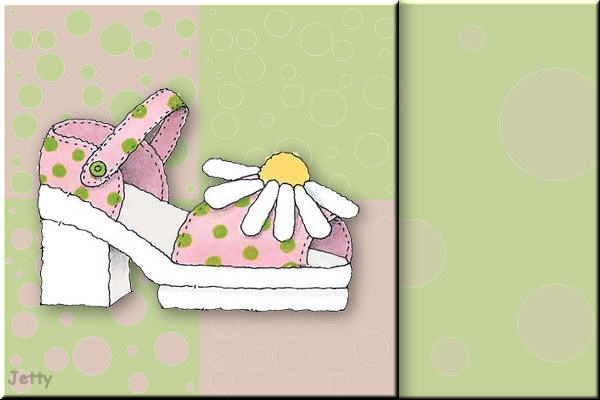
Example 2:
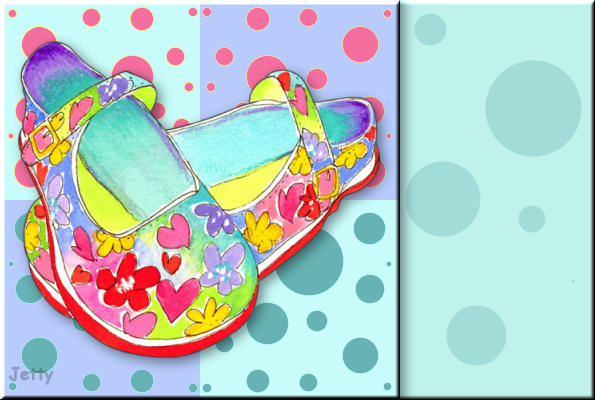
and yet another example:
Example 2:
I hope you enjoyed making this letter. I would love to see the results.
You can reach me at:
[email protected]
Please put a link to my group:
http://groups.yahoo.com/group/IMtutorialsbyJetty
Or to my website:
http://www.geocities.com/ladyluna37/index.htm
My tutorials can be found in my groupfiles.
http://groups.yahoo.com/group/IMtutorialsbyJetty
or at the earlier mentioned homepage.
With thanks to the brilliant women who have given me
lessons in PSP and Incredimail.
Many things I learnt have been used by me in creating.
Any resemblance with other
tutorials is purely coincidental.
And special thanks my testers for their testing.
You are free to share my tutorials. If you want to use them
for lessons
or a groupshare please ask me and please
acknowledge it as my tutorial.
Hugs
Jetty