
ground colour in the Materials box
background colour in the Materials box
COLORIZING
to use and which you want to colorize into PSP. You
will need one background and at least two big hearts
and perhaps one or two small ones. Whatever you
prefer of course.
Materials box
Saturation numbers and note these down
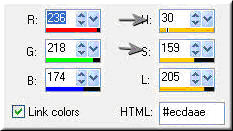
Materials box.
Saturation numbers and note these down.
BACKGROUND
here the numbers of the light foreground color you noted
down before. Your background will adjust to your
foreground color.
Tiling method: Mirror, Direction: Bidirectional, Settings will
adjust.
If you prefer another Width, you can adjust. Please keep
Height to 400.
to pattern.
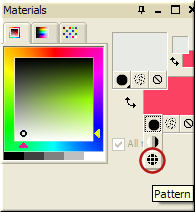
Properties box.
right clicking in the image
your light foreground color by left clicking in the image.
to make your background more text friendly, but the
pattern still visible. I used 74, 82 and 58 in my examples.
here the numbers you noted down before of your back-
ground color. Your heart will adjust to your background
color.
For instance: Direction: Left, Degrees: Free, 15.
Rotate single layer around canvas centre: checked.
position in the left corner.
Horizontal: 3, Opacity: 40, Blur: 10 and Color: Black
here the numbers you noted down before of your back-
ground color. Your heart will adjust to your background
color.
For instance: Direction: Right, Degrees: Free, 25.
Rotate single layer around canvas centre: checked.
position in the left corner
Horizontal: 3, Opacity: 40, Blur: 10 and Color: Black
here the numbers you noted down before of your back-
ground color. Your heart will adjust to your background
color.
own likings.
position close to the other hearts or partly on top of
them.
Horizontal: 3, Opacity: 40, Blur: 10 and Color: Black
your hearts to have a good looking combination. When
the Move Tool is activated in your Tool Box you left click
on a heart, you don�t need to activate the heart layer in
your Layers Palette, just drag it to it�s wanted position.
Position it nicely on top of the hearts while there must
still be a part of the hearts showing.
Horizontal & Vertical: 3, Opacity: 40, Blur: 10 and Color:
Black
FINISHING
Another example:

And the last example:

I hope you enjoyed making this letter. I would love to see the results.
You can reach me at:
[email protected]
Please put a link to my group:
http://groups.yahoo.com/group/IMtutorialsbyJetty
For the creatorscommunity, please put a link to my website:
http://www.geocities.com/ladyluna37/index.htm
My tutorials can be found in my groupfiles.
http://groups.yahoo.com/group/IMtutorialsbyJetty
or when they are released in the creatorscommunity at the
earlier mentioned homepage.
With thanks to the brilliant women who have given me
lessons in PSP and Incredimail.
Many things I learnt have been used by me in creating.
Any resemblance with other tutorials is purely coincidental.
And special thanks to my testers for their testing.
You are free to share my tutorials. If you want to use them for
lessons or a groupshare please let me know and please
acknowledge it as my tutorial.
Hugs
Jetty