GOLDEN FLOWER TUTORIAL
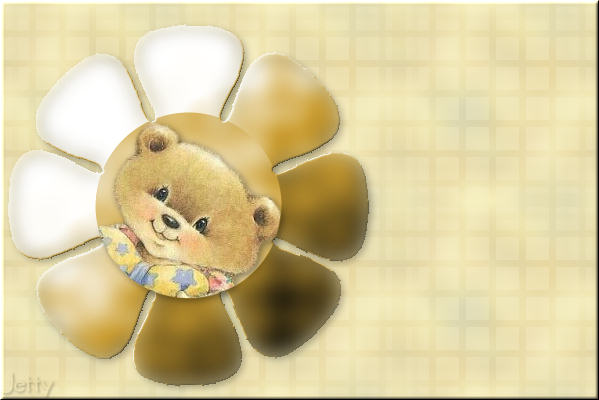
NEEDED:
- PSP
- Letter Creator
- Tube of your choice: a not too detailed tube works best
- Filter Penta.com: Dot and cross
http://www.pentacom.jp/pentacom/products.html
download the Garbage Collection
- Filter Bordermania: Round Button #1
http://www.pluginfilters.com/bordermania/
- Optional: If you don't have the flower 5 preset shape
go to the group files
members of the IMtutorialsgroupbyJetty go here
members of the creatorscommunity go here
Or email me at [email protected]
PREPARING
- Open tube, height maximum: 350 px
- Duplicate tube (Shift D)and close original
- Choose a light colour from tube and select it as foreground
colour in the material box
- Choose a darker colour from tube and select it as background
colour in the material box
- Edit - Copy
- Minimize copy of tube
GOLDEN FLOWER
- File �New Image: 400x400 (transparent)
- Activate your Preset Shape Tool in your toolbox
- Select your flower shape
- View � Rulers
- In your image start drawing at 20 horizontal until
20 vertical (20-20) and stop at 380-380.
- Select your magic wand in your toolbox and click
once in your flower
- Hit delete.
- Layers � Convert to raster layer
- Edit - Paste � Paste as New Layer
- Layers � New raster layer
- Floodfill with your light foreground color
- Layers � Arrange � Send to bottom
- Layers � Merge � Merge visible
- Effects � Reflection Effects � Pattern: default settings
- Adjust � Blur � Gaussian Blur: radius of 15
- Effects � Bordermania � Round button 1: settings:
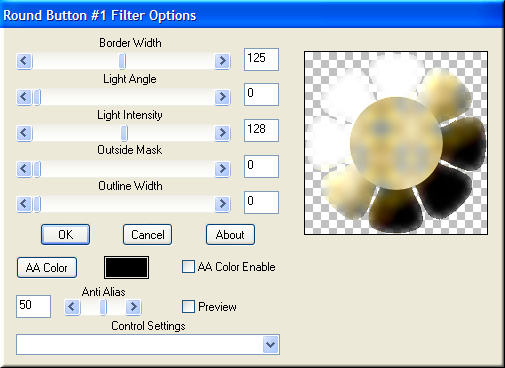
Settings: Border Width: 125, Light Angle: 0, Light Intensity: 128
Outside Mask: 0, Outline Width: 0, Color: black, 50 anti-alias
- Selections � Select None

Selection Type Circle, Mode: Replace, Feather: 0 and Anti-Alias:
checked.
- Now we are going to draw a circle selection. Starting point at
200-200. Draw the circle to the point where the flower leaves
begin at the edge of the inner circle. That�s about 105 from
each edge.
- Edit � Paste � Paste as new layer
- With your mover tool move your tube until there is a part in the
circle that you want to have focused. You should move with a
part that is situated outside the circle selection.
- Selections � Invert
- Hit the delete button once
- Selections � Select none
- Effects � 3d effects � Dropshadow: Vertical & Horizontal: 3,
Opacity: 45, Blur: 10 and Color: black.
- Layers � Merge � Merge Visible
- Effects � 3d Effects � Inner bevel: with these settings:
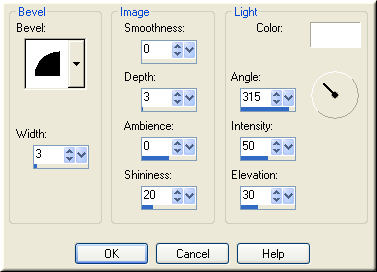
Bevel: 2, Width: 3, Smoothness: 0, Depth: 3, Ambience: 0.
Shininess: 20, Angle: 315, Intensity: 50 and Elevation: 30
- Edit � Copy
- Minimize, we will use this flower later
BACKGROUND TILE
- File - New Image: 400-400 Transparent
- Selections � Select all
- Edit � Paste � Paste into Selection
- Selections � Select none
- Layers � New raster layer
- Floodfill with your foreground color or background color
- Layers � Send to bottom
- Layers � Merge � Merge All (Flatten)
- Effects � Image effects � Seamless Tiling: default settings
- Adjust � Blur � Gaussian Blur: radius of 20
- Effects � Penta.com � Dot and cross: with these settings:
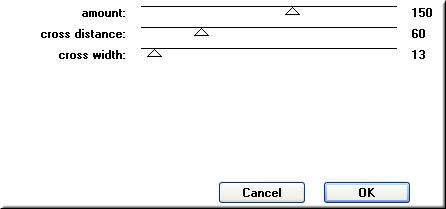
Settings: Amount: 150, Cross distance: 60, Cross width: 13
- Effects � Image effects � Seamless Tiling: Mirror and
Bidirectional checked, Horizontal and Vertical Offset: 0 and
Width: 50
- Optional: Image � Resize � Resize to 50 %, all checked
- Your background tile is now ready, minimize
BACKGROUND
- File �New Image: 1280x400 (transparent)
- Go to your material pallet and put your background color
(box)
to pattern
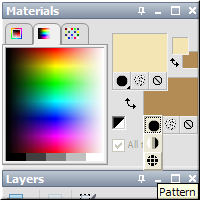
- Click once to open your Material Properties box.
- Choose your settings: angle 0, scale 100,
- Choose your background tile as pattern
- Floodfill the background with your pattern
- Layers � New raster layer
- Floodfill this raster layer with your light foreground color
- Lower opacity to 50-80.
- Layers � Merge � Merge All (Flatten)
- Edit � Paste � Paste as new Layer
- Move your flower tube to the left, leave symmetrical
spaces from top, bottom and left edge
- Effects � 3d effects � Dropshadow: vertical and
Horizontal: 3, Opacity: 45, Blur: 10 and color: black
- Layers � New raster layer
- Add your watermark
- Layers � Merge � Merge all (flatten)
FINISH
- File � Export � PJEG Optimizer: compression of 22
- Open Letter Creator
- File � open your letter
- Tile in your body
- Mention your credits in your footer
- Finish
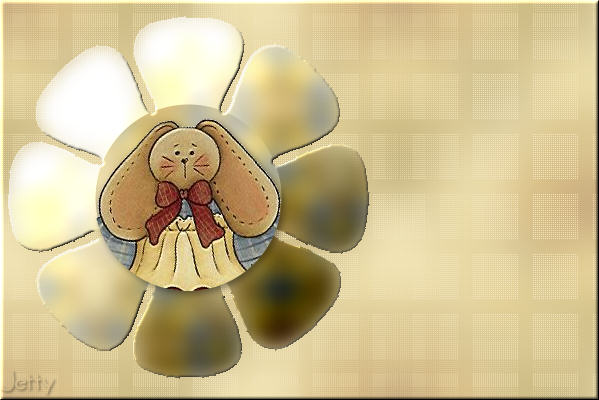
See this example: here I didn�t resize the background tile
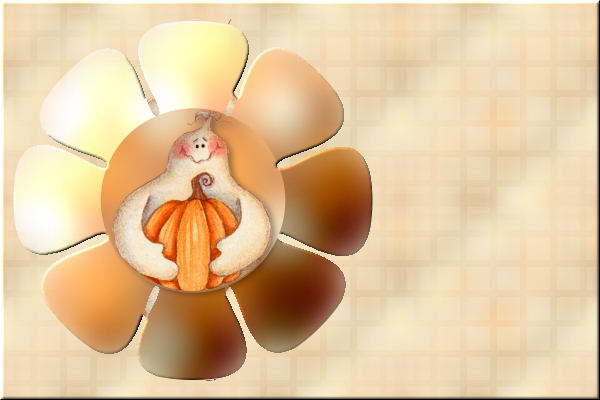
Another example:
I hope you enjoyed making this letter. I would love to see the results.
You can reach me at:
[email protected]
Please put a link to my group:
http://groups.yahoo.com/group/IMtutorialsbyJetty
Or to my website if you have gotten this tutorial through
creatorscommunity:
http://www.geocities.com/ladyluna37/index.htm
My tutorials can be found in my groupfiles.
http://groups.yahoo.com/group/IMtutorialsbyJetty
or after a while at the earlier mentioned homepage.
With thanks to the brilliant women who have given me
lessons in PSP and Incredimail.
Many things I learnt have been used by me in creating.
Any resemblance with other
tutorials is purely coincidental.
And special thanks my testers for their testing.
You are free to share my tutorials. If you want to use them
for lessons
or a groupshare please ask me and please
acknowledge it as my
tutorial.
Hugs
Jetty