TRI-TILE SPLASH TUTORIAL

NEEDED:
- PSP
- Letter Creator
- Tube of your choice
- Filter Factory D: Tri Tile
- VM Natural: Splash
http://www.fleursauvage.be/utilitaire/filtres/filtres.htm
LEVEL:
Beginner with basic knowledge of paint shop pro, letter
creator and filters. There is an intermediate part.
PREPARING
- Open tube, height maximum: 320 px. or resize to 320
A tube larger then width works best
- Duplicate tube (Shift D) and close original
- Chose a light color from tube and select it as foreground
color in the materialbox
- Chose a dark color from tube and select it as background color
in the materialbox
- Edit - Copy
- Minimize Tube
BACKGROUND TILE
- File � New � New image of 400 X 400 pixels, transparent
- Selections - Select all
- Edit - Paste into selection
- Selections � Select none
- Layers � New layer (raster)
- Flood fill layer with light foreground colour
- Layers � arrange � send to bottom
- Layers � Merge � Merge visible
- Effects � Image effects � Seamless tiling (default)
- Adjust � Blur � Gaussian Blur: radius of 25
- Effects: Filter Factory D: Tri-Tile: settings:
Tiles: 64, Mode: 207, X-Adjust: 162 and Y-Adjust: 116

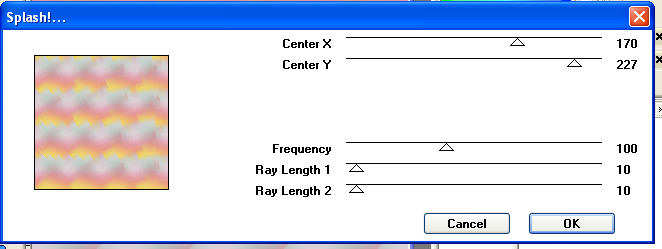
- Effects: VM Natural: Splash: with these settings:
Center X: 170, Center Y: 227, Frequency: 100, Ray Length1:
10, Ray Length 2: 10
- Effects � Image effects � Seamless tiling: default
- Your background tile is now ready
- Minimize
BACKGROUND
- File � New � New image of 1280x400 pixels
- Go to your material pallet and put your background color
(box) to pattern
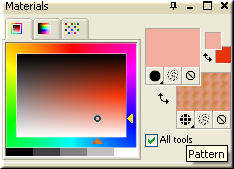
- Chose your settings: angle 0, scale 100,
- Chose your background tile as pattern
- Flood fill the Background with your pattern
- Optional: Effects � Image effects � Seamless tiling: default
(should not be necessary)
- Layers � New raster layer
- Flood fill with your foreground colour (material box)
- Lower the opacity of your layer to 40 - 80
You should be able to see the tile through it. I chose 50 / 72
- Layers � Merge � Merge all (flatten)
- Go to your toolbar and chose your Selection Tool: Selection
- In your Selection presets chose type: Ellipse, Mode: add
And Feather: 0, Anti-Alias must be checked
- Starting point: horizontal 120 and vertical: 200. Go to the left
to horizontal: 40 and vertical: 30, You now have an ellipse form.
- Layers � New raster layer
- Flood fill with your foreground colour
- Selections � Modify � Contract: 10
- Hit delete once
- Selections � Select none
- Effects � 3d effects � Inner Bevel: these settings
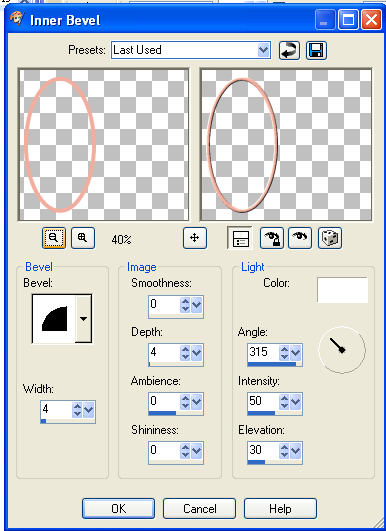
Bevel 2, Width: 4, Smoothness: 0, Depth: 4, Ambience: 0,
Shininess: 0, Angle: 315, Intensity: 50 and Elevation: 30
- Layers � Duplicate
- Image � Rotate � Free rotate: Right and Free: 25,
Uncheck �all layers�
- Layers � Duplicate
- Image � Rotate � Free rotate: Left and Free: 50
Uncheck �all layers�
- Make the bottom layer invisible (click the eye once)
- Layers � Merge � Merge visible
- Effects � 3d Effects � Drop Shadow: settings:
Vertical: 4, Horizontal: 4, Opacity: 40, Blur: 5, Colour: black
- Repeat Drop Shadow but now with Horizontal and
Vertical: � 4.
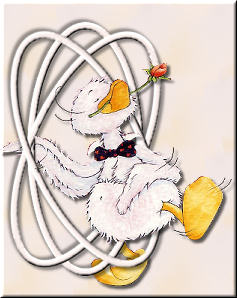
- Make bottom layer visible again (click the eye again)

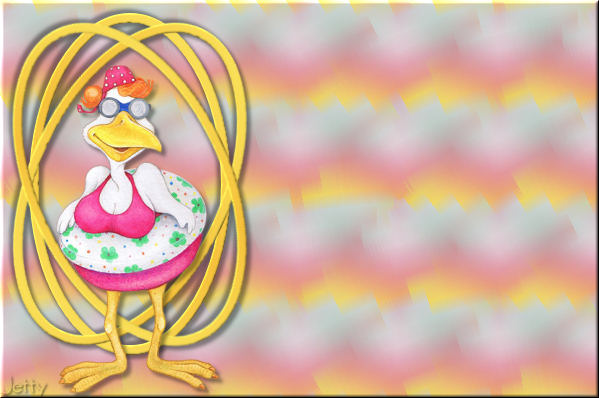
It should look like this
- Edit � Paste � Paste as New Layer
- Move tube with mover tool to the left and position the
tube nicely among the ellipses
- Effects � 3dEffects � Drop Shadow: settings:BR>
Vertical: 4, Horizontal: 4, Opacity: 40, Blur: 5, Colour: black
ADDITION FOR INTERMEDIATES, BEGINNERS SKIP
AND CONTINUE WITH POINT 60
In this part you will erase a part of the tube to make it look
like that part of the tube is behind the ellipse and a part will
remain on top of the ellipse. See my example
- Layers � Duplicate
- Layers � Arrange � Move down to below ellipses
- Activate your top layer
- Lower opacity to about 40
- In the toolbox select your Eraser Tool
- Your top layer should be activated!
With the Eraser Tool go over the parts of the ellipses,
where you want to have parts of the tube removed so that it
will look that the ellipses are in top of the tube at those spots.
58. Your image should look now as if a part is behind the
Ellipses and a part in front of them. Play with it.
VARIATION: You can also have the ellipses get more
entwined.
- Put Opacity of Toplayer back to 100
From here continue with point 60
CONTINUING POINT BEGINNERS AND INTERMEDIATES
- Layers � New raster layer
- Add your watermark
- Layers � Merge � Merge all (flatten)
- File � Export: JPEG Optimizer with compression of 20-25
FINISHING
- Open Letter Creator
- In your Body open your background
- In your body tile
- In your Footer mention your credits
- Finish
Another example:
Here I played with the starting point and width of the ellipses
And here yet another example:

VARIATIONS
- You could use a mini or a small tube and position it in
the middle of the ellipses
- You can add some more ellipses, but keep the distance
the same
- You can fill the ellipses with a background color or
the pattern
- You can leave the layer in step 27 -29 for a more
colorful example
- You can place the tube behind the ellipses:
Layers � Arrange � Move down�
so it is peeping through�
- Of course you can replace the ellipse form by rectangles
I hope you enjoyed making this letter. I would love to see the results.
You can reach me at:
[email protected]
Please put a link to my group:
http://groups.yahoo.com/group/IMtutorialsbyJetty
Or to my website:
http://www.geocities.com/ladyluna37/index.htm
My tutorials can be found in my groupfiles.
http://groups.yahoo.com/group/IMtutorialsbyJetty
or at the earlier mentioned homepage.
With thanks to the brilliant women who have given me
lessons in PSP and Incredimail.
Many things I learnt have been used by me in creating.
Any resemblance with other
tutorials is purely coincidental.
And special thanks my testers for their testing.
You are free to share my tutorials. If you want to use them
for lessons
or a groupshare please ask me and please
acknowledge it as my tutorial.
Hugs
Jetty