SPIKEY WAVE TUTORIAL
NEEDED:
- PSP
- Letter Creator
- Tube of your choice, light or medium colors
LEVEL:
Advanced Beginner
PREPARING
- Open tube in PSP (longer then width), not bigger then 350 in height.
- Or resize to height of maximum 350. You can chose for a smaller height
to have the wave more clear to view
- Duplicate (Shift-D) your tube
- Close original (don�t save). We will work on image that is left
- Edit � Copy
- Chose a clear/bright color for your foreground color in material box
- Chose a lighter matching color or white for your background color
BACKGROUND PATTERN
- Your tube copy is still activated. If not activate
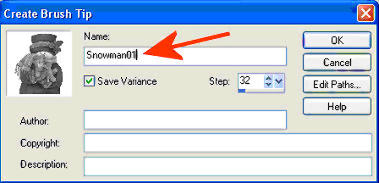
- File � export, chose �custom brush�, give name you can find back easily,
default settings
- File - New Image of 400 � 400, raster background, transparent
- Select brush you made: Paintbrush, next to presets chose your brush.
- Height or width of no more then 350 steps 32
- Put brush once in middle of image. If it is not clear enough click once more
At the exact same spot. Right click with the foreground color!
- Effects � Image Effects � Seamless tiling at default
- Layers � New raster layer
- Floodfill new layer with the lighter color in your background box or white
- Layers � arrange � send to bottom
- Layers � merge � Merge visible
- Put opacity of merged image between 25 � 50 to your liking. I used 32 and 50.
- Layers � Merge � Merge all (flatten)
- Image � Resize to 50 %. Resample using: Bicubic.
- Your background pattern is ready, minimize
BACKGROUND
- File � New (Image): 1280 x 400 transparent
- Change your foregroundbox in the materialbox to pattern
- Chose your earlier made background pattern
- Floodfill your background with pattern, angle = 0, scale = 100
SPIKEY WAVE
- Layers � New Raster layer
- Selection Tool: Selection
- In your selection toolbar chose Custom Selection
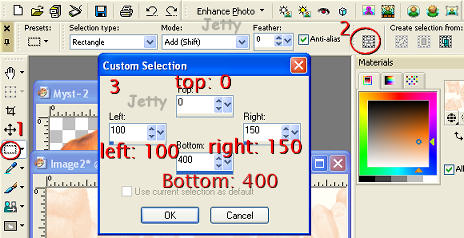
- Use the following settings for your Custom Selection: top: 0,
Left: 100, Right: 150 and Bottom: 400
- Floodfill your selection with your foreground color (put it back to
Color)
or chose your background color or another color.
What you prefer.
- Selections � Select none
- Effects � Distortion effects � Wave with the following settings
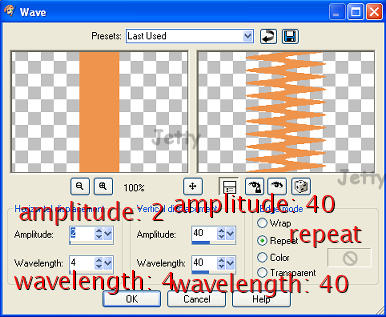
Settings: Horizontal amplitude: 2, Wavelength: 4, Vertical amplitude: 40,
Wavelength: 40, Edge mode: repeat
- Effects � 3d effects � Inner bevel: with these
Settings
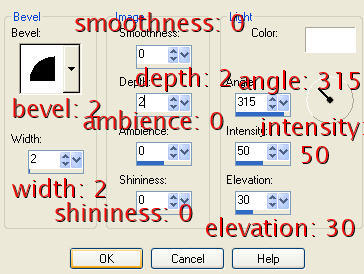
Settings: Bevel 2, Width: 2, Smoothness: 0, Depth: 2, Ambience: 0, Shininess: 0,
Angle: 315, Intensity: 50, Elevation: 30
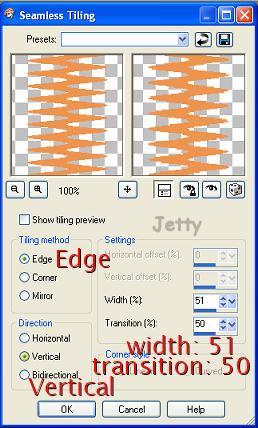
- Effects - Image effects - Seamless tiling: with the following
settings: Edge checked, Vertical Direction checked, width: 51 and transition: 50
- Effects � 3d effects � Dropshadow to your choice. This is
optional
- Edit � Paste � Paste as a new layer
- Move your tube to the left. Position in center of your wave.
- Effects � 3d effects � Dropshadow to your liking. I used
Horizontal & Vertical: 4, Opacity: 50, Blur: 15, black
- Layers � New raster layer
- Add your watermark
FINISHING
- File � Export: JPEG Optimizer with compression of 22-25
- In Letter Creator in your Body open your background
- Tile in your body
- Chose a matching text color and place margins
- In your Footer mention your credits
- Finish
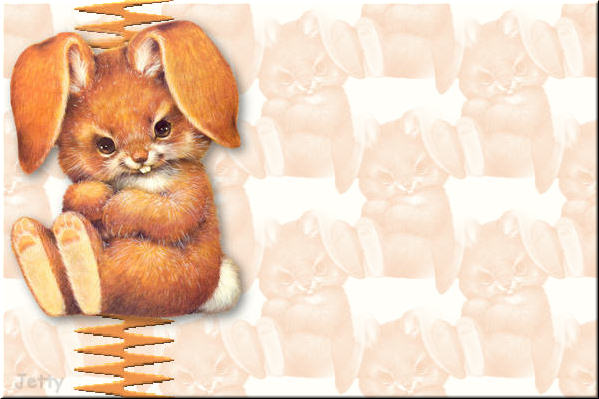
Another example:

I hope you enjoyed making this letter. I would love to see the results.
You can reach me at:
[email protected]
Please put a link to my group:
http://groups.yahoo.com/group/IMtutorialsbyJetty
Or to my website:
http://www.geocities.com/ladyluna37/index.htm
My tutorials can be found in my groupfiles.
http://groups.yahoo.com/group/IMtutorialsbyJetty
or at the earlier mentioned homepage.
With thanks to the brilliant women who have given me
lessons in PSP and Incredimail.
Many things I learnt have been used by me in creating.
Any resemblance with other
tutorials is purely coincidental.
And special thanks my testers for their testing.
You are free to share my tutorials. If you want to use them
for lessons
or a groupshare please ask me and please
acknowledge it as my tutorial.
Hugs
Jetty