 |
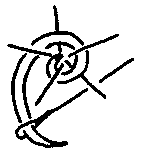
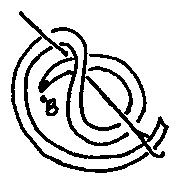
Although this stitch seems complicated at first, once you develop a rhythm, it becomes like an old friend. Bring the ribbon to the top of the fabric at 'A.' Let ribbon make a small circle on top of the fabric. Insert needle tip through center of circle and under ribbon. With your left hand, bring the ribbon over and around the needle; then take needle back onto the fabric at 'B' (very close to but NOT the same as 'A'), keeping hold of ribbon in your left hand. Holding onto the needle in your right hand, pull gently on the ribbon with your left hand to bring the loops on the needles as snugly as desired. Hold the ribbon in place with your left hand while you pull the ribbon back through the fabric. It's easier to do than explain! |
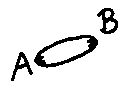 |
Bring the ribbon to the top of the fabric at 'A,' take the needle back down into the fabric at 'B.' Pull the ribbon gently through the fabric, using a laying tool to keep the ribbon flat if necessary; leave as loose or tight as desired. |
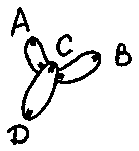 |
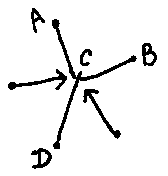
Bring the ribbon to the top of the fabric at 'A.' Take the ribbon back down into the fabric at 'B,' leave a small bit of ribbon loose on top of the fabric. Bring the ribbon back to the top of the fabric at 'C,' then back down at 'D.' Stitch C-D may be any length required. (With other threads, step B-C would be done with a 'sewing motion,' but this is too hard on the ribbon 52; make each step separately.) |
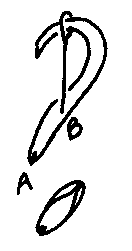 |
This stitch is best done on tightly-woven fabrics with wider ribbon. Begin by bringing the ribbon up at 'A.' Hold the ribbon flat against the fabric over 'B;' take the needle down through the ribbon and the fabric at 'B.' You must be careful not to pull too tightly on step B or you will loose the effect of this stitch, which is the curled edges. Note: 'A' is the base of the stitch, 'B' is the tip. |
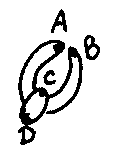 |
This stitch is accomplished in the same manner as the fly stitch: up at 'A,' down at 'B;' back up at 'C' and down at 'D.' The difference being that 'A' and 'B' are the same (or very nearly the same) place. Again, when using ribbon do not sew this stitch, make each step separately in order to maintain the integrity of the ribbon. When using stranded embroidery floss, the sewing method is better. |
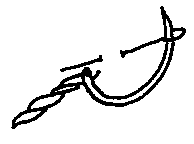 |
Here the stem stitch is worked with stranded embroidery floss, and should be done with a sewing motion. Follow the diagrammed stitch sequence. |
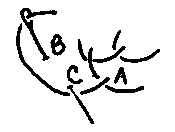 |
Bring thread up at 'A;' take stitch B-C in sewing motion. Work from top to bottom; widen/angle the stitches as desired. |
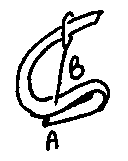 |
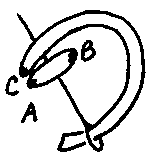
This stitch is similar to the ribbon stitch. Bring the ribbon to the top of the fabric at 'A.' Lay the ribbon back over itself to make a small loop. Mow take needle down through both layers of ribbon and the fabric. Pull gently or you will lose the stitch. The loop may or may not have a twist in the ribbon depending on your preference. A small stitch may be made on the back of the fabric to secure loop. |
 |
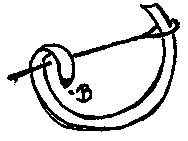
Make a straight stitch, A-B, pulling ribbon until it narrows. Bring ribbon back to top of fabric at 'C.' Keeping ribbon flat, wrap it around the straight stitch several times. |
 |
Bring ribbon to the top of the fabric where knot is desired. Wrap ribbon around needle once. Take needle down at 'B,' keeping hold of ribbon with one hand while gently bringing ribbon through fabric with the other hand. |
1994 © Cynthia S. Wetzel
Please remember, these instructions, diagrams and photographs are copyright protected from unauthorized reprint and distribution just like any chart pack or pattern book you would purchase in your local needlework store.