1 LEDs Make sure you use clear lens LEDs.
1 Resistor (either 330 ohm or 450 ohm)
Wire
Aluminium Foil
Bic Pen cap
Hot Glue Gun
Electrical Tape


| Improved LED Bars | ||||||||||||||||||||||||||
| I got this idea from viewing pages on DIY Angel-Eyes. I noticed how the plastic tube they were using glowed brighter and how they made small natches in the plastic to refract the light. | ||||||||||||||||||||||||||
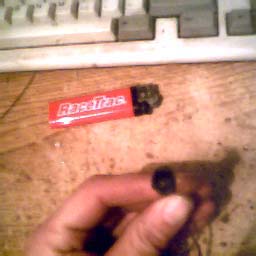
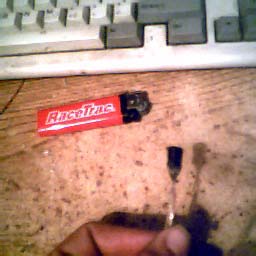
| Items Needed: | ||||||||||||||||||||||||||
| 1 Vibrance Replacement rod $2 @ home depot 1 LEDs Make sure you use clear lens LEDs. 1 Resistor (either 330 ohm or 450 ohm) Wire Aluminium Foil Bic Pen cap Hot Glue Gun Electrical Tape |
||||||||||||||||||||||||||
|
||||||||||||||||||||||||||
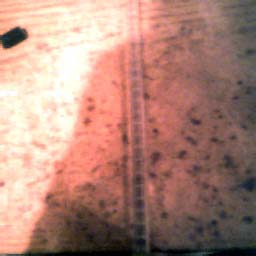
| Step 1: Cut the bar to the desired length | ||||||||||||||||||||||||||
|
||||||||||||||||||||||||||
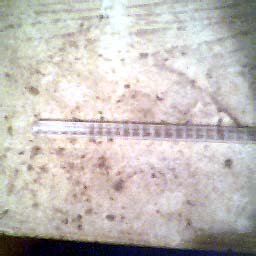
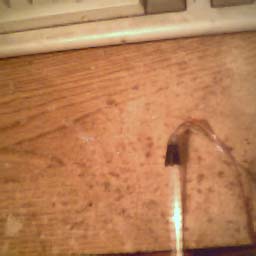
| Step 2: Cut 1 cm notches into the bar about 2 cm apart | ||||||||||||||||||||||||||
|
||||||||||||||||||||||||||
| Step 3: Clean out dust from the notches | ||||||||||||||||||||||||||
|
||||||||||||||||||||||||||
| Step 4: Wrap one end in foil and tape | ||||||||||||||||||||||||||
|
||||||||||||||||||||||||||
| Step 5: Wire up your clear lens LED and 330 ohm or 450 resistor | ||||||||||||||||||||||||||
|
||||||||||||||||||||||||||
| Step 6: Cut the cap down to fit the end of the bar | ||||||||||||||||||||||||||
|
||||||||||||||||||||||||||
| Step 6: Glue the LED in place and wrap the cap end with tape. | ||||||||||||||||||||||||||
|
||||||||||||||||||||||||||
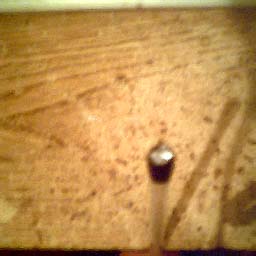
| Step 7: Stick the cap holding the LED to the end of the bar. You can either tape the cap on or use a hot glue gun to glue the cap on. | ||||||||||||||||||||||||||
|
||||||||||||||||||||||||||
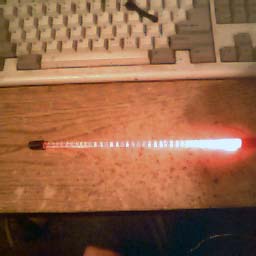
| Step 8: Test out your new and improved LED bar. Notice how much brighter it is than the original LED bar and how much easier it is to make. | ||||||||||||||||||||||||||