Windows XP Home
Edition Instructor Manual
Introduction
This module covers must-know topics for technical
support of Microsoft® Windows XP and is designed to familiarize participants
with new features, enhancements, and built in tools. This course is designed to help support specialists use tools and
resources to efficiently solve customer support questions. Note: If the
unit comes preinstalled with Windows XP and is less than 21 days old it is
supported by the Hardware Support team.
Objectives
At the completion
of this module you will be able to:
![]() Identify the hardware requirements for XP.
Identify the hardware requirements for XP.
![]() State the differences between Pro vs. Home.
State the differences between Pro vs. Home.
![]() Diagnose
problems with the computer configuration MSCONFIG
Diagnose
problems with the computer configuration MSCONFIG
![]() Windows
Registry
Windows
Registry
![]() System
Restore Points
System
Restore Points
![]() Understand
the function and information MSINFO32 provides
Understand
the function and information MSINFO32 provides
![]() Control
Panel
Control
Panel
![]() Windows
Update
Windows
Update
![]() View
messages such as errors, warnings, or successes generated by software and
operating system components using the Event Viewer
View
messages such as errors, warnings, or successes generated by software and
operating system components using the Event Viewer
![]() Locate
and use the Hardware software/hardware compatibility list
Locate
and use the Hardware software/hardware compatibility list
![]() Explain
Windows XP Startup Menu
Explain
Windows XP Startup Menu
![]() Explain what is Safe Mode?
Explain what is Safe Mode?
![]() Explain what is Last Known Good Configuration?
Explain what is Last Known Good Configuration?
![]() Identify new features of Windows XP Device
Manager
Identify new features of Windows XP Device
Manager
![]() Install,
update, and uninstall drivers using Device Manager
Install,
update, and uninstall drivers using Device Manager
![]() Identify the primary disk tools with in XP
Identify the primary disk tools with in XP
![]() Use Driver Rollbacks to reinstall previously
used drivers
Use Driver Rollbacks to reinstall previously
used drivers
![]() Use Network setup wizard
Use Network setup wizard
![]() Troubleshoot Firewall problems
Troubleshoot Firewall problems
![]() Configure
a LAN or high-speed connection
Configure
a LAN or high-speed connection
![]() Understand
the importance and utilize the following built in Troubleshooting tools
Understand
the importance and utilize the following built in Troubleshooting tools
![]() User
accounts
User
accounts
![]() USB
and IEEE1394
USB
and IEEE1394
![]() Launch
and use the Help and Support Center
Launch
and use the Help and Support Center
![]() Folder
settings and permission
Folder
settings and permission
![]() Identify and use the different categories
within Help and Support Center
Identify and use the different categories
within Help and Support Center
![]() Identify the two views of the Control Panel
Identify the two views of the Control Panel
![]() Use Control Panel and understand what function
the different Categories perform
Use Control Panel and understand what function
the different Categories perform
![]() Gather information on one system and use them
on a second computer using File Setting Transfer wizard
Gather information on one system and use them
on a second computer using File Setting Transfer wizard
Hardware Requirements
·
PC with 233 MHz CPU
minimum required (300 MHZ or higher recommended single or dual CPU for Windows
XP Professional) Intel Pentium/Celeron family, or AMD K6/Athlon/Duron family,
or compatible processor recommended
·
64 MB of RAM minimum
required, may limit performance and some features (128MB of RAM or higher
recommended)
·
1.5 gigabytes (GB) of
available hard disk space
·
Super VGA (800 × 600)
or higher-resolution video adapter and monitor
·
CD-ROM or DVD drive
·
Keyboard and Microsoft
Mouse or compatible pointing device
Home Vs Pro
There are two types of Windows XP
operating system:
n
XP Professional: used to replace Win2000 workstations in Workgroup or
Domain configurations.
n
XP Home: used to replace WinME in Home or Stand alone configurations.
Installation
The hardware requirements
for installing Windows XP Home Edition and Windows XP Professional are similar;
however Windows XP Home Edition supports only one CPU.
Users can upgrade to Windows XP Home Edition from Windows 98 or Windows Me — but not from Windows 95, Microsoft® Windows NT® Workstation or Windows 2000 Professional. You can upgrade to Windows XP Professional from any of those operating systems, except Windows 95.
Because Windows XP Professional is targeted to
businesses, it contains several features that are not included with Windows XP
Home Edition.
Note: Computers running Windows XP Home Edition cannot join
corporate domains. For this reason, features that require machine accounts
within a domain, such as Group Policy, are not available in Windows XP Home
Edition.
The following corporate
management features are not included with Windows XP Home Edition:
· Folder Redirection
· System (Poledit), Group and
Local Policy settings
· Roaming User Profiles
· Offline Files and Folders
· Software Installation and
Maintenance
· Remote Installation
Services (RIS)
· Encrypting File System
(EFS)
· Dynamic disks
· Allows only limited control
over Access Control Lists (ACLS) to allow simple file sharing. Simplified file
sharing in Windows XP allows for three states: Me Only, Local Users, and The
World.
· Administrative shares
(available only when joined to a domain)
· Log
on using dial-up connection option in Log On to Windows
dialog box
· Automated System Recovery
(ASR), which is designed for servers or advanced workstations that have complex
disk configurations, is not included with WinXP Home
· Remote Desktop Service
· Multilanguage user
interface
· Start menu option to show
administrative tools
· Internet Information
Services (IIS)
Important Facts: Security features such as
Personal Firewalls are enabled by default in Windows XP Home Editions (but not XP
Pro).
Backup is included with Windows
XP Home Edition but not installed by default. Users who want to use this
feature must install it from the installation CD.
Windows XP does not support
Personal Web Server (PWS). IIS is included with Windows XP Professional to
allow users to manage simple Web servers.
Tools
System
Configuration Utility (MSCONFIG)
The System
Configuration utility automates the routine troubleshooting steps that Dell
Product Support Professionals use when they diagnose system configuration
issues. When you use this tool to modify the system configuration, you can
select check boxes to eliminate issues that do not pertain to your
configuration. This process reduces the risk of typing errors that can occur if
you use a text editor such as Notepad. You must be logged on as an
administrator or as a member of the Administrators group to use the System
Configuration utility.
Simply put, this utility allows you to create a clean environment in which to
work from.

Fig 1 System Configuration Utility
To start the System
Configuration utility (MSCONFIG), click Start,
click Run, type msconfig in the Open box, and then click OK.
Fig. 2 How to launch System
Configuration utility
When you use Msconfig.exe,
you can easily reset or change the configuration settings in Windows to include
preferences for the following files and settings:
System.ini
file -Initialization file used with Microsoft
Windows to initialize system settings for
the computer such as the fonts, keyboard, language and various other settings.
The system.ini file is located in the c:\windows directory and its backup is
generally system
Win.ini
file - The Microsoft Windows initialization file
located in windows directory. The win.ini file is used to load
various settings each time Windows boots, for example the communications
drivers, wallpaper, screen saver, languages, fonts, etc... are loaded each time
the win.ini is initialized. If this file becomes corrupt or bad Windows will
either not load, or have several errors as it loads.
Boot.ini file
- Windows (specifically Ntldr) uses the Booot.ini file to determine the
operating system options to display during the startup (boot) process. Boot.ini
is flagged as a read-only system file by default and should not require any
manual modification.
Services
- Services are generally considered important components of
operating system code that provide functionality for various hardware,
applications, tasks, and so on. Of course, you shouldn't attempt to disable
core operating system kernel processes and related services that manage process
scheduling, interrupt handing, file management, virtual memory management, etc.
But in our context, there are many less critical services, invoked by default,
layered atop or working alongside the core operating system services that may
be disabled or modified to improve system responsiveness or performance,
without serious side effects.
Startup –
This tab allows you to select which programs load or don’t.
There are many different methods in which to prevent any of these items from
loading when you restart the computer.
Fig. 3 Diagnostic startup
NOTE: This method temporarily disables Microsoft services
(for example, Networking, Plug and Play, Event Logging, and Error Reporting)
and permanently deletes all restore points for the System Restore utility. Do
not do this if you want to retain your restore points for System Restore or
need to use a Microsoft service to test a problem. Instead it is suggested to
click the General tab, and then click Selective Startup. You can select
the options that you do not want to load when you restart the computer. These
options include:
Process SYSTEM.INI
File
Process WIN.INI File
Load System Services
Load Startup Items
Fig. 4 Selective
Startup
The following settings apply to these options:
§
If the check box is
selected, the configuration file is processed when you restart the computer.
§
If the check box is
cleared, the configuration file is not processed when you restart the computer.
§
If the check box is
selected but is unavailable, some items are still loading from that
configuration file when you restart the computer.
§
If the check box is not
selected, but is unavailable, the configuration file is not present on the
computer.
§
You cannot clear the Use Original BOOT.INI check box.
To prevent individual items
or lines form a specific configuration file from loading when you restart your
computer, click the tab for that particular configuration file, and then click
to clear the check box for the individual line or item that you do not want to
load. Check boxes that are unavailable on the SYSTEM.INI and WIN.INI
tabs indicate that the lines are temporarily removed by the System
Configuration utility.
Fig. 5 Line items
·
To change the currently
active line or item, click a different line or item, or click Move Up or Move
Down to move between items.
·
To create a new entry
in any of the configuration files, click New.
·
To edit a line that is
currently selected, click Edit.
Note: When
you click to clear a check box for an item or a line, the Selective Startup option (on the General tab) is automatically selected. Please see Fig.6 showing how the
General Tab will display when a line item has been de selected in the
system.ini, this applies to any tab and line item.
Fig. 6
After you make the
selections that you want, click OK,
and then restart the computer when you are prompted to initiate the changes.
Before you begin a
troubleshooting session, you can use the System Configuration utility to
initiate a System Restore operation. To do this, click the General tab, and then click Launch System Restore. You can then
create a restore point that you can use to restore your computer to a previous
state.
NOTE:
Restore points will be discussed later in this manual.
Fig. 7 System Restore
To verify that all of the
configuration files and all of the items that are listed in those files are
loaded when you restart your computer, click the General tab, and then click Normal
startup.
TO HIDE OR
NOT TO HIDE?
At times
application and device drives will load a system service that may cause system
instability, when troubleshooting startup and window environment issues it may
be a good idea to determine 3rd party installed services and
deactivate them. To accomplish this click the services tab and place a check
mark in the box labeled hide all Microsoft services, this allows you to
determine add in services that may be causing system faults.
Note: If your customer is having difficulties
installing hardware such as USB or IEEE1394, the students should consider the
possibility that a 3rd party service is causing the problem
Fig. 8 All services showing
Fig. 9 All Microsoft services hidden
Expand File
To extract individual
Windows files directly from the cabinet files, click the General tab, and then click Expand File. If a system file is
required for many different reasons, utilize the expand File tool to extract
the appropriate file(s).
Fig. 10 Expand File
Registry
Open the Registry Editor [Fig. 11]
using Start > Run and typing regedit in the Open: line and you'll see it's
divided into two panes. Understanding Registry Editor is much easier if you
think of the left pane as the Keys Pane and the right side as the Values Pane.
In the left pane there are five (5) main divisions or root keys as shown below.
Registry Editor uses a hierarchical structure similar to Windows Explorer but
with one major difference. In Windows Explorer you have folders in both the
left and right hand panes, but in Registry Editor there are never any folder
icons in the right hand section. In Registry Editor the yellow folder icon really
denotes a separate and distinct key. Since the right hand pane is reserved for
values only there are no folders displayed in that pane.
Each of the five main keys can be expanded to reveal additional keys or what
some refer to as sub-keys. Many sub-keys have sub-keys below them, in some
cases the amount of sub-keys becoming almost unbelievably long, but in the same
manner that Windows Explorer works, registry locations are defined by a path.
Just remember that any reference to a registry location begins with one of the
five root keys.
Fig. 11 Registry editor
Notice at the bottom of Registry Editor that
My Computer\HKEY_CLASSES_ROOT is displayed. This display will change as you
navigate down through the registry structure; very handy for keeping track of
where you are rather than having to scroll upward if the mind momentarily goes
blank while you are editing.
Each
heading and what do they do?
HKEY_CLASSES_ROOT - This section of the registry is in charge of three important tasks:
§
Keeping track of the
file extensions and their associations with file types. A group of file
extension sub keys is devoted to this purpose.
§
Keeping track of the
programs associated with the file types that are registered in the system. A
group of class-definition sub keys is devoted to this information.
§
Keeping track of
information about OLE objects and documents. Within the sub key \CLSID are the
class identifier subkeys that are devoted to tracking this information.
The fact is that you very
probably don’t even need this key–it’s a duplicate of
HKEY_LOCAL_MACHINE\Software\Classes. It’s actually even more than a
duplicate–it’s a hot link, and if you make changes to a key in one, the same
change is made to the other instantaneously.
HKEY_CURRENT_USER - contains the same information as that listed by
the security identifier in HKEY_USERS. Any change made to HKEY_CURRENT_USER is
immediately made to HKEY_USERS also. The opposite is also true.
HKEY_CURRENT_USER allows programmers and developers easy access to the
currently logged-on user's settings. By establishing this key Microsoft made it
very easy to make changes, additions, and settings without concern for the
user's SID.
HKEY_LOCAL_MACHINE - is the keeper of the configuration data for a
computer. Both hardware and software are tracked in this key, along with other
varied information about both entities. For example, not only does this key
include specific information about the configuration of your hardware and
peripherals, but it also stores all the available choices for making changes
(the keyboard language options fill up several pages if you print them out).
These are the choices you see as you configure your machine through the Control
Panel. This key is enormous. This is where to find
everything you ever wanted to know about a computer – perhaps more than you
ever wanted to know.
HKEY_USERS
– See HKEY_LOCAL_USER
HKEY_CURRENT_CONFIG - It is a
shortcut to HKEY_LOCAL_MACHINE\SYSTEM\CurrentControlSet\Hardware
Profiles\Current and will change depending on the hardware file. Stores
information about the hardware profile specified at startup. The mapping of
HKEY_LOCAL_MACHINE for the current configuration is in HKEY_CURRENT_CONFIG.
If the system has only one
configuration, the original configuration, the data will always be the same
here. Creating an extra configuration in Control Panel/System/Hardware Profiles
puts extra information in HKEY_LOCAL_MACHINE.
The hardware profile that is
selected on boot up is mapped into HKEY_CURRENT_CONFIG.
Types
of Registry Backups
It is critical that before you do any editing you
make a backup of the current registry. The temptation to make 'one little
change' without backing up is great. It can also be deadly. That said, there
are different ways of backing up so let's look at each one individually.
Backing up is simply exporting information from the registry into a file that
is saved on your system. When you invoke the export function you are given a
choice of different file types that can be saved.
Fig. 12
Each one of the different file types above
plays an important role in how the data you export is saved. Choosing the wrong
type can give you unexpected results. Understanding each type and when to use
it is essential.
·
Registration Files: The Registration Files option creates a .reg file. This is probably the
most well-known file format used for backing up the registry. The Registration
File can be used in two ways. As a text file it can be read and edited using
Notepad outside of Registry Editor. Once the changes have been made and saved,
right clicking the file and using the [Merge] command adds the changed file
back into the registry. If you make additions to the registry using regedit and
then merge the previously saved Registration File, anything that you've added via
regedit will not be removed, but changes you make to data using regedit that previously
existed in the saved Registration File will be overwritten when it is merged.
·
Registry Hive Files: Unlike the Registration Files option above, the
Registry Hive Files option creates a binary image of the selected registry key.
The image file is not editable via Notepad nor can you view its contents using
a text editor. However, what the Registry Hive Files format does is create
an image perfect view of the selected key and allow you to import it back into
the registry to ensure any problematic changes you made are eliminated.
·
Text Files:
This option does just as the name suggests. It creates a text file containing
the information in the selected key. It's most useful purpose is creating a
record or snapshot of a key at a particular point in time that you can refer
back to if necessary. It cannot be merged back into the registry like a
Registration File.
·
Win9x/NT4 Registration Files: This option creates a .reg file in the same manner
used by the Registration Files option. It's used by previous Windows versions
and serves no purpose in XP unless you want to merge a key from XP into a
previous version of Windows.
Considering the four choices above, the most
effective and safest method of backing up the registry is to use the Registry
Hive Files option. No matter what goes wrong in your editing, importing the
image of the key will eliminate all changes, additions, or other things that
might have occurred.
If you want to edit outside the confines of regedit, or if you are sure you
want your additions to the registry to remain even if you have to merge, use
Registration Files for your backup.
If you just want a copy of the key that can be referenced using a text editor,
but want to eliminate any chance of the file being accidentally merged back
into the registry, use Text Files.
The
Actual Backup Process
The actual process of backing up the registry is
quite simple once you've decided the file type for the backup and whether you
want to back up an individual key or the entire registry. In the left hand pane
of regedit, select the key to be backed up, right click and select [Export] to
open the Export Registry File Property Sheet. From there, it's merely a matter
of assigning the backup a descriptive filename and selecting the type
of backup file you want based on the discussion above. To be on the safe
side, it certainly wouldn't hurt to make a backup in both Registry Hive Files
and Registration Files formats.
There are two notes you should be aware of regarding what can be backed up
using specific file types.
·
If My Computer is
selected in the left pane of regedit, you will not be allowed to make a backup
using the Registry Hive Files format. This is equivalent to backing up the
entire registry. XP requires you to use the System State backup in this instance.
(Backing up the System State is discussed further down in this article)
·
If My Computer is
selected in the left pane of regedit, you may select Registration Files as the
backup file format but this is not the recommended method for a complete
registry backup.
 Fig. 13
Backing up
Individual Values
Take a quick look at Fig. 13
and you'll note it displays the HKEY_CURRENT_USER\Control Panel\Desktop key. In
the Values Pane you'll see the WaitToKillAppTimeout value that is currently set
to 5000. It will be the subject of backing up individual values.
It's important to remember that the registry is really just a big compilation
of data and settings that sits there waiting to be accessed by XP itself or by
an installed application. By itself it does nothing. At first glance that may
not seem to be of much importance, but it can be useful when you consider that
the truly useful information in the registry is stored in the values. Look at
the majority of registry edits and you'll see they involve changing values, not
adding or removing keys. Combine that knowledge with the fact that XP or an
application has to be programmed to access the values or else they are useless
and that provides a quick, easy way to back up individual values.
Fig. 14 illustrates how the previous information is applied to backing up values of
keys that might be modified. It's important to note that this section applies
to values,
not keys. For this example I have decided to modify the value of the string
WaitToKillAppTimeout. The WaitToKillAppTimeout string value highlighted in red
is the original string value with a value of 5000 that I'm going to modify.
Once I modify the value I might forget what the original value was (5000)
before I decide if the change I make is appropriate. To guard against the
original value being forgotten, I've created the string value
TEG_WaitToKillAppTimeout that's shown highlighted in green. For this tutorial
I've used TEG_ before the real value name but you can use anything convenient.
If your dog was named Fido, you might use Fido_ before the real value name.
Fig. 14
Now, looking at the screen capture below, I
can go back to the original string value (the one highlighted in red) and make
the change to the new (4000) value. At this point the question is often asked
why having the two values listed in the registry doesn't cause a conflict.
Remember what was said previously; XP or an application has to be programmed to
access the values or else they are useless. There is no application or part of
XP that is programmed to look for a string value named TEG_WaitToKillAppTimeout
so it can happily co-exist with WaitToKillAppTimeout, providing a journal or
record of what changes have been made to the registry. For a more detailed
record you can add a date to the prefix which might look like
TEG08252003_WaitToKillAppTimeout that is shown highlighted in blue.
Fig. 15
If the change doesn't work out all you have
to do is reference the backed up entry (the one highlighted in green or blue)
for the original value and change the value that was modified (the one in red)
back to the original value. An easier way to revert back to the original value
is to delete the modified string (the one in red) and then right click the
backup strings (green or blue) and select Rename. Eliminate the prefix that was
added to return the string to its original configuration.
If you do a lot of registry tweaking and modification of existing values this
is an excellent method because it provides a visual record of any modifications
that have been made to the registry values. Two months from now if I want to
know if I made a modification to the WaitToKillAppTimeout value, all I have to
do is open Registry Editor, navigate to the HKEY_CURRENT_USER\Control Panel\Desktop
key and compare the WaitToKillAppTimeout with the backup entries. By using the
dated prefix I can not only tell what change was made but what date it was
modified. After the value modification has been tested you can go back and
remove the new prefixed values that were created if it bothers you having them
remain in the registry. I always leave them as a permanent record and have
never noticed any problems or system performance penalty.
Backing
up Individual Keys
Prefix Method
One of the first questions that
always comes up after reading the previous section is what happens if the
prefix method is used to back up keys rather than just individual values. It's
a good question and let’s go through another example to try and explain one
possible scenario.
In the previous section we were working in the HKEY_CURRENT_USER\Control
Panel\Desktop key so lets apply a prefix to the Desktop key and see what
happens.
·
Open Fig. 16 to see
HKEY_CURRENT_USER\Control Panel\Desktop before any changes are made. Note that
HKEY_CURRENT_USER\Control Panel\Desktop also has a sub-key WindowMetrics.
·
Open Fig. 17 to see the
change made to HKEY_CURRENT_USER\Control Panel\Desktop. Nothing has been
altered other than adding the TEG_ prefix to the Desktop key. No changes were
made to the sub-key WindowMetrics.
What do you think happened when the change
was made and the user logged off and back on?
·
Open Fig. 18 and you'll
see that XP automatically recreated the HKEY_CURRENT_USER\Control Panel\Desktop
key that is shown with the green highlight. However, it's a far cry from what
the original HKEY_CURRENT_USER\Control Panel\Desktop key looked like before it
was modified to TEG_HKEY_CURRENT_USER\Control Panel\Desktop. There is only one
entry in the Values Pane and that is Default, plus there is no sub-key for
WindowMetrics. You can also see that the default Bliss background is also
missing from the desktop.


Fig.
16
Fig.
17
Fig. 18
So, what does this tell us about adding a
prefix as a method of backing up keys? First and foremost it shows that while
it yields some interesting results it's not a suitable method for backing up
registry keys. The results are unpredictable at best and when you're dealing
with the registry you want a method that's rock solid. That's not to say though
that the procedure is totally without merit when it comes to keys. As a
troubleshooting tool it can be handy to rename a key with a prefix and then see
if XP or even an application will recreate the basic key. In effect the
prefix hides the registry key from XP so you can see what effect deleting the
key would have while still giving you a method of restoring the key that was
hidden by the prefix.
The bottom line is; play around with this method but make sure you have another
proven backup in place first.
.REG File Method
Unlike the previous methods
discussed, using .reg files to back up individual keys and entire branches of
the registry is a well established, proven method that is used daily by
millions of registry tweakers. Refer back to Fig. 13 and the
HKEY_CURRENT_USER\Control Panel\Desktop key that is highlighted in the Key
Pane.
The actual backup procedure is simple. In the Keys Pane, right click on the
individual key (in this case Desktop) you want to back up, click [Export],
assign the backup a descriptive filename and select the type of backup
file being created. In Fig. 19 I used the file name Desktop and because we are
discussing .reg backups I selected Registration Files [*.reg] as the file type.
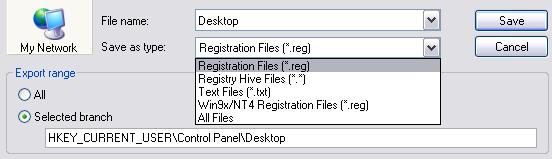
Fig. 19
Notice the radio button by [Selected Branch]
that details what key is actually being saved. A quick check of this
information can help prevent ending up with a backup of the wrong key that
might not be discovered until it's too late. Once [Save] is clicked the key
will be saved to a file named Desktop.reg in the location you specify. Some
additional points;
·
When the key entry
point for the backup is determined, in this case HKEY_CURRENT_USER\Control
Panel\Desktop, all the sub-keys beneath that point will also be backed up. In
this example, that means that in addition to HKEY_CURRENT_USER\Control Panel\Desktop
you will also be backing up HKEY_CURRENT_USER\Control
Panel\Desktop\WindowMetrics.
·
Often times users
accidentally move higher up in the registry hierarchy when backing up than is
necessary. In this example, if I'd set the key entry point for HKEY_CURRENT_USER\Control
Panel, the intended key HKEY_CURRENT_USER\Control Panel\Desktop would be backed
up, but in addition many other unnecessary keys would also be a part of the
backup. Keep specific key backups as compact as possible by not traveling up
the key hierarchy further than is necessary. To illustrate how the .reg file
can quickly increase in size if an incorrect entry point is selected take a
look at the table below. It's quickly apparent that the last choice highlighted
in red is the way to go. Not only will it require less disk space to save, it
can be merged quickly and is easier to edit, if necessary, with less chance of
error.
|
If the key entry
point is: |
The size of the
saved .reg file will be: |
|
My Computer |
51.6 MB |
|
HKEY_CURRENT_USER |
6.72 MB |
|
HKEY_CURRENT_USER\Control
Panel |
442 KB |
|
HKEY_CURRENT_USER\Control
Panel\Desktop |
7.26 KB |
Restoring a .REG
File Backup
There are four ways of
restoring a .reg file backup.
·
Method One - From the Registry Editor menu bar select File >
Import... and then navigate to where the .reg file is saved. Select the file
and click Open. The contents of the .reg file will be merged into the current
registry followed by a confirmation dialog stating the information in the file
has been successfully entered into the registry. This is a low risk method
because it forces you to consciously select the .reg file you want to import.
Hopefully your mind is focused on the task at hand and the proper .reg file is
selected.
·
Method Two - By default, Windows XP is configured so that when a
.reg file is double-clicked it's automatically merged into the registry. To my
way of thinking this is a rather high risk method, especially if you happen to
double-click the wrong .reg file. Fortunately, this method does present a
dialog box that states the name of the .reg file and asks if you're sure you
want to add the contents of the file to the registry, then waits for your Yes
or No confirmation. A Yes response will generate a confirmation dialog stating
the information in the file has been successfully entered into the registry.
Clicking No will end the process with no information being entered in the
registry.
·
Method Three - Navigate to where the .reg file is saved and right
click the file to open the context menu. Select Merge and a dialog box appears
that states the name of the .reg file and asks if you're sure you want to add
the contents of the file to the registry, then waits for your Yes or No
confirmation. A Yes response will generate a confirmation dialog stating the
information in the file has been successfully entered into the registry.
Clicking No will end the process with no information being entered in the
registry.
·
Method Four - Navigate to where the .reg file is saved and right
click the file to open the context menu. Select Open With > Registry Editor
and a dialog box appears that states the name of the .reg file and asks if
you're sure you want to add the contents of the file to the registry, then
waits for your Yes or No confirmation. A Yes response will generate a confirmation
dialog stating the information in the file has been successfully entered into
the registry. Clicking No will end the process with no information being
entered in the registry.
The Downside of the
.REG File Backup Method
It's pretty much a consensus
among experienced registry editing users that allowing a double click on a .reg
file to initiate the merging process can be dangerous in spite of the warning
dialog box. Many have changed the default double-click action to open the .reg
file in Notepad rather than start the merge process.
The basic weakness in a .reg file backup boils down to a two word war; Merge versus Replace. Assume for a moment
you've made a .reg backup and safely tucked it away. You go ahead and edit the
registry using Registry Editor, but unfortunately your changes don't work as
planned. You turn to the .reg backup file and expect that running it will
restore the registry to the way it was prior to your edits. Will it really do
so or are your expectations about to be dashed? The answer is; maybe, depending
on what edits you made. This is where Merge
versus Replace comes into play. Let’s look at some If/Then
statements.
·
[If] a value exists in
the .reg file and also exists in the modified registry [Then] the value will be
changed in the registry.
·
[If] a value exists in
the .reg file but not in the modified registry [Then] the value will be added
to the registry.
·
[If] a value does not
exist in the .reg file but does exist in the modified registry [Then] the value
will not be removed or changed in the registry.
·
[If] a value does not
exist in the .reg file and does not exist in the modified registry [Then] there
is no action to be taken in the registry.
The third item above, highlighted in red, is
where the trouble or weakness with .reg backup files occurs. As long as the
modifications made to the registry don't stray outside the bounds of what was
included in the .reg backup things are fine. But if you've added a new key or
value during the editing process there can be trouble. Importing the .reg
backup file does not replace or remove additions to the registry that are not
referenced in the .reg backup file.
Backing
Up the System State
Backing up the System State includes the registry, the COM+ Class
Registration Database, and boot files. Windows XP comes with Backup Utility
accessible via [Start] [All Programs] [Accessories] [System Tools] [Backup]. In
the Advanced Backup Wizard there is a setting to back up the System State
either to one of the hard drives or a different media of your choosing. If the
registry does become corrupt, the System State backup is used to restore the
system.
System
Restore
The last method of backing up the registry is using
System Restore, another utility that is included with Windows XP. System
Restore is best likened to a camera taking a complete snapshot of your computer
system at one point in time and storing that image in what is called a restore
point. This restore point can then be recalled at some point in the future,
effectively overwriting any changes that have been made to the computer since
the restore point was created. A more complete description of System Restore is
available below.
Which Backup Method is best?
Truthfully, I think it's a matter of personal
preference. All of the methods are good and offer some level of protection
against disaster. None of the methods require an undue amount of time to
complete and are well worth the security and peace of mind they supply. Bearing
that in mind, I'd recommend using as many methods as time and practicality
allow before editing the registry.
If I was limited to only one choice of backup before editing the registry I'd
probably choose the Hive File method, but System Restore would also be a
contender. The changes that occur when you edit the registry can be far
reaching, well beyond just the particular key that is edited, and may not show
up immediately. For that reason alone, System Restore affords protection to the
entire system rather than just a single key, and if I do notice a side issue
hours or days later after an editing session I can restore to a well tuned
system.
Now that you've formulated your own best plan and methods for backing up the
registry just in case things don't go as you'd planned, it's time to move
onward to
System
Restore
Windows XP Professional makes it easier
to resolve problems if they occur in your system. You can use System Restore to
remove any system changes that were made since the last time you remember your
computer working correctly. System Restore does not affect your personal data
files (such as Microsoft Word documents, browsing history, drawings, favorites,
or e–mail) so you won’t lose changes made to these files. Windows XP creates
“restore points” every day, as well as at the time of significant system events
(such as when an application or driver is installed). You can also create and
name your own restore points at any time. Creating a restore point can be
useful any time you anticipate making changes to your computer that are risky
or might make your computer unstable. If something goes wrong, you select a
restore point and Windows XP undoes any system changes made since that time.
When you run System Restore, a calendar is displayed to help you find restore
points. If you don't use your computer every day, some days might not have any
restore points. If you use your computer frequently, you might have restore
points almost every day, and some days might have several restore points.
To create a Restore Point
1.
Access the System
Restore Wizard through Help and Support Center. (Click Start, and then click Help
and Support. Click Performance
and Maintenance, click Using
System Restore to undo changes, and then click Run the System Restore Wizard. Or by running the System
Information Utility (MSCONFIG) Launch System Restore
2.
Click Create a restore point, and then click
Next.
3.
In the Restore point description box, type a
name to identify this restore point. System Restore automatically adds to this
name the date and time that this Restore Point is created.
4.
To finish creating this
restore point, click Create.
5.
To cancel restore point
creation and return to the Welcome to
System Restore screen, click Back.
6.
To cancel restore point
creation and exit the System Restore Wizard, click Cancel.
Fig. 23 Create a Restore Point
To view or to return to this restore point,
from the Welcome to System Restore screen
of the System Restore Wizard select Restore
my computer to an earlier time. Then select the date when the restore
point was created from the calendar in the Select a Restore Point screen. All of the restore points that were
created on the selected date are listed by name in the list box to the right of
the calendar.
To set advanced restore options
1.
Open Backup. (Click Start, point to All Programs, point to Accessories, point to System Tools, and then click Backup.)
The Backup Utility Wizard starts by default, unless it is disabled.
2.
Click the Advanced Mode button in the Backup
Utility Wizard.
3.
Click the Restore and Manage Media menu and
select the files to restore.
4.
Click the Start Restore button.
5.
On the Confirm Restore dialog box, click Advanced.
6.
Set the advanced
restore options you want, and then click OK. See the Notes section for a description of each option.
To turn off Windows XP
System Restore
1.
Click Start >
Programs > Accessories > Windows Explorer
2.
Right-click My
Computer, and then click Properties.
3.
Click the System Restore
tab.
4.
Check the "Turn
off System Restore" or "Turn off System Restore on all drives"
check box as shown in this illustration
Fig. 26 Windows XP Restore Feature
5.
Click Apply. The
following message appears
Fig. 27 Windows XP Restore Confirmation Box
6.
As noted in the
message, this will delete all existing restore points. Click Yes to do this.
7.
Click OK.
8.
Proceed with what you
need to do. For example, removing viruses. Restart the computer and follow the
instructions in the next section to turn on System Restore.
To turn on Windows XP System Restore
- Click Start.
- Right-click My Computer and then click Properties.
- Click the System Restore tab.
- Uncheck the "Turn off System Restore" or "Turn off
System Restore on all drives" check box.
- Click Apply, and then click OK.
IF Windows does not start
Start the System Restore tool from Command
Prompt
1. Restart your computer, and then press F8 during the
initial startup to start your computer in Safe Mode with a command prompt.
2. Log on to your computer with an administrator account
or with an account that has administrator credentials.
3.
Type the following
command at a command prompt, and then press ENTER: %systemroot%\system32\restore\rstrui.exe
4. Follow the instructions that appear on the screen to
restore your computer to an earlier state.
Use for Troubleshooting
Purposes
You may inadvertently
restore Windows XP to a previous configuration that you do not want. To undo
the restoration:
1. Log on to Windows as Administrator.
2. Click Start,
point to All Programs,
point to Accessories,
point to System Tools,
and then click System Restore.
System Restore starts.
3. On the Welcome
to System Restore page, click Undo my last restoration, and then click Next. A System Restore message may
appear that lists configuration changes that System Restore will make. Click OK.
4. On the Confirm
Restoration Undo page, click Next. System Restore restores the original Windows XP
configuration, and then restarts the computer.
5. Log on to the computer as Administrator. The System
Restore Undo Complete
page appears.
6. Click OK.
System
Information (MSINFO32)
System Information collects system
information, such as devices that are installed in your computer, or device
drivers that are loaded in your computer, and provides a menu for displaying
the associated system topics. You can use System Information to diagnose
computer issues. For example, if you are having display issues, you can use
System Information to determine what display adapter is installed on your
computer, and to view the status of its drivers.
System Information maintains a history of device drivers that are installed on
your computer. If you are unsure of a computer's recent history, you can use
System Information to better understand what has happened in the past. If a
device does not work correctly, and its history indicates a recent upgrade to a
new driver, replace that driver with the original driver, and test to see if
doing so resolves the issue.
System Information also provides access to tools you can use for
troubleshooting your computer.
If you install an update from the Windows Update Web site, and it fails to meet
your expectations, restore the original files by running the Update Wizard
Uninstall from the Tools
menu in the System Information tool. If your computer worked fine yesterday,
but is not working properly today, try restoring yesterday's configuration
files by running the System Restore utility from the Tools menu in the System Information
tool.
For more information about tools that are included with System Information in
Windows XP, see the "Tools Menu" section later in this article.
 Fig. 28 System Information
To start Microsoft System Information, use either of
the following methods:
·
Click Start, point to Programs,
point to Accessories,
point to System Tools,
and then click System Information.
·
Click Start, click Run, type msinfo32.exe in the Open
box, and then click OK.
The information that is
displayed in System Information is divided into the following five categories:
·
Hardware Resources
·
Components
·
Software Environment
·
Applications
·
Internet Explorer
The following sections describe the categories, and sub-categories that are
displayed in System Information, and explain how you can use this information
when you troubleshoot issues with your computer.
System Summary
The System Summary category
provides a general profile of your computer. This information includes:
·
The version of Windows
·
OEM System Information
(manufacturer, model, and type)
·
The type of central
processing unit (CPU)
·
The amount of memory
and system resources
·
BIOS version
·
Locale
·
Time zone
·
User name in the format
DOMAINNAME\USERNAME (only present if the computer
is configured to log into a domain)
·
Boot device (if
multiple devices are present on the computer)
·
The path to the Page
file
Use this information at the
beginning of the troubleshooting process to develop a basic picture of the
environment in which the issue occurs.
Hardware Resources
The Hardware Resources category displays hardware-specific settings, such as
assigned, or used interrupt requests (IRQs), input/output (I/O) addresses, and
memory addresses. The following list provides the sub-categories that are
included in the Hardware Resources category.
Conflicts/Sharing
Lists the identified resource conflicts between Industry Standard Architecture
(ISA) devices, and identifies resources that are shared by Peripheral Component
Interconnect (PCI) devices. Use this information to help identify hardware
conflicts.
DMA
Reports the direct memory access (DMA) channels that are in use, the devices
that are using them, and those that are available for use.
Forced Hardware
Lists hardware devices in which the Plug and Play (PNP) configuration has been
disabled ,and resource settings have been manually set to user-specified
resources. Forced hardware would also apply to devices that do not participate
in the PNP process such as legacy ISA devices. This information is useful when
you want to troubleshoot Plug and Play resource conflicts.
I/O
Lists all I/O port ranges that are in use, and the devices that are using each
range.
IRQs
Summarizes IRQ usage, identifies the devices that are using the IRQs, and lists
the available IRQs.
Memory
Lists memory address ranges that are
in use by devices.
Components
The Components category displays
information about your Windows XP system configuration. This includes the
status of your device drivers, network components, and multimedia software.
There is also a comprehensive driver history, and a summary of devices that may
not be working correctly. The following list provides the sub-categories that
are included in the Components category.
Multimedia
Lists sound card, and game controller information.
Multimedia – Audio
Lists the audio codecs that are loaded.
Multimedia – Video
Lists the video codecs that are loaded.
Multimedia - CD-ROM
Lists the drive letter and model of your CD-ROM drive. If a data CD-ROM is in
the drive, System Information also performs a data transfer test.
Multimedia - Sound Device
Lists the name and manufacturer of your sound device(s). This also lists the
status, I/O port, IRQ, DMA channel, and the drivers that are used for your
sound device(s).
Display
Lists video card, and monitor information.
Infrared
Lists Infrared device information.
Input
Lists keyboard, and mouse information.
Miscellaneous
Lists information about any miscellaneous components.
Modems
Lists modem information.
Network
Lists network adapter, client, and protocol information. Network protocol
information is now presented in much greater detail than in Microsoft Windows
98. The new presentation of network protocols includes much more granular configuration
information on the protocol, related to how it operates on the network.
Network – Winsock
Lists Winsock version, description, and status information.
Ports
Lists serial, and parallel port information.
Storage
Lists information about hard disks, floppy drives, removable media, and
controllers. Each drive is presented with information including drive letter,
total size, free space, file system, compression status, drive type, and volume
letter.
Printing
Lists installed printers, and printer drivers.
Problem Devices
Lists devices with problems. Lists each device that is flagged in Device
Manager, and displays the corresponding status information.
USB
Lists Universal Serial Bus (USB) controllers, and drivers that are installed.
Software Environment
The Software Environment category
displays the software loaded in your computer's memory.
Drivers
Lists the drivers currently loaded into memory.
Environment Variables
Lists the Windows XP global environment variables. The Global Environment
Variables formerly in the Autoexec.bat, and Config.sys files are migrated to
the registry, and are shown here.
Print Jobs
Shows the printing jobs currently in the print queue.
Network Connections
Lists all current network connections.
Running Tasks
Lists the currently running executable files or programs. This provides a
comprehensive view of the processes that are running on your computer.
Loaded Modules
Lists all modules currently loaded into memory.
Program Groups
Lists programs that are in the Start menu group for every user
that has a profile on the computer. Lists the group name, the name of the
program itself, and the profile to which the program group belongs.
Startup Programs
Lists programs started automatically either from the registry, the Startup folder,
or the Win.ini file.
OLE Registration
Lists Object Linking and Embedding (OLE) file associations that are controlled
by the registry and various .ini files
NOTE: Hardware information is not available in Safe mode.
While System Information can be run in Safe mode, it is limited to displaying
information about system components, and the software environment.
Applications
Microsoft Office 2000 adds information to the System Information tool for each
program that is installed on your computer. Unlike System Information in
Windows 98, complete Office program information is not displayed in Windows XP
unless that program is running. Refreshing the view may not completely populate
the data. Close System Information, start the program, and then re-open System
Information for complete information.
Tools Menu
The Tools menu
contains links to several tools and control panels: Backup, Network
Connections, Hardware Wizard, Disk Cleanup, Net Diagnostics, System Restore,
Network Diagnostics, File Signature Verification Tool, DirectX Diagnostics
Tool, and Dr. Watson.
Control Panel
Unlike previous Windows versions, XP offers
two versions of Control Panel. The version prior to XP is now known as Classic
Control Panel while the new, updated XP version is Category Control Panel. As
the name Category implies, the individual items from the Classic view have been
compartmentalized or categorized into related areas. The graphic below depicts
the nine major categories of the new XP Control Panel. Click on any category for
related articles, tips, etc., further divided by the Classic Control Panel
categories.
Classic View
 Fig. 29 Classic View
Pick a Category
Fig. 30 Pick a Category
Appearance
and Themes
With this category you can
do the following:
· Change the computer’s theme
· Change the desktop background
· Choose a screensaver
· Change the screen resolution
Or Pick a Control Panel icon
· Display
· Folder Options
· Taskbar and Start Menu
Display Properties are the same as Windows 9x with a
few newer options. The Themes tab
contains all the Windows XP Themes. From here you can change back to Classic
Windows. Under the Desktop tab, you can change your background, or click
customize desktop, to change the icons you want displayed on your desktop. On
the Screensaver tab, the old password option is now replaced with the on resume
return to the welcome screen.
Appearance contains the Clear Type feature under effects.
Printers
and Other Hardware
With this category you can do the following:
· View installed printers or fax printers
· Add a printer
· Or pick a Control Panel icon
· Game Controllers
· Keyboard
· Mouse
· Phone and Modem Options
· Printers and Faxes
· Scanners and Cameras
Network
and Internet Connections
With this category you can
do the following:
· Set up or change your Internet connection
· Create a connection to the network at your workplace
· Set up or change your home or small office network
· Or pick a Control Panel icon
· Internet Options
· Network Connections
From here access the
Internet Wizard and enable AutoDial.
Also on the advanced tab on the connections you have the built in
firewall feature. You can also disable
the network card from here if the user does not use the built in Network card,
in our XP models, by right clicking on the network card and selecting disable.
To access the Firewall,
select the icon, click Change Settings of the Connection, and click the
Advanced tab.
User
Accounts
With this category you can
do the following:
· Change an account
· Create an account
· Change the way users log on and off
· Or select an account to change
You can select limited or administrator for the
account type. By setting a password on
an administrator account, make that person document folder protected so only
that user or under administrators can only view it. Also you can disable the welcome screen and the fast user switch
from this area in the Control Panel.
Also you can change the icon the user sees on the welcome screen from
the list or ones they download off the Internet.
Add
or Remove Programs
With this category you can
do the following:
· Change or Remove Programs
· Add New Programs
·
Add/Remove Windows Components
Date,
Time, Language and Regional Options
With this category you can
do the following:
· Change the date and time
· Change the format of numbers, dates, and times
· Add other languages
Or pick a
Control Panel icon
·
Date and Time
·
Regional and
Language Options
Sounds,
Speech and Audio Devices
With this category you can
do the following:
· Adjust the speaker volume
· Change the sound scheme
· Change the speaker settings
· Or pick a Control Panel icon
· Sounds and Audio Devices
· Speech
Note: You
can adjust the volume for your audio devices using a shortcut icon on your
taskbar. By placing the volume control icon on the taskbar, you don’t have to
go into Sounds and Audio Devices in Control Panel each time you want to adjust
the volume.
To add the icon, follow
these steps:
1.
Click Start, and then click Control Panel.
2.
Click Sound, Speech, and Audio Devices.
3. Under Pick a task, click Change
the speaker settings.
4. In the Sounds
and Audio Devices Properties dialog box, on the Volume tab, select the Place
volume icon in the taskbar check box, and then click OK.
Accessibility
Options
With this category you can
do the following:
· Adjust the contrast for text and colors on your screen
· Configure Windows to work your vision,
· Hearing, and mobility needs
· Or pick a Control Panel icon
· Accessibility Options
Performance
and Maintenance
With this category you can
do the following:
· Adjust the visual effects
· Free up space on your hard drive
· Back up your data
· Rearrange items on your hard drive to make
· Programs run faster
· Or pick a Control Panel icon
· Administrative Tools
· Power Options
· Scheduled Tasks
· System Icon
From here your
Administrative tools, which contains Disk Management, Event Viewer, Disk
Defrag, Disk Cleanup. Also you can get
to System Properties from here.
Scheduled Tasks can also be added to the tasks wizard. Power options can be set up for Hibernation,
sleep and APM if the computer with XP installed doesn’t have ACPI.
3rd Party CPLs
All 3rd party Control Panel
CPLs are kept on the left hand side of the Control Panel window, as other control panel options. Also 3rd party applications as in Norton
Live Update, Real Player and Quick Time.
Windows Update
Most web pages are created
with Internet Explorer in mind. This means using Internet Explorer can offer
excellent multimedia features while viewing web content, and that the browsing
experience can be rich. However, since Internet Explorer is the most common
browser, it is the target for most destructive programs. Viruses, Spyware,
Adware, Trojans, and more are often made specifically to attack Windows
machines and Internet Explorer. Most web pages can do no harm, however certain
flaws in some areas of Internet Explorer allow certain sites to harm the
machine or perform actions against the user’s will. Information can be taken,
viruses spread, or the machine could be compromised. Microsoft spends quite a
bit of time to fix these flaws and holes in its products, and offers an update
system to bring these patches to Windows and Internet Explorer. It is very
important for customers to be aware that IE requires constant updates, similar
to changing the oil in a car.
A windows update walkthrough
should be included with almost any internet issue, with emphasis placed on teaching
the customer to update themselves in the future. Have the customer open
Internet Explorer, click tools, and choose Windows Updates. This will load the
Windows Update site from Microsoft, and may need to install the update software
in order to scan for updates. If there is a prompt asking to trust Microsoft,
have the customer agree by clicking yes in the relevant dialog box. One at the
update site, click to have Windows scanned for updates. When completely
scanned, there will generally be several categories of updates available.
Critical Updates and Service Packs offer the most important updates and patches
for Windows and Internet Explorer. Any important and serious updates, such as
those specific to system integrity and security will end up in this category.
Once the updates are
selected, click Install and Internet Explorer will download and install all the
updates requested. In most circumstances, reboot to complete the install.
Windows Updates should be performed often, as new updates come out regularly as
new flaws are found and patched.
The Windows Update interface
is unique in XP. When visiting Windows Updates in XP, and allowing XP to
install the update software, the Updates page will load, and offer different
install choices. Express install will install what Windows determines to be the
most important and critical updates. Custom install allows Windows to scan for
updates, and will report back with the most important recommended. By clicking
review other updates, another scan will occur and the updates page will display
the rest of the updates available for that version of Windows. Select the
updates to install, and click Go to install updates. Follow through with the
instructions to install the updates to Windows XP. Generally, a reboot is recommended
after the install process is complete.
Note: The
user must be the administrator or part of the administrator group to perform
some updates.
Uninstalling
a Windows XP Update
To
uninstall windows update files go to add/remove programs.
Maintenance and General Performance
Check Disk and Defrag
Check Disk and Defrag are important utilities that
come with Microsoft Windows. They’re designed to enable users to tune up their
Windows system and make sure it's running properly. Check Disk performs a check
on the customer’s drive to identify and correct certain problems such as cross
linked files and damaged file structure as well as physical damage to the
drive. Defrag (short for Disk Defragmenter) reorganizes a computer’s files into
a contiguous order to help Windows read, access, and save files to the hard
drive in a faster and more stable manner.
Check Disk and Defrag are usually located on Windows
Start menu under "Programs", "Accessories", and
"System Tools". A customer can also access both programs by selecting
"My Computer", and then right clicking on the drive they want to tune
up.
It is generally best to run these applications in
Safe Mode as there are very few applications and processes running in Safe
Mode.
Note: One of the
main applications that can cause problems with Defrag is AntiVirus. The reason
is when running a defrag the system is reading and writing files on the hard
drive. The AntiVirus is designed to monitor such events and will cause it to
restart the scan from the beginning. From there is tends to get stuck in a loop
and continue to restart the process over and over.
Running Check Disk
After accessing the System Tools and selecting to run
Error Checking you will get a second screen providing choices as to what you
want Check Disk to do:

It is recommended to put a checkmark in each box and
click Start. You will then get a message stating Check Disk requires exclusive
access to some system files that it cannot get unless the system is restarted.
It asks if you want to schedule it to run the next time the computer is
started. Say yes and then reboot the system.
Running Defrag
Once you select defrag, have the customer navigate to
the drive they want to defrag. Only one drive can be selected at a time in
defrag. Advise the customer of the need for running a periodic Defrag to insure
system stability and speed. Also let the customer know that the defrag is best
performed over a period of time when they are not planning on using their
computer as the process can take several hours.
Note: When running
a Defrag, communicate to the customer the amount of time it could take to run.
If a machine has never been defragged before customers often quit out of the
program once they see the progress meter at 1% for an extended period of time,
thinking the program has stalled. Defrag is one of the slowest and most
thorough operation a computer might perform and patience is required.
Disk Clean Up
Disk Clean Up is an essential maintenance step which
removes residual and temporary files that can slow down a customer’s machine.
These files can be the remnants of previously moved or deleted files, internet
files and cache, or come from a wide variety of sources. They are not by nature
malicious, and the customer should be made aware they are not “infecting” the
computer in any manner, but they do need to be cleaned regularly. In all
versions of Windows sine Windows 98 there is a Disk Clean Up Wizard that
automates this process. It is located under Programs, Accessories, System
Tools, Disk Clean Up.
Once Disk Cleanup finishes calculating the computer’s
unwanted temp files the wizard will give the customer the option of cleaning
their hard drive, including multiple partitions if applicable. It will show
them how much space is being consumed by unneeded temporary Internet files, as
well as other temporary files, downloaded program files, and offline web pages,
including the Recycle Bin.
Windows XP has a
consolidated interface to keep track of program and user activities and the
Event Viewer analyzes the activity logs. The Event Viewer is a tool for
troubleshooting, and viewing messages (errors, warnings, success) generated by
software and operating system components.
The information supplied by
Event Viewer, in the Event ID, can be interpreted or used in technical database
queries to devise a resolution for the problem generating the event.
Windows XP records events in
the following three logs:
Application log
The application log contains
events logged by programs. For example, a database program may record a file
error in the application log. Developers determine which events are written to
the application log.
Security log
The
security log records events such as valid and invalid logon attempts, as well
as events related to resource use, such as the creating, opening, or deleting
files. For example, when logon auditing is enabled, an event is recorded in the
security log each time a user attempts to log on to the computer. You must be
logged on as Administrator or as a member of the Administrators group in order
to turn on, use, and specify which events are recorded in the security log.
System log
The system log contains
events logged by Windows XP system components. For example, if a driver fails
to load during startup, an event is recorded in the system log. Windows XP
predetermines the events that are logged by system components.
Each event in a log can be
classified into one of the following types:
n Information describes the successful operation of a
task, such as an application, driver, or service. For example, an Information
event is logged when a network driver loads successfully.
n Warning is not necessarily significant, however, may
indicate the possible occurrence of a future problem. For example, a Warning
message is logged when disk space starts to run low.
n Error describes a significant problem, such as the
failure of a critical task. Error events may involve data loss or loss of
functionality. For example, an Error event is logged if a service fails to load
during startup.
n Success
Audit (Security log)
describes the successful completion of an audited security event. For example,
a Success Audit event is logged when a user logs on to the computer.
n Failure
Audit (Security log)
describes an audited security event that did not complete successfully. For
example, a Failure Audit may be logged when a user cannot access a network
drive.
Information logged about the
event includes:
n Date the event occurred.
n Time the event occurred.
n User the name of the user logged on when the
event occurred.
n Computer the name of the computer where the event
occurred.
n Event
ID the event number
identifies the event type. The Event ID can be used help understand what
occurred in the system.
n Source This can be the name of a program, a system
component, or an individual component of a large program.
n Type
can be one of the following
five types:
w
Error
w
Warning
w
Information
w
Success Audit
w
Failure Audit.
n Category is a classification of the event by the
event source. This is primarily used in the security log.
Compatibility
Hardware/Software Webpage for HCL
To locate compatibility
software and hardware, in the Help and Support Center menu, click Find compatible hardware and
software for Windows XP.
The Search function makes it
easy to locate the whether or not hardware and software is compatible.
Use the Program Compatibility Wizard to resolve the most common
compatibility problems between your programs and Windows XP that might
occur after an upgrade.
Software Compatibility
Wizard and How to Run It
The Windows XP compatibility
wizard technologies depend on database files to identify and fix applications
that may not otherwise run on Windows XP. (The database files that are used in
upgrading from Windows 98, and Windows Millennium on the one hand, or Windows
2000 on the other are MigDB.inf and NTCompat.inf, respectively.)
The database files used for
application compatibility after Windows XP is installed are:
n SysMain.sdb
contains the matching information and compatibility fixes
n AppHelp.sdb
contains the Help messages that alert users to application compatibility
problems that have no current fix
Windows XP includes the Program Compatibility Wizard to assist
users in applying compatibility fixes to their own applications through the Help and Support Center.
Experienced users can modify
the properties of an executable file using the Compatibility tab in the application’s Properties dialog box to
apply compatibility fixes.
Note: You
can also insert the Windows XP CD and run the compatibility wizard from the
auto run screen that comes up.
Safe Mode
Safe mode is a diagnostic startup environment that runs only a subset of
the drivers and services that are in your system memory. Use Safe mode when you install software or a
device driver that causes instability or problems in when starting normal mode.
Note: Logging on to the computer in
safe mode does not update the Last Known Good Configuration.
In safe mode, Windows XP uses the minimum set required to start the
graphical user interface (GUI). The following registry subkeys list the drivers
and services that start in safe mode:
HKLM\System\Current_Control_Set\Control\SafeBoot\Minimal
To access safe mode
1.
Remove all floppy disks and CDs from your computer, and restart your
computer.
2.
Press F8 when prompted.
3.
Using the Windows Advanced Options menu, select Safe Mode, Safe Mode
with Networking, or Safe Mode with Command Prompt.
Last
Known Good Configuration
Last Known Good
Configuration corrects instability or startup problems by reversing the most
recent system and driver changes within a hardware profile. When you use this
feature, you lose all configuration changes that were made since you last
successfully started your system.
Using the Last Known Good
Configuration restores previous drivers and also restores registry settings for
the sub key in the file:
HKEY_LOCAL_MACHINE\SYSTEM\CurrentControlSet.
When is last known
good configuration created?
Last known Good
Configuration is created when you successfully start the operating system in
normal mode and log on.
When you are troubleshooting,
it is recommended that you use Last Known Good Configuration before you try
other options, such as safe mode. However, if you decide to use safe mode
first, logging on to the computer in safe mode does not update the Last Known
Good control set. Therefore, Last Known Good Configuration remains an option if
you cannot resolve your problem by using safe mode.
To access the Last
Known Good Configuration startup option
1. Remove all
floppy disks and CDs from your computer, and restart your computer.
2. Press F8
when prompted. If it starts without displaying a menu, press F8 after the
firmware POST process but before the graphical output display.
3. On the
Windows Advanced Options menu, select Last Known Good Configuration.
When Windows XP
Professional starts, it reads status information from the file systemroot\Bootstat.dat.
Device Manager
How and when to use the
Device manager
No matter what version of
Microsoft Windows (except Windows NT) your customers are using, each Operating
System consists of a device manager. Device Manager is a Windows feature that
lets the end-user view, change, and update the properties of all hardware
devices attached internally and externally to the computer.
A normal working computer
with all correct drivers installed will not have any exclamation marks, red Xs
and/or Other Devices errors. When the end-users indicates that there is an
exclamation mark (usually in yellow colors), this is a warning that the device
is conflicting with another hardware device. Don’t be alarmed by this
indication because updating the device to the latest driver could solve it. If
the driver which came with the hardware does not resolve this problem, then
direct them to the manufacturer’s website to check for an updated version. In
some cases, the company has already released a newer driver. In other cases,
the customers may have to contact the manufacturer directly if the problem
still persists.
A Red X is most alarming
warning. It indicates that the Windows is not able to locate the device driver,
that the device has been disabled, or there are no resources allocated to the
device. So if the end-user wants to use the specified device, they will not be
able to do so until the problem is resolved. There is a possibility that the
device may have been disabled and simply needs to be enabled. Right click the
device, and choose Enable. If the device is enabled properly, the exclamation
mark will disappear and the device would be listed normally in the category it
belongs. If the drivers are missing, to resolve this type of issue have the
end-user find the driver disk or CD that came with the device. If a driver disk or CD is not available,
then you must obtain the make and model of device and search for an updated
driver directly from the manufacturer’s website. Download and use this updated
driver to reinstall the drivers of the device.
Lastly, there is an error
category in Device Manager called Other Devices. When the end-users mentions about this category, it simply means
that the Operating System was not able to locate the device drivers. Even more
troubling in some cases Windows does not recognize what type of device being
installed. When this is the case you
may have to walk the end-user to open up the computer case to check for the
device’s make and model. Sometimes, you can better search for the drivers with
the device’s serial number. Some hint will usually be given in the Other
Devices, like PCI Communication Device, or Ethernet Controller, which at least
tells you which type of device is causing the problem. Knowing it is a modem or
Ethernet card helps to narrow down the devices to be located, since it may be
rather difficult to walk a customer through finding this device. Since Windows
doesn’t know what card it is the customer may have to manually remove the card
to get the modem number in order to find a driver for it. Always have the
power unplugged for a customer that is going to move or open a case.
Some manufacturer’s website
will allow the end-users to search directly by the hardware serial number,
which more convenient because it will bypass all steps involving in search for
drivers. Some site will also be able to scan the system online and determine
the type and model of the hardware device.
Note: When
opening the computer’s case, make sure that the end-users are comfortable doing
this. In some cases the end-user will create other problems when attempting to
troubleshoot device driver issues.
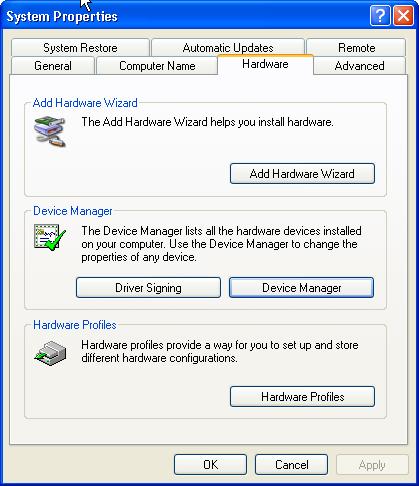
Fig. 31 From System Properties choose the hardware tab and select Device
Manager
Common signs of driver
conflict
A computer and the hardware
may not function if drivers are not installed properly. There is another factor that may cause the
computer or hardware to not function the way they should: driver conflicts. Driver conflicts can occur even if the
customer has loaded the proper driver software, and the hardware components
have been working fine for a given period of time. An example of a driver conflict may be that recently the customer
purchased a new webcam, and after installing the webcam’s software, the
customer’s scanner does not respond.
This behavior is known as driver conflicts, which cause different
drivers installed on your customers’ computer to react erratically. The problems can be repaired; however, not
correcting these conflicts can cause major crashes and unexpected error
messages in the future.
When your customers
described the symptoms, be sure to take careful notes because it would
certainly save you time in resolving these types of issues. Signs such as: What was recently installed,
any new hardware, software, program updates?
By asking probing questions
most customers can usually give you enough information to begin
troubleshooting. For example:
The computer used to work
before I installed a new device or piece of hardware. Ask your customers what they have done and try to reverse the
processes that they have taken. Maybe the end-user has not followed the
step-by-step instructions provided in the manual or instructions accompanying
the device. They might have connected the USB hardware device, for instance,
before installing the driver first. By reversing the processes that the
end-user has taken you can guide them on the right path.
After I installed my USB
printer, my USB mouse stopped responding.
Again, confirm with the end-user that something used to work in the past
has stop working since an installation of a new hardware device. There are a
few possible conflicts with this type of symptom. The new device may not be
compatible with the operating system. The computer’s specifications might not
meet the minimum requirements. This may be especially true for USB problems,
due to power issues. USB uses significant power resources from the machine to
supply power to all the devices connected. Sometimes when adding that one new
device, there may be not enough power available from the power supply of that
computer’s case. If each device works individually, but fails when more are
added, it could be a lack of power and a new power supply may be necessary. It
could also be a conflict of resources, where not enough IRQ resources or other
memory addresses may exist and thus not all devices can be assigned proper
resources by the operating system to function.
I kept getting Find New
Hardware window even after I have successfully installed my new hardware
driver. If the end-user is getting this message, then they either have not
installed the driver and/or software for the hardware device properly or
additional drivers might be required. Have the end-users go through the wizard
again so you can determine what device might have caused this continuous window
to pop-up every time Windows starts. Once the wizard has completed, make sure
to ask for any completion or error message. Last, to be sure that the device
driver has been completely installed, check Device Manager to see if there is
any question mark(s) or exclamation point(s) on any of the devices.
Note: It
is important that you ask for the make and the model of the device in question.
Much of the time, the end-user will not read or follow the step-by-step
instructions; therefore, this behavior may not have installed the device driver
properly. Some hardware requires different installation processes depending
upon the operating systems of the end-users. Lexmark USB printers, for
instance, will require end-users to install the printer driver and utilities
before connecting the printer to the computer. If end-users connect the printer
to the computer before appropriate installation of its printer drivers and
software, the printer will not function properly on certain models.
Digitally signed devices
Digitally signed devices are
devices tested and sign off from Microsoft. Protection drivers signed will not
be over written.
Note: Installing unsigned
drivers will cause an unstable system.
Driver resiliency
Driver resiliency—three
setting:
Warn
Block (not installing that driver)
Ignore (not suggested just ignored
the driver)
To Remove a device
Right click and
uninstall—scan for hardware changes or little computer magnifying. Some devices
require you to reboot and until you reboot it will not install.
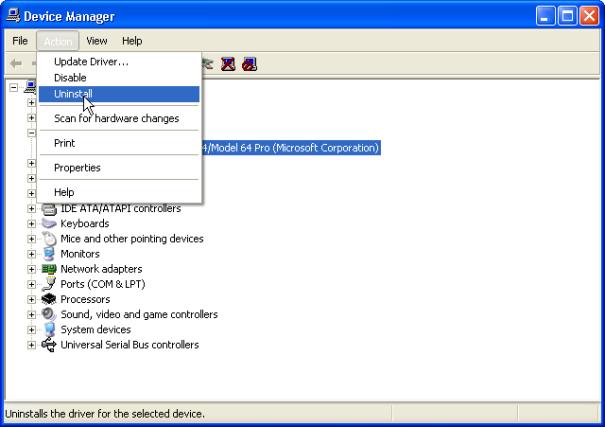 Fig.
32 Uninstall drivers
Fig.
32 Uninstall drivers
To refresh the driver
Once you uninstalled it from
Device Manager select Actionàscan for new hardware.
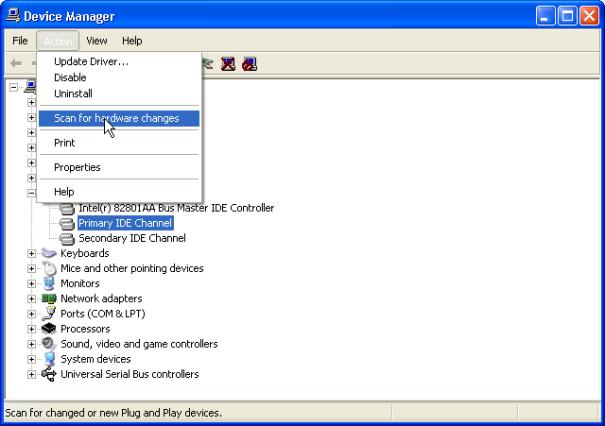
Fig. 33 Scan for hardware changes
Driver Rollback
If you
know the specific driver causing the problem, you have the option of using
Device Driver Roll Back in safe mode. This might be preferable because Device
Driver Roll Back changes are limited to a single device. Also, consider using
System Restore because it enables you to revert system registry settings by
date.
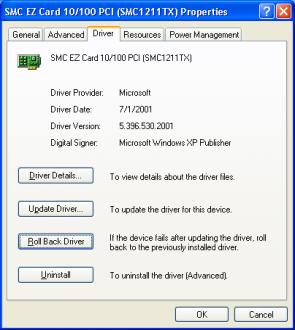
Fig. 34 Driver Information
How to Roll Back to the
Previous Version of a Device Driver
Device Driver Roll Back
reinstalls the driver you were using previously and restores any driver
settings that were changed when you added the new driver. Note that you cannot
restore printer drivers with Device Driver Roll Back.
To roll back a device driver
to a previous version:
1.
Log on to the computer
by using an account with administrative privileges.
2.
Click Start, and then click Control Panel.
3.
Under Pick a category,
click Performance and Maintenance.
4.
Under or pick a Control
Panel icon, click System.
5.
On the Hardware tab,
click Device Manager.
6.
In the device list,
expand the device type branch that you want to work with. For example, Display adapters.
7.
Right-click the device
that you want to work with, and then click Properties.
8.
On the Driver tab, click Roll Back Driver. Click Yes when you receive the following
message: Are you sure you would like to roll back to the previous driver?
9.
The previous device
driver is restored. Click Close.
How to burn CDs and Common Issues
CDR vs. CDRW
Check with the end-user to determine whether or not
the CD recorder has worked in the past. Once that is determined, you can better
assist them with determining the exact cause of the problem with burning CDs.
Sometimes, end-users will not be able to use the recorder if the IDE cable and
jumpers are not configured correctly. This will prevent Windows from recognizing
the device properly. Go to My Computer and check to ensure that the recorder is
there. If not, check the Device Manager under DVD\CDROM Drives to see if the CD
recorder is listed and if there are any problems.
If the recorder does not show up, have the end-user
restart the computer and enter BIOS setup. Under Basic BIOS setup, the end-user
will be able to see the make and the model of the recorder. If the BIOS does
not show the recorder device, exit BIOS setup and turn off the computer
completely. Unplug the computer’s power cable at this time. The next step is to
check all internal connections from the drive to the motherboard. Generally the
CD recorder should be connected with a secondary IDE cable and usually set to a
master setting if this is the only drive on that secondary IDE cable. This is
ideal for a setup that has 1 or 2 hard drives on a primary IDE cable, and 1 CD
drive on a secondary IDE. If there are 2 CD drives, have the burner act as
master and the other drive set as slave, if possible. They can be switched, as
long as the jumpers and cables are correct on ALL drives, to verify the jumper
settings refer to the vendor’s web site. Another issue that may arise with
burning CDs is with the burning software itself. Make sure it is not a trial
version and if so that the trial program has not expired. A trial burning
program may not work effectively. Of course expired burning software will not
work at all. Also check for updates for the burning software being used. For
example, Nero burning software offers updates about once a month. These updates
can fix issues with buffer flows, memory issues, drivers, recognizing certain
CD driver, different types of blank media, and more. Most reputable burning
software manufacturers will offer updates for their software.
The end-user may experience some annoyances with the
recording media i.e. CD-R blank disks. CDR is recording media that can be used
once, while CD-RW is rewriteable media that can be used hundreds of times. Make
sure that the end-user does not overload files that exceed the media limit. If
CD-R’s limit is 700 MB, try to load no more than 695 MB on a single media. Some
burning software will help end-users compress files if the files exceed the
media’s limit by a small amount.
Note: Anything
more than 10 MB may prevent a successful burning process.
Note: Have the
end-user check for scratches on the recording CD-R media. Even tiny scratches
will prevent the recorder from writing files onto the media properly.
Network Wizard
Dial
up Access
End users might be calling about problems trying to install their ISP
disks or going through the wizard. The
three choices in the wizard:
n Choose from list (ISPs)
n Set up my connection manually
n Use the CD I got from an ISP.
If you choose to go through the list, this will offer
if you want to set up with MSN or it will set up a separate icon for you to log
on to with, and get an updated list of ISP in your local area.
If your ISP gave you a CD to install, it’s recommend
that you go through the Use the CD I got from an ISP, this will just copy over
the settings from the DNS, Gateway and IP information that the ISP requires you
input into the system.
If you decide to set up the connection manually, the
end user will be required to get all information required from the ISP.
Dial-up Connection Wizard
Walkthrough
1.
Click Start, Control Panel, Network and Internet Connections, and then
the Network Connections icon.
2.
Click Create a new connection under Network tasks to start the New
Connection Wizard.
3.
The first screen of the wizard, Welcome to the New Connection Wizard, is
an introductory one. Click Next.
4.
The Network Connection Type screen allows for selection of the type of
network connection that you would like to make. Click Next.
5.
On the Getting Ready screen, the choices are Choose from a list of
Internet service providers (ISPs), Set up my connection manually, and Have the
CD I got from an ISP click Next.
6.
On the Internet Connection screen, the choices are Connect using a
dial-up modem, Connect using a broadband connection that requires a user name
and password, and Connect using a broadband connection that is always on. Click
Next.
7.
On the Connection Name screen, we type in the ISP’s name, click Next.
8.
On the Phone to Dial screen, we type in the phone number provided by the
ISP, and click Next.
9.
On the Internet Account Information screen, we type in a username and
password, and then confirm the password by typing it in again. There are
several other options on this screen also – use this account name and password
for all users of this computer, make this the default connection, and enable
the firewall. These are all on by default. Click Next. On the Completing the
New Connection Wizard screen, we are provided a summary of the choices made.
Click Finish. We are immediately prompted to connect
DSL/Cable high speed
connection
To setup DSL or a Cable
connection, use the same wizard as the dialup connections. The only difference
is select to set up my connection manually.
This will offer you 2 selections related with DSL and Cable. From here you can either select if your
required to use a username and password to login to your broadband or if you do
not require this information. Some
cable internet providers also require the end user to have the correct computer
name to know who they are online, instead of using a user name and
password. Most Cable and DSL Internet
providers support DHCP, but if they don’t then it’s the user’s preference to
contact their ISP to get their settings, so they can input them in the
networking adapter they just set up.
Additional Network Issues
Red X
In regards to a possible network icon with a red X in their notification
area. The easiest way to remove this
icon from the notification area is to go to network options and to right click
on the network card, and selecting disable.
This will disable the card, but will also remove the icon they don’t
want to see all the time.
Firewall
Also keep in mind the firewall, which is build in Windows XP, is turned on by
default when you build a new connection.
If a user calls not being able to view secure WebPages, they you must go
to the properties of the connection, to the advanced tab. This is where you find the firewall; just
remove the checkmark will remove the firewall for that connection.
Internet Explorer 6
If Internet Explorer becomes corrupted, and needs to be repair to repair it by
using the following. Get the user to
get to a Command prompt (cmd.exe) and from there use the SFC /SCANNOW which
will scan the files in your Windows directory and fix any that night be damaged
or corrupted.
AutoDial
By default the enable AutoDial is enabled for the dialup connection. To disable it, go to the Network Connections
window, and click on Advanced and click dialup networking settings. Then remove the checkmark for Enable
Autodial on the end users dialup connection.
How to configure a LAN or high-speed
connection
Follow these seven steps to configure a LAN or high-speed connection:
1.
Click Start, Control Panel, Network and Internet Connections, and then
the Network Connections icon.
2.
Right click the LAN or high-speed Internet connection icon and select
Properties. Notice that there are three tabs on the properties dialog: General,
Authentication, and Advanced
3.
Select the General tab. On this tab, we can configure our network
adapter driver and the items that the connection uses. The most common items
are the Client for Microsoft Networks, File and Printer Sharing for Microsoft
Networks, and the Internet Protocol.
4.
Highlighting them and clicking Properties can separately configure each
of these. Select Internet Protocol and then click Properties to view the dialog
box that appears for configuring the Internet Protocol properties. Click Cancel
to return to the General tab.
5.
Notice that we can install other items by clicking the Install button.
We can also remove items in this list by selecting the item and then clicking
the Uninstall button. Select Internet Protocol. Notice that the Uninstall
button is not available. In Windows XP, the Internet Protocol cannot be
uninstalled. It can be disabled, however, by de-selecting the box next to it in
the list.
6.
Select the Authentication tab. Notice that on this tab we can choose
options for how to be authenticated on the network, including the Extensible
Authentication Protocol to be used. Additionally, there are options on how to
authenticate when connecting over the network.
7.
Select the Advanced tab. Notice that we have the option to enable the
Internet Connection Firewall, and if there is more than one connection, we have
the option to enable/disable Internet Connection Sharing.
Firewalls
A firewall is a security for
you personal computer or network and the outside world. The firewall sets
restrictions on what information leaves your home and what information comes
in.
You should not
enable a Firewall that does not directly connect to the Internet. Only install
the firewall on the machine that is directly connected to the Internet.
Note: Do
not use Wingate or Norton Firewall with the Window’s XP firewall.
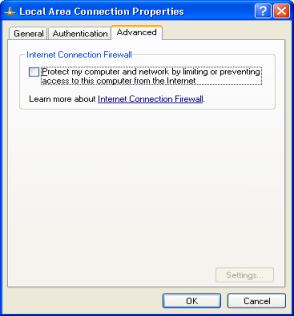
Fig. 35 Internet Firewall
Steps to set up a
Firewall
Click
Start, Control Panel, Network and Internet Connections, and then Network
Connections.
Right click on the connection icon and select Properties. Select the Advanced
tab.
To enable Personal Firewall, check Protect my computer and network by limiting
or preventing access to this computer from the Internet.
Windows XP Startup Menu
This
menu can be accessed utilizing a couple of different methods.
Method 1 –
Immediately after restarting the computer press the F8 function key repeatedly
until you see the start up menu as shown in Fig. 36 (If you receive a 301
keyboard error message you have hit the F8 function key to early press any key
to continue and continue pressing the F8 function key)
Fig.36 Advanced Options Menu
Method 2 –
While the system is booting simply turn the power off, this will advice you
that your system did not successfully load see Fig. 37.
Fig. 37 Incomplete boot
Windows Advanced option menu
Safe Mode
– Choosing this option will bring us to Safe Mode without network connectivity.
(You need to be the admin to gain access)
Safe Mode with Networking – Choosing this option will bring us to Safe Mode
with network connectivity. (You need to be the admin to gain access)
Safe Mode with Command Prompt – This option will bring you to a command prompt
only, similar to choosing safe mode command prompt only in other Operating
Systems. (You need to be the admin to gain access)
Enable Boot Logging – Starts while logging all the drivers and services
that were loaded (or not loaded) by the system to a file. This file is called
ntbtlog.txt and it is located in the %windir% directory. Safe Mode, Safe Mode
with Networking, and Safe Mode with Command Prompt add to the boot log a list
of all the drivers and services that are loaded. The boot log is useful in
determining the exact cause of system startup problems.
Enable VGA mode – Starts using the basic VGA driver. This mode is useful when you have
installed a new driver for your video card that is causing Windows not to start
properly. The basic video driver is always used when you start in Safe Mode
(either Safe Mode, Safe Mode with Networking, or Safe Mode with Command
Prompt).
Last Known Good Configuration (your most recent
settings that worked) - The Last
Known Good Configuration feature is a recovery option that you can use to start
your computer by using the most recent settings that worked. The Last Known
Good Configuration feature restores registry information and driver settings
that were in effect the last time the computer started successfully. Use
the Last Known Good Configuration feature when you are unable to start Windows
XP after you make a change to your computer, or when you suspect that a change
that you just made may cause a problem.
Directory Services Restore Mode (Windows domain
controllers only) - This is for the
server operating systems and is only used in restoring the SYSVOL directory and
the Active Directory directory service on a domain controller.
Debugging Mode - Starts while sending debug information through a serial cable to another
computer.
Start Windows Normally – The normal Windows boot process is followed.
Reboot – Restarts
the computer.
Return to OS Choices Menu – IF more than 1 OS is installed
Help and Support
Center
Accessing Help and Support Center
The
three most common ways to access Help and Support Center are from the Start
menu, keyboard hotkey <Window+ F1> and from the System Search
HELP AND SUPPORT
Interface
The help and support center
user interface is divided into six major areas. These areas are the global navigation bar, search, pick a help
topic, ask for assistance, pick a task and did you know.
Fig. 38 help and Support Console
Global Navigation Bar
The global navigation bar in
the help and support center is located at the top portion of the screen. The first three buttons: back, forward and home are navigation
buttons and take you to specific content, much like the Internet Explorer
navigation bar. Index allows you to
search for particular content.
Favorites bookmark specific content you’re in to return quickly. History shows you different items that
you’ve visited. Support takes you to an
area to request assistance from Microsoft on particular areas of problems or
troubleshooting. And last the option
allows you to set search options.
![]()
![]()
Fig. 39 The global navigation bar in the Windows XP Help and
Support Center
Setting search options
For best results in
searching for information setup your “Set search options” for the most accurate
results.

 Fig.40 Search Bar

Fig.41
Search Options
PICK A
HELP TOPIC
The pick a help topic in
Microsoft Windows XP help and support center interface divides common user
tasks into four areas. The user area
has information like what’s new in Windows XP and Windows basics. The networking area has tasks such as
networking in the web and working remotely.
The customizing section provides information on how to customize your
computer and accessibility features.
The last area, the system area, has information on printing and faxing,
fixing a problem, and performance and maintenance. Dividing these topics into four areas allows users to find common
situations that they may need help on when working with Windows XP.
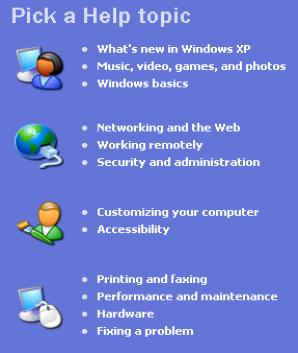
Fig. 42 The pick a
help topic in Microsoft Windows XP Help and Support Center
Windows Update
Keep your computer
up-to-date with Windows Update
Find compatible hardware and
software for Windows XP
Undo changes to your
computer with System Restore
Use Tools to view you
computer information and diagnose problems
PICK A TASK
Pick a Task contains 4 items
in help and support. The first allows
users to connect to the Windows update website to download current versions of
software for their system. The second
points them to the compatibility hardware and software list for Windows
XP. The third is to undo system changes
with the system restore feature, which we cover later. System restore allows you to rollback system
changes to undo application or driver installations and may render your system
unstable. The last is tools to allow
you to create or perform administrative tasks and diagnose problems on your
system.
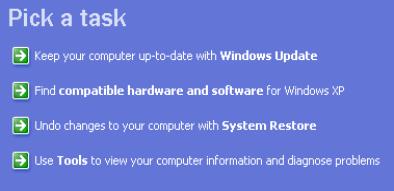
Fig. 41 The
pick a task area contains four items in the Help and Support Center
Windows XP Service
Pack 2
Introduction
Microsoft web sites for
Service Pack 2:
http://www.microsoft.com/windowsxp/sp2/default.mspx
http://www.microsoft.com/athome/security/protect/windowsxp/choose.aspx
Windows XP SP2 Support
Center
http://support.microsoft.com/default.aspx?&pr=windowsxpsp2
About once a year, Microsoft releases an update to Windows
XP. These updates contain all the fixes and enhancements which have been made
available in the previous year. The updates (called Service Packs) provide
convenient, all-in-one access to the most up-to-date drivers, tools, security
updates, patches, and customer-requested product changes.
The latest Service Pack for Windows XP is all about
security, and it’s one of the most important service packs ever released. It
provides better protection against viruses, hackers, worms, and includes upgrades
to Windows Firewall and Automatic Updates, a Pop-up Blocker for Internet
Explorer, a Spam blocker for Outlook Express and finally the new Windows
Security Center.
Windows
XP Service Pack 2 (SP2) provides better protection against viruses, hackers,
and worms, and includes Windows Firewall, Pop-up Blocker for Internet Explorer,
and the new Windows Security Center.
Installing SP2
Find out the top reasons to
install, see features at a glance, and read the SP2 overviews. Windows XP
Service Pack 2 with Advanced Security Technologies helps you protect your PC
against viruses, hackers, and worms. Learn about the benefits of Windows XP SP2
here.
What to Know Before Downloading and Installing
Learn the steps you need to
take before installing SP2.
http://support.microsoft.com/xpsp2getinstall
Detailed step by step
instructions for installing SP2 can be found here:
http://support.microsoft.com/kb/875364
How to use the Automatic
Recovery feature to recover your computer or your Tablet PC if the Windows XP
Service Pack 2 Setup program is not completed successfully:
http://support.microsoft.com/kb/875355
Follow these steps before
installing Windows XP SP2 to prevent potential conflicts with other software on
your computer:
- Back up
your critical information.
- Check your computer for spyware and other unwanted software.
- Check for special update instructions from your
computer's manufacturer.
Once you have completed the
above steps, you can download this and all future critical updates
automatically by turning on the Automatic Updates feature in Windows XP.
Turn on Automatic Updates for me.
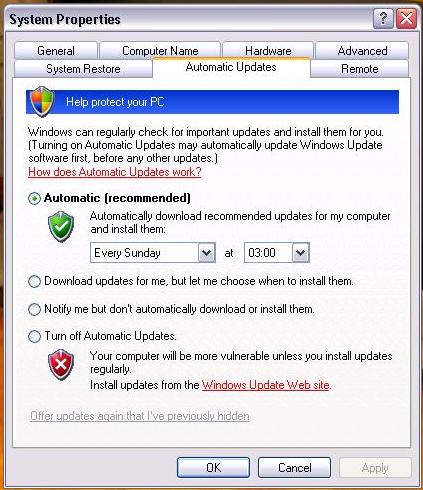
Automatic Updates Tab in
System Properties
Or, if you prefer, use our step-by-step instructions. You can also
download Windows XP SP2 from Windows Update. If you cannot use Automatic Updates
or download Windows XP SP2 via Windows Update, order a CD.
Windows XP Service Pack 2 Information
With Windows XP SP2, you get
safer browsing and communication, powerful security tools, and improved
experiences.
Troubleshooting SP2 Installation
Your
computer stops responding when you restart after you install Windows XP SP2
This article discusses how
to resolve an issue where your computer stops responding (hangs) when you
restart to complete the installation of Windows XP SP 2. This issue occurs on a
limited number of systems that use a version of basic input/output system
(BIOS) that does not have production support for Intel Pentium 4 and Intel
Celeron D processors based on the Prescott C-0 stepping.
This article discusses how
to resolve an issue where, after installing Windows XP SP2, you receive a
"Stop: c0000135" and "winsrv was not found" error message
and your computer repeatedly restarts.
Device
drivers known to cause instability in SP2 are blocked during installation
SP2 contains a Driver
Protection feature that helps protect operating system stability by preventing
the operating system from loading drivers that are known to cause stability problems.
Some
programs seem to stop working after you install Windows XP SP2
After you install Microsoft
Windows XP Service Pack 2 (SP2), some programs may seem not to work. By
default, Windows Firewall is enabled and blocks unsolicited connections to your
computer. This article discusses how to make an exception and enable a program
to run by adding it to the list of exceptions. This procedure permits the
program to work as it did before the service pack was installed.
This article describes the
steps you should take if you receive this error message when you try to install
SP2.
"Access
is denied" error message when you try to install SP2
This article describes
methods to workaround the "Access is denied" error message when you
try to install SP2.
More Troubleshooting issues...
This link contains more
usefully troubleshooting articles.
New Features
Learn to use the new
features of SP2 and get help if you need it.
Manage your computer's security settings in one place. Windows
XP Service Pack 2 (SP2) contains a collection of new technologies designed to
help keep your PC and your personal information more secure. SP2 also makes it
easier to monitor these settings with the new Windows Security Center,
available through the Control Panel.
The Security Center lets you check the status of your
essential security settings. You can also use it to find information about the
latest virus or other security threat or to get customer support from Microsoft
for a security-related issue.
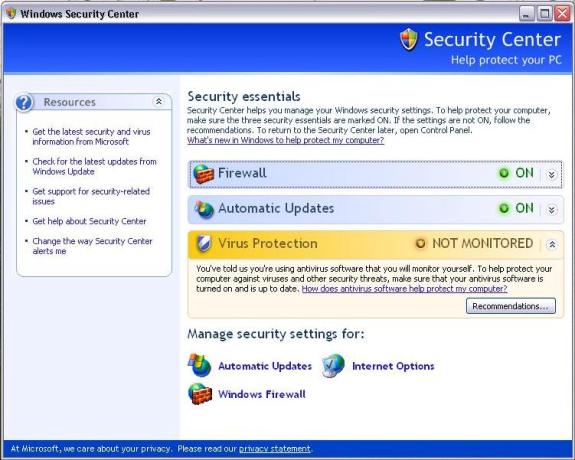
Windows XP Service Pack 2
Security Center
Block pop-up windows with Internet Explorer. Many
legitimate advertisers on the Internet use windows that pop up in the middle of
your screen to display a message. They might also open when you click a link or
button on a Web site, and they might open either over or under the window you
wish to view. Some pop-ups are helpful. For example, if you click an image to
see a larger version, it might open in a pop-up window. Unfortunately, some
pop-up windows can contain inappropriate content or can be a way for you to
accidentally download dangerous software (called spyware or adware) onto your
computer.
With Windows XP Service Pack 2 (SP2) Internet Explorer allows
you to prevent most pop-up windows from appearing over pages you want to view
while you're using the Internet.
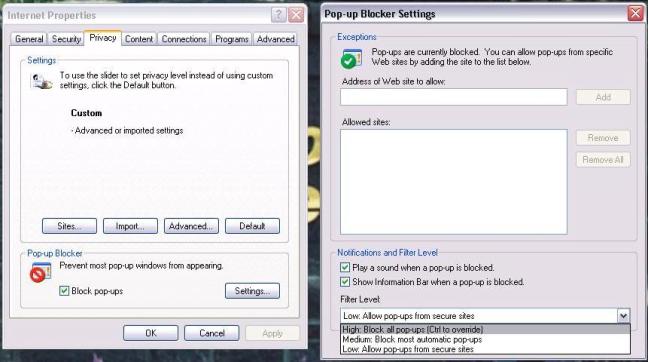
Internet Explorer Pop-up
Blocker (feature of Service Pack 2)
Learn the basics about the new Windows Firewall, plus find
out how to adjust your firewall settings if you need to. Windows Firewall,
previously known as Internet Connection Firewall or ICF, is a protective
boundary that monitors and restricts information that travels between your
computer and a network or the Internet. This provides a line of defense against
someone who might try to access your computer from outside the Windows Firewall
without your permission.
If you're running Windows XP Service Pack 2 (SP2), Windows
Firewall is turned on by default. However, some computer manufacturers and
network administrators might turn it off.
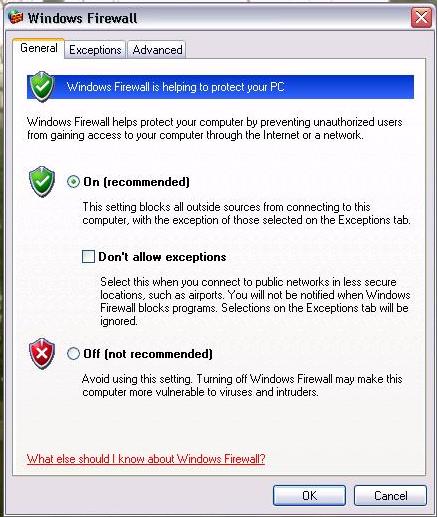
Windows Firewall – General
Tab
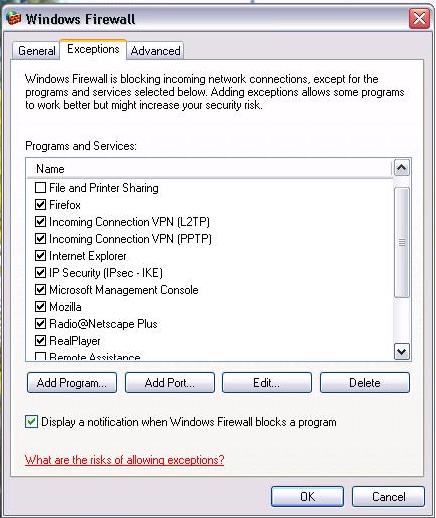
Windows Firewall –
Exceptions Tab
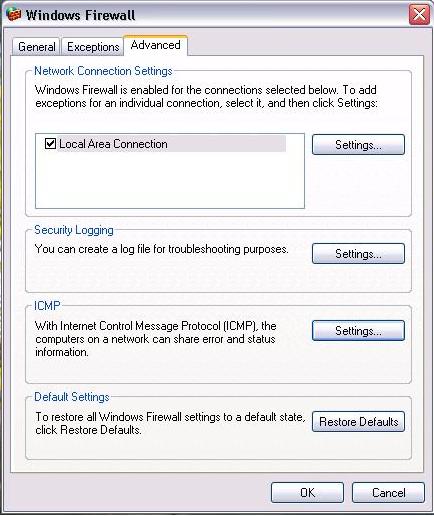
Windows Firewall – Advanced
Tab
How to
use the Security Alert dialog box when it appears on your screen
When a program tries to use
one or more of the resources or the ports on your system that are covered by
the firewall, a Security Alert dialog box appears. This article describes the
Security Alert dialog box options available to you.
Add-ons are typically fine
to use, but sometimes they slow down your computer or force Internet Explorer
to shut down unexpectedly. This can happen if the add-on was poorly built or
created for an earlier version of Internet Explorer. SP2 you can use the new
Internet Explorer Add-on Manager to help make the add-ons that you do want
function properly and to easily get rid of the ones you don't want.
Device Manager is also
located elsewhere, however, it is on the same tab.
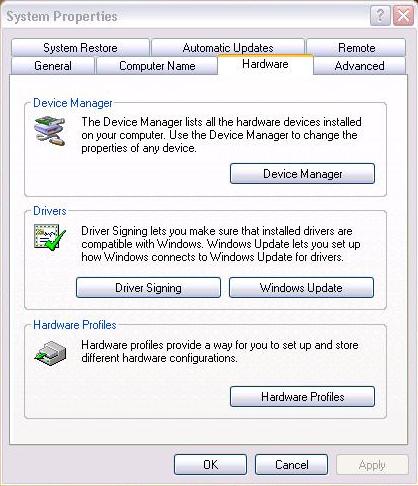
The Device Manager Button is
now located in its own is now located in its own Grouping Box but is still on
the Hardware tab. Windows Update is now
located where the Device Manager Button used to be.
These articles show how to
use the new features of SP2. Things such as:
- What to Know Before You Download and Install
- Manage Your Computer's Security Settings in One
Place
- Understanding Windows Firewall
- Use the Internet Explorer Information Bar
- Block Pop-up Windows with Internet Explorer
- Control Internet Explorer Add-ons with Add-on
Manager
- Use the New Security Features in Outlook Express
- Improve Your Home Network Security
- Making File and Printer Sharing Safer in Windows
XP SP2
- Disabling Antivirus Alerts
- Disabling Firewall Alerts
- Disabling Security Center Alerts
Videos, How to Topics, and More
Walk through important Windows
XP SP2 settings and how to manage them with these 5-minutes-or-less videos. Get
more information and step-by-step directions for configuring and setting up SP2
with these frequently-requested articles.
Video: How to configure Internet Explorer Pop-up Blocker
This short video walks you
through configuring the Internet Explorer Pop-up Blocker.
Video: Using Outlook Express to fight SPAM
Video: How to use new
security features in Outlook Express to help block SPAM This short video
describes how to configure Outlook Express to help block unwanted junk mail.
Video: How to use the Windows Security Center to help
protect your computer and keep it updated
This short video walks you
through configuring the new Windows Security Center feature in Windows XP SP2.
More Videos, how to topics, and more...
Windows XP Recovery
Console
If your Microsoft Windows
XP-based computer does not start correctly or if it does not start at all, you
can use the Windows
Recovery Console to help you recover your system software.
This article discusses the following topics:
- How to start the Windows Recovery Console.
- How to use the Command Console.
- Restrictions and limitations of the Windows
Recovery Console.
- The commands that are available in the Windows
Recovery Console.
When you use the Windows
Recovery Console, you can obtain limited access to the NTFS file system, FAT,
and FAT32 volumes without starting the Windows graphical user interface (GUI).
In the Windows Recovery Console, you can:
- Use, copy, rename, or replace operating system
files and folders.
- Enable or disable service or device startup the
next time that start your computer.
- Repair the file system boot sector or the Master
Boot Record (MBR).
- Create and format partitions on drives.
Note: Only
an administrator can obtain access to the Windows Recovery Console so that
unauthorized users cannot use any NTFS volume.
How to Install the Recovery Console
You can install the Recovery
Console on your computer to make it available if you cannot restart Windows.
You can then select the Recovery Console option from the list of available
operating systems during startup. Install the Recovery Console on important
servers and on the workstations of IT personnel. This article describes how to install
the Recovery Console to your Microsoft Windows XP-based computer. To install
the Recovery Console, you must be logged on as an administrator.
Although you can run the
Recovery Console by starting directly from the Windows XP CD, it is generally
more convenient to set it up as a startup option on your startup menu.
To install the Recovery
Console, follow these steps:
- Insert the Windows XP CD into the CD-ROM drive.
- Click Start, and then click Run.
- In the Open box, type d:\i386\winnt32.exe
/cmdcons where d is the drive letter for the CD-ROM drive.
- A Windows Setup Dialog Box appears. The Windows
Setup Dialog Box describes the Recovery Console option. To confirm the
installation, click Yes.
- Restart the computer. The next time that you
start your computer, "Microsoft Windows Recovery Console"
appears on the startup menu.
To start the Windows
Recovery Console, use one of the following methods:
- Use the Windows Setup floppy disks or the
Windows CD-ROM to start your computer. At the "Welcome to Setup"
screen, press F10 or press 'R" to repair.
- Use the Winnt32.exe utility with the /cmdcons
option to add the Windows Recovery Console to the Windows Startup folder.
This procedure requires approximately 7 megabytes (MB) of hard disk space
on the system partition to hold the Cmdcons folder and files.
Using the Command Console
After you start the Windows
Recovery Console, you receive the following message:
Microsoft Windows(R)
Recovery Console
The Recovery Console
provides system repair and recovery functionality.
Type EXIT to quit the
Recovery Console and restart the computer.
1: C:\WINDOWS
Which Windows Installation
would you like to log on to
(To cancel, press ENTER)?
After you enter the number
for the appropriate Windows installation, Windows will then prompt you to enter
the Administrator account password.
Note: If
you use an incorrect password three times, the Windows Recovery Console quits.
Also, if the Security Accounts Manager (SAM) database is missing or damaged,
you cannot use the Windows Recovery Console because you cannot have correct
authentication. After you enter your password and the Windows Recovery Console
starts, type exit to restart the computer.
When you use Windows XP
Professional, you can set group policies to enable automatic administrative
logon. For additional information about how to set Recovery Console to enable
automatic administrative logon, click the following article number to view the
article in the Microsoft Knowledge Base:
312149 How to enable an administrator to log on
automatically in Recovery Console.
Restrictions and limitations of the Recovery Console
When you use the Windows
Recovery Console, you can use only the following items:
- The root folder
- The %SystemRoot% folder and the subfolders of
the Windows installation that you are currently logged on to
- The Cmdcons folder
- The removable media drives such as the CD-ROM
drive or the DVD-ROM drive
Note: If
you try to obtain access to other folders, you may receive an "Access
Denied" error message. Also, when you are using the Windows Recovery
Console, you cannot copy a file from the local hard disk to a floppy disk.
However, you can copy a file from a floppy disk or from a CD-ROM to a hard
disk, and you can copy a file from one hard disk to another hard disk.
Administrative Password
When accessing the Windows
Recovery Console you are prompted for the Administrative account. The console
should work with any administrative account. If the customer does not know the
Administrative account password they can type in the name of their personal
account (as long as it is an administrator account) and the correct password
for that account.
Available Commands
For a further break down of
the available commands and switches please see Microsoft article 307654.
The following is a list of
commands that can be used in the Recovery Console:
attrib:
Use the attrib command with one or more of the following parameters to change
the attributes of a file or a folder: -R +R -S +S -H +H -C +C
batch: Use
this command to run commands that are specified in a text file.
bootcfg:
Use this command for boot configuration and recovery.
cd: Use
the command to change to a different folder.
chdir:
Same as the cd command. The chdir command works only in the system folders of
the current installation of Windows, in removable media, in the root folder of
any hard disk partition, or in the local installation sources.
chkdsk:
The command checks the specified drive and repairs or recovers the drive if the
drive requires it. The command also
marks any bad sectors and it recovers readable information.
cls: Use
this command to clear the screen.
copy: Use
this command to copy a file.
del: Use
this command to delete a file.
delete:
Same as the del command. The delete command works only in the system folders of
the current Windows installation, in removable media, in the root folder of any
hard disk partition, or in the local installation sources. The delete command
does not accept wildcard characters.
dir: Use
this command to display a list of files and subfolders in a folder.
disable:
Use this command to disable a Windows system service or driver.
diskpart:
Use this command to manage the partitions on your hard disk volumes.
enable:
You can use the command to enable a Windows system service or driver.
exit: Use
the command to quit the Recovery Console and restart your computer.
expand:
Use this command to expand/extract a file.
fixboot: Use
this command to write the new Windows boot sector code on the system partition.
fixmbr:
Use this command to repair the MBR of the boot partition.
format:
Use this command to format the specified drive to the specified file system.
help: Use
this command to get help with the Windows Recovery Console.
listsvc:
The command lists all available services, drivers, and their start types for
the current Windows installation.
logon: The
command lists all detected installations of Windows and then requests the local
administrator password for the copy of Windows that you want to log on to.
map: Use
this command to list drive letters, file system types, partition sizes, and
mappings to physical devices.
md: Use
this command to create new folders. Wildcard characters are not supported.
more: Use
this command to display a text file to the screen.
mkdir: Use
this command to create new folders. Wildcard characters are not supported. The
mkdir command works only in the system folders of the current installation of
Windows, in removable media, in the root folder of any hard disk partition, or
in the local installation sources.
rd: Use
this command to delete a folder. This command works only in the system folders
of the current Windows installation, in removable media, in the root folder of
any hard disk partition, or in the local installation sources.
ren: Use
this command to rename a file. You cannot specify a new drive or path for the
renamed file. These commands work only in the system folders of the current Windows
installation, in removable media, in the root folder of any hard disk
partition, or in the local installation sources.
rename:
Use this command to rename a file. You cannot specify a new drive or path for
the renamed file. These commands work only in the system folders of the current
Windows installation, in removable media, in the root folder of any hard disk
partition, or in the local installation sources.
rmdir: Use
this command to delete a folder. This command works only in the system folders of
the current Windows installation, in removable media, in the root folder of any
hard disk partition, or in the local installation sources.
set: You
can use the set to display or modify four environment options. For additional
information about how to use the set command, click the following article
number to view the article in the Microsoft Knowledge Base: 235364 Description
of the SET command in the Recovery Console
systemroot:
This command sets the current working folder to the %SystemRoot% folder of the
Windows installation that you are currently logged on to.
type: Use
this command to display a text file.
Troubleshooting
Windows XP Using the Recovery Console
How
to recover from a corrupted registry that prevents Windows XP from starting
These steps describe how to
recover a Windows XP system that does not start because of corruption in the
registry. This procedure does not guarantee full recovery of the system to a
previous state; however, you should be able to recover data when you use this
procedure.
Note: The
system hive on OEM installations creates passwords and user accounts that did
not exist previously. Microsoft sates that if you use the procedure that is
described in this article, you may not be able to log back into the recovery
console to restore the original registry hives. Please make sure the customer
is aware of this possibility before proceeding.
When you try to start or
restart your Windows XP-based computer, you may receive one of the following
error messages:
- Windows XP could not start because the following
file is missing or corrupt: \WINDOWS\SYSTEM32\CONFIG\SYSTEM
- Windows XP could not start because the following
file is missing or corrupt: \WINDOWS\SYSTEM32\CONFIG\SOFTWARE
- Stop: c0000218 {Registry File Failure} The
registry cannot load the hive (file): \SystemRoot\System32\Config\SOFTWARE
or its log or alternate
The procedure that this
article describes uses Recovery Console and System Restore. This article also
lists all the required steps in specific order to make sure that the process is
fully completed. When you finish this procedure, the system returns to a state
very close to the state before the problem occurred. If you have ever run
NTBackup and completed a system state backup, you do not have to follow the
procedures in parts two and three. You can go to part four.
Note: Due
the long length of this article please review the rest of it on Microsoft’s
Knowledge Base. The article is 307545.
How to
start the Windows XP uninstallation process from a command prompt
These steps describe how to
start the Windows XP uninstallation process when you are unable to start your
Windows XP-based computer typically or in Safe mode.
Windows XP includes the
Uninstall Windows XP option in the Add/Remove Programs tool in Control Panel if
you upgraded from Microsoft Windows 98, Microsoft Windows 98 Second Edition, or
Microsoft Windows Millennium Edition (Me). You can use this option to restore
your previous version of Windows. To uninstall Windows XP when you are unable
to start your Windows XP-based computer typically or in Safe mode, manually
start the uninstallation process:
- Start your computer to Safe Mode with Command
Prompt. Note: You must log on
as an administrator or a user that has administrator rights.
- At the command prompt, type cd\, and then press
ENTER.
- Type cd\windows\system32, and then press ENTER.
- Type osuninst.exe, and then press ENTER.
- Follow the instructions on the screen to begin
uninstalling Windows XP from your computer to restore the previous
operating system.
Features
and Benefits
Windows XP Professional gives you all the
benefits of Windows XP Home Edition, plus additional remote access, security,
performance, manageability and multi-lingual features that make it the
operating system of choice for businesses of all sizes and people who demand
the most out of their computing experience.
Key: ![]() = Feature included
= Feature included ![]() = Feature
not included
= Feature
not included
|
Features |
Windows XP |
Windows XP |
|
All the
features of Windows XP Home Edition |
||
|
§
New
user interface -
makes it easy to find what you need when you need it. §
A
reliable foundation you can count on – keeps your computer up and running when you need it
most. §
Windows
Media Player for Windows XP - single place for finding, playing, organizing, &
storing digital media. §
Network
Setup Wizard -
easily connect & share the computers and devices in your home. §
Windows
Messenger – the
ultimate communications & collaboration tool with instant messaging,
voice and video conferencing, and application sharing. §
Help
& Support Center
- easy to recover from problems and get help and support when you need it. |
|
|
|
Premier
mobile support, providing access to information while you're on the go |
||
|
Advanced
laptop support (incl. ClearType support, DualView, power management
improvements) - so
you get as much work done while you are on the road as while you are in the
office. |
|
|
|
Wireless
connections -
automatic 802.1x wireless network configuration. |
|
|
|
Remote
Desktop – remotely
access your Windows XP Professional PC, from another Windows PC, so you can
work with all of your data and applications while away from your office. |
|
|
|
Offline
Files and Folders
- access to files & folders on a network share when disconnected from the
server. |
|
|
|
Highly
responsive with the power to work on multiple tasks at once |
||
|
Fast
start-up & power management improvements - faster boot and resume times. |
|
|
|
Multitasking - allow multiple applications to
run simultaneously. |
|
|
|
Scalable
processor support
– up to two-way multi-processor support. |
|
|
|
Keeps
your data secure and maintains your privacy |
||
|
Internet
Connection Firewall
- automatically shields your PC from unauthorized access when you're on the
Internet. |
|
|
|
Internet
Explorer 6 privacy support - maintain control over your personal information when visiting Web
sites. |
|
|
|
Encrypting
File System -
protects sensitive data in files that are stored on disk using the NTFS file
system. |
|
|
|
Access
Control – restrict
access to selected files, applications, and other resources. |
|
|
|
Designed
to work with Microsoft Windows Servers and management solutions |
||
|
Centralized
administration -
join Windows XP Professional systems to a Windows Server domain to take
advantage of the full range of powerful management and security tools. |
|
|
|
Group
Policy -
simplifies the administration of groups of users or computers. |
|
|
|
Software
Installation and Maintenance – automatically install, configure, repair, or remove
software applications. |
|
|
|
Roaming
User Profiles -
access to all your documents and settings no matter where you log on. |
|
|
|
Remote
Installation Service (RIS) – support for remote operating system installations where desktops
can be installed across the network. |
|
|
|
Communicate
efficiently with others around the world |
||
|
Single
Worldwide Binary -
enter text in any language and run any language version of Win32 applications
on any language version of Windows XP. |
|
|
|
Multi-lingual
User Interface (MUI) add-on - change the user interface language to get localized
dialog boxes, menus, help files, dictionaries, and proofing tools etc. |
|
|