|
1. Open a new image, 150x95. 2. Make sure you canvas is white; now we can start applying the filters for the effect. |
|
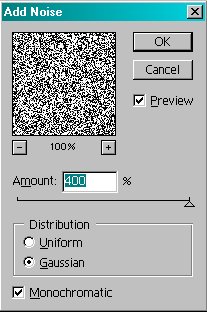 |
3. Filter>Noise>Add Noise� Amount � 400% Check the Distrabution to Gaussian. Check the Monochromatic box. Your settings should now match the ones pictured to the left. The image should look like what is pictured in the preview box. |
 |
4. Filter>Blur>Motion Blur� Angle: 90 degrees. Distance: 999 pixels. Your settings should now match the ones pictured to the left. The image should look like what is pictured in the preview box. |
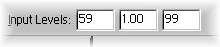 |
5. Image>Adjust>Levels� Input levels: 59, 1.00, 99 You may have to adjust the input levels further to create desired effect. Your settings should now match the ones pictured to the left. |
 |
6. Hit the �D� key on your keyboard. This will set your foreground color and background color to black and white. Now select the Rectangular Marquee Tool.  7. Hit �ctrl+A� on your keyboard to select the whole image. Now with your Marquee Tool, hold the �alt� key on your keyboard and you will see a �-� appear next to your cursor. This means it is going to take away from the selected area. Holding the �alt� key, make a selection on the inside of the image like what is pictured to the left. As you can see, holding �alt� took away from the entire selection, leaving only a boarder selected. |
 |
8. Now hold the �shift� key on your keyboard and you will see a �+� appear next to your cursor. This means it is going to add to the selected area. Holding the �shift� key, make a selection on the bottom of the image like what is pictured to the left. |
 |
9. Hit �delete� on your keyboard to get rid of the selected area, turning it white. Then hit �ctrl+D� on your keyboard to de-select the image, leaving you with what is pictured to the left. |
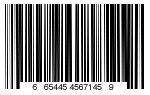 |
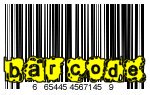
10. Now just add some numbers (font: Arial, size: 4) like pictured to the left to get your finished product. |