
|
1. Open a new image, 225x150. 2. Make sure you canvas is white; now we can start applying the filters for the effect. |
|
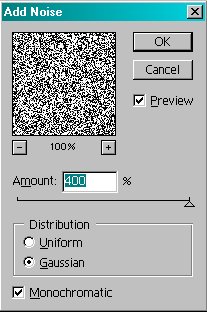 |
3. Filter>Noise>Add Noise� Amount � 400% Check the Distrabution to Gaussian. Check the Monochromatic box. Your settings should now match the ones pictured to the left. The image should look like what is pictured in the preview box. |
 |
4. Filter>Pixelate>Mosaic� Cell size: 13 Your image should now look something like pictured to the left. |
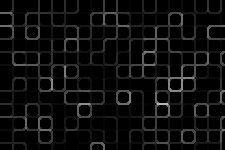 |
5. Filter>Stylize>Glowing Edges� Edge Width: 2 Edge Brightness: 8 Smoothness: 5 Your image should now look something like pictured to the left. |
 |
6. To change the color to any hue you want: Image>Adjust>Hue/Saturation� Check the Colorize box. Adjust the settings until you�re happy. For the final product pictured to the left: Hue: 41 Saturation: 76 Lightness: 0 |