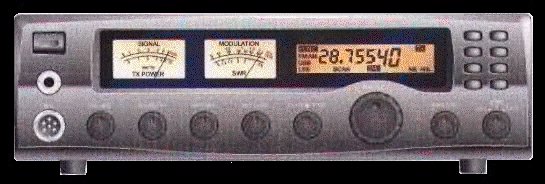
| Eagle Tomahawk |
 |
| Channel Modification |
| ** Note ** There are two different board designs. So there are two different channel mods. |
| Old Model |
| 1) Remove top cover. 2) Behind the number pad there are 2 black jumpers on a small board. 3) Move both of them from pin 1&2 to 2&3. 4) Find another jumper spot behind the channel display. If there is no jumper there then you can either put one there or solder the 2 pins together. 5) Close up the radio and turn on. 6) Use the #1 button to change bands. |
| New Model |
| 1) Remove the top cover 2) Locate the main CPU chip on the back side of the display. 3) Just below this chip, there is a diode next to the Calibration/SWR control pot. (Pic 1) 4) Clip the banded end of the diode. (Do not remove! The heat from a soldering iron could damage the components around it.) 5) Locate 3 sets of empty pads just left of the main CPU chip. (Pic 2) 6) Take a small tiped flat blade screwdriver and touch each set for a couple of seconds. This resets the CPU. 7) Re-assemble the radio |
| When you first turn on the radio, it will display 29.300 FM mode. To get the extra bands, press the "FUNC" button once, then press and hold the "2" button in for about 2 seconds till it says "09" band F. You may keep it on this mode if you like. This is the channel mode. You can toggle the bands (A,B,C,D,E,F,G,H,I) by pressing the "2" button each time. If you want to display the frequency, then press "FUNC" button once, then "2" once. It will now display the frequency and band. Each time you power down the radio, then back up, you will need to do this for the extra bands. You may remove Q29 which is the modulation limiter. |
| RV1 RF Power Meter adjust RV2 Squelch Level adjust RV4 AM Carrier adjust RV5 Modulation adjust RV7 Modulation Meter adjust RV11 13.8 Volt RV12 S-Meter Adjust Both AM and SSB. RV14 SSB ALC adjustment. RV50 Clarifer Center adjust |
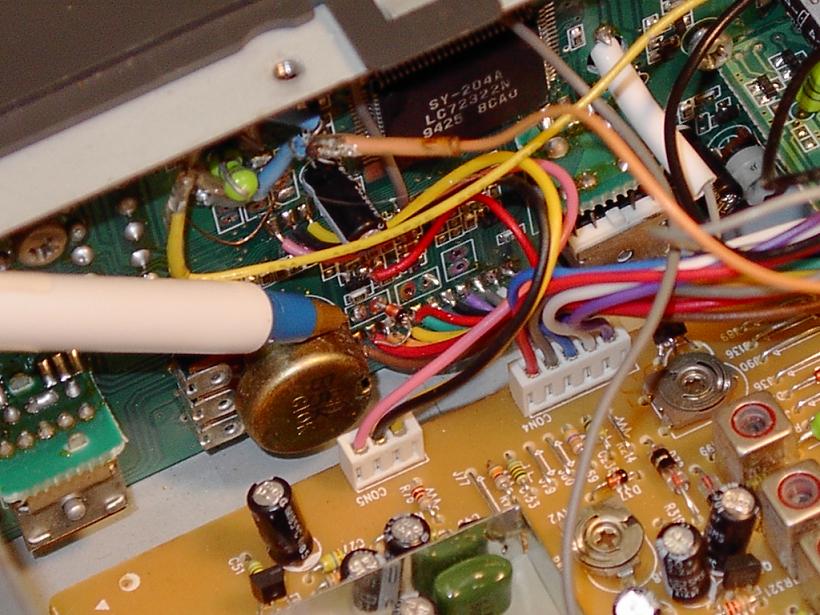 |
| Pic 1 |
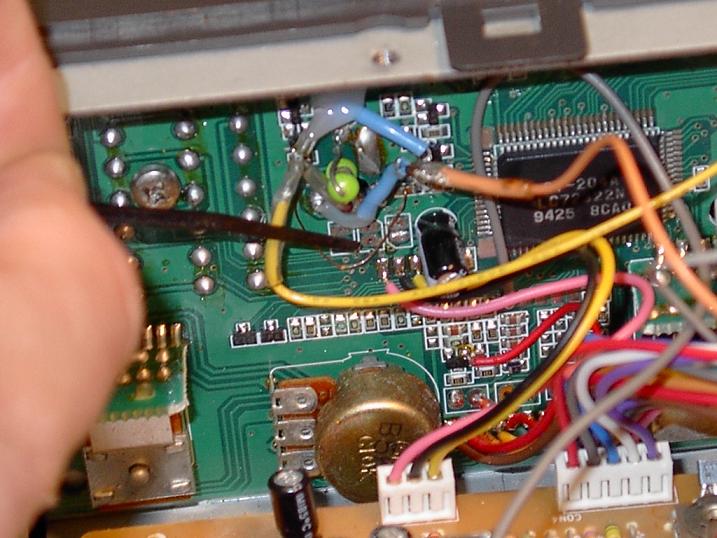 |
| Pic 2 |
 |