| Items/Key Items |
| Click on a picture to enlarge it, click on a name to read the bio. |
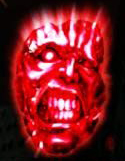 |
| Red Orb |
| A magic red stone of crystallized demon blood. Red orbs are most often obtained by defeating enemies. They can also be found by smashing furniture, or they may fall out of thin areas where Dante lands on certain hard-to-reach surfaces. Sometimes Red Orbs are scattered around an area, waiting for Dante to collect them. Spend Red Orbs to upgrade the firepower of weapons and to purchase new actions for Devil's Arms. Items such as Vital Stars and Devil Stars can also be purchased with Red Orbs. The number or Red Orbs collected during a mission is a criterion for ranking. |
| Orbs |
| Orbs are most often found when dropped by defeated enemies. They are sometimes uncovered by smashing furniture or objects, and sometimes they float high up in a room, just out of sight. When Dante moves near orbs, they naturally gravitate towards him. If Dante doesn't absorb orbs soon after a defeated enemy releases them, the orbs may disappear. Any orb with a Red Orb Price can be purchased from the shop menu. Each orb purchase costs more than the last to cap out at a set max price. |
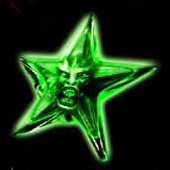
| Green Orb |
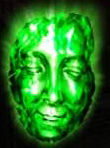 |
| A magic green stone of crystallized demon essence. When Dante absorbs a Green Orb, his life is restored. Defeated enemies sometimes drop Green Orbs, but only if Dante's life gauge is partially empty and the combo meter is a high level when the enemy dies. Green Orbs are sometimes found by breaking enviromental objects to reveal them. |
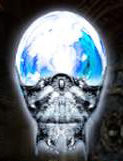
| White Orb |
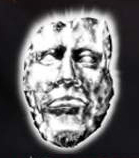 |
| A magic white stone of crystallized devilspirit. When Dante absorbs a White Orb, power is replenished in the Devil Trigger gauge. White Orbs are located in rare spots on the map. |
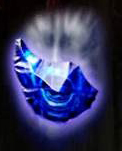
| Blue Orb |
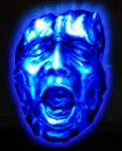 |
| A magic blue stone of crystallized life power. It boosts one's maximum life. Each Blue Orb extends Dante's life meter by one segment, allowing him to sustain more damage before dying. Blue Orbs can be obtained by collecting four Blue Orb Fragments. Each Blue Orb purchased costs more than the last. |
| Blue Orb Fragment |
 |
| A fragment of crystallized life force. Four of these combine to form one Blue Orb. Blue Orb Fragments are found on the map occasionally. However, they are usually obtained by performing great feats of skill, such as completing a Secret Mission or breaking a Combo Adjudicator statue by raising the combo level high enough. Once all the Blue Orb Fragments available in the game have been found, the only way to increase life is to purchase Blue Orbs through the shop menu. |
| 1st 2nd 3rd 4th 5th 6th 5,000 10,000 15,000 20,000 30,000 50,000 |
| Purple Orb |
| Purple Orbs can only be purchased through the shop menu. Each Purple Orb extends Dante's Devil Trigger gauge by one segment. The longer the Devil Trigger gauge extends, the longer Dante in remain in Devil Trigger mode. |
| 1st 2nd 3rd 4th 5th 6th 7th 3,000 5,000 7,000 9,000 10,000 20,000 30,000 |
| Yellow Orb |
| Yellow Orbs allow Dante to continue if killed during a mission, without having to restart the mission from the beginning. Yellow Orbs are sometimes found on the map, and they can also be purchased from the shop menu by spending Red Orbs. Only three Yellow Orbs can be purchased during the course of an entire game, however you can hold up to 99. |
| 1st 2nd 3rd 10,000 15,000 20,000 |
| Vital Star S |
| Items |
| Items can be used during the game to recover health, recharge Devil Trigger power, or to wipe out enemies in a radius around Dante. Items are found in some locations, and they can also be purchased from the shop menu. The player can only purchase a set number of items during the course of the game and then no more. Each item purchased costs more than the last to a set max cost. To use an item during the game, press the Up Directional Button to access the Quick Item Menu. |
 |
| A spiritual stone made using alchemy. A Vital Star S restores a small amount of life. Vital Star S's can be found in some locations or purchased through the shop menu. |
| 1st 2nd 3rd 4th 5th 6th 7th 500 750 1,200 1,800 2,500 3,500 5,000 |
| Vital Star L |
 |
| A spiritual stone using alchemy. Restores a large amount of life. Vital Star L's can be found in a few places or purchased through the shop menu. |
| 1st 2nd 3rd 4th 5th 6th 2,000 3,000 4,500 6,000 7,500 10,000 |
| Devil Star |
 |
| A spiritual stone using alchemy that restores a large amount of magic power. Devil Stars can be found at certain locations, or purchased through the shop menu. |
| 1st 2nd 3rd 4th 5th 3,000 5,000 7,000 9,000 10,000 |
| Holy Water |
 |
| Fends off demons and severely damages enemies. It's found in rare locations, or purchased through the shop menu. Reserve these for use in extreme crisis situations. |
| 1st 2nd 3rd 4th 5th 10,000 15,000 20,000 25,000 30,000 |
| Key Items |
| The following is a list of items used to unlock doors or unseal areasm so that the player may proceed further in the game. Each item bears its in-gam description, where it is found and where it is used. |
| Amulet |
| Astronomical Board |
| A keepsake amulet from Dante's birth-mother. It possesses mysterious power. Where Found: Dante carries this keepsake at all times. |
| Model of an ancient weapon used to control lightning. This is merely an ornament. Where Found: Incandescant Space, in the section behind the bars. Where Used: Chamber of Echoes, the clock mechanism at the top of the area. |
| Vajura |
| Model of an ancient wepaon used to control lightning. This is merely an ornament. Where Found: Chamber of Echoes, in the area sealed in by stone walls. Requires the astronomical Board be put in place. Where Used: Living Statue Room, inserted into the winch on the second level. Raises the steel cage surrounding the Soul of Steel. |
| Soul of Steel |
| The essence of a powerful and fearless soul. Its possessor need not fear Hell no oblivion. Where Found: Living Stauue Room, under the cage. Requires usage of the Vajura. Where Used: Endless Infernum, aloows Dante to walk across the chasm without falling to the level below. |
| Essence of Fighting |
| The fighting spirit of the ancient ones. Offer this to the goddess to open a new path. Where Found: Trial of the Warrior, defeat all the near-invincible enemies by activating the two striking dials simultaneously. Where Used: Mute Goddess' Chamber, one of the three objects set in to the central statue to unseal the east door and obtain Artemis. |
| Essence of Technique |
| Masterful techniques of the ancient ones. Offer this to the goddess to open a new path. Where Found: Trial of Skill, move through the chamber of skewers to the end. Where Used: Mute Goddess' Chamber, one of the three objects set in to the central statue to unseal the east door and obtain Artemis. |
| Essence of Intelligence |
| Impalpable knowledge of the ancient ones. Offer this to the goddess to open a new path. Where Found: Trial of Wisdom, go through the doors marked with four red stones, then the one with two red stones, the the one with three red stones. Where Used: Mute Goddess' Chamber, one of the three objects set in to the central statue to unseal the east door and obtain Artemis. |
| Orihalcon Fragment |
| A piece of Orihalcon which grants amazing power. They say it was used as an energy source. Where Found: The Divine Library, on the ground under a Damned Pawn. Where Used: Lift Room, set into the machinery at the top of the room to power the lift. |
| Siren's Shriek |
| The sorrowful skriek of the siren. Calms even the most ferocious of flames. Where Found: Tranquil Souls Room, defeat all of the enemies and the object falls onto the altar. Where Used: Chamber of Echoes, removes the flame seal from the lowest door in the area. |
| An eerie sculpture made of magic crystal. It seems to be a piece of a larger creation. Where Found: Cursed Skull Chamber, lower and smash the large ball. Where Used: Skull Spire, unseals the door at the end of the corridor. |
| Crystal Skull |
| Ignis Fatuus |
| Souls of those sent to hell for various sins. They are Leviathan's energy source. Where Found: Leviathan's Retina, kill enemies in the chamber until the central device absorbs enough souls to create the object. Where Used: Heartcore Chamber, removes the membrane protecting the Heart of Leviathan. |
| Ambrosia |
| Fruit that mankind is forbissen to even touch. It is said to unlock the door to paradise. Where Found: Provisions Storeroom (2nd). Where Used: Limestone Cavern, unseals the door to the Sunken Opera House. |
| Stone Mask |
| A mask of magic stone made by ancient priest. It is said he who dons it can part rivers. Where Found: Limestone Cavern, the ledge outside the Sunken Opera House. Where Used: Subterranean Lake, raises the bridge connecting to the central platform. |
| Neo-Generator |
| A magic artifact able to supply power for an eternity. It is used to power the main bridge. Where Found: Subterranean Lake, central platform, requires placement of Stone Mask. Where Used: Rotating Bridge room, one of the two generators that rotates the bridges that allows access to the areas of the Forbidden Land. |
| Haywire Neo-Generator |
| He who holds this broken device is irradicated and their soul is drained in exchange for power. Where Found: Torture Chamber, after the Beowulf boss fight. Where Used: Rotating Bridge room, one of the two generators that rotates the bridges that allows access to new areas of the Forbidden Land. |
| Orihalcon |
| A perfectly formed piece of Orihalcon. Said to open the door to the open Lair of Judgement. Where Found: Vestibule, in the side passage, after solving the light crystal puzzle. Where Used: Obsidian Path, unlocks the door to the Lair of Judgement. |
| Orihalcon Fragment |
| A mysterious stone used as a power source. It is one fragment that must be made whole to use. Where Found: Altar of Evil Pathway, post-transformation. Where Used: One of three fragments required to use the lift in the Devilsprout Lift room. |
| Orihalcon Fragment |
| A mysterious stone used as a power source. It is one fragment that must be made whole to use. Where Found: Provisions Storeroom (2nd). Where Used: One of three fragments required to use the lift in the Devilsprout Lift room. |
| Orihalcon Fragment |
| A mysterious stone used as a power source. It is one fragment that must be made whole to use. Where Found: Top Subterria Lack. Where Used: One of three fragments required to use the lift in the Devilsprout Lift room. |
| Golden Sun |
| A sculpture etched in the shape of a golden sun. It contrasts the onyx moonshard sculpture. Where Found: Walking Sun Chamber, in the area revealed after destroying the giant hanging ball. Where Used: One of the two items required to unseal the south door in the Sun & Moon Chamber |
| Onyx Moonshard |
| Samsara |
| A sculpture etched in the shape of the onyx moon. It contrasts the golden sun sculpture. Where Found: Chamber of Sins, post-transformation. Must lower the two giant balls and force them to colide to obtain the item. Where Used: One of the two items required to unseal the south door in the Sun & Moon Chamber. |
| Sculpture symbolizing the time-space continuum. Used to restore order ro time-space rifts. Where Found: Infinity Nirvana, must defeat the enemies before the time in the central hourglass runs out. Where Used: Nirvana of Illusions, set the golden goddess statue. |