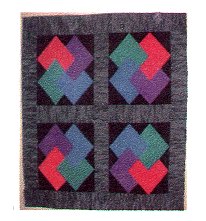
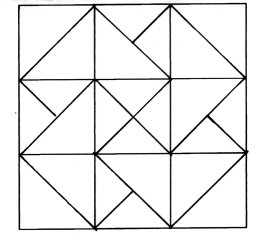
Lessons for the Card Trick Quilt
Materials
1/4 yard of 4 different fabrics (for cards)
3/8 yard for background for 4 blocks
1/2 yard for shashing
1/4 yard for binding
1 square yard of batting and material for the back of the quilt
Unit 1
- Cut one strip of each of the 4 colors for the cards 6"x45"
- Cut 2 strips of background fabric 6"x45"
- Cut two 6" squares of each of the 4 colors (8 squares)
- Cut eight 6" squares of the background fabric
- Place one colored square with one background square, right sides together
- Draw one line from corner to opposite corner
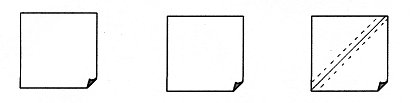
- Sew 1/4 inch seam on each side of drawn line
- Cut on the line you drew
- Press, Open and Press
- Using 4 1/2 inch square, trim the units making sure you have the points of the square on the seam line
Unit 2
- Take one 6" square of each color (1-4) and 4 background 6" squares
- Put the right sides together
- Draw lines across from corner to corner

- Now start sewing on the LEFT side of the drawn line 1/4, down to the midpoint where the lines cross, pivot, and stitch along the line for about 5 or 6 stiches, pivot and now sew down the RIGHT side of the line
- Repeat for each square
- Repeat on the other line
- Cut on the lines you drew
- DO NOT PRESS with iron at this point, finger press open
- Next, take two 6" squares of each color 1-4 and cut on the diagonal
- Now you will start laying out your units, do not sew 3 triangle units together until you have laid them out and like your color arrangement
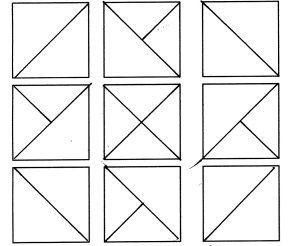
- Once you have laid them out, then you can sew the large triangle to the units of the two small triangles
- Trim each unit, lining up 3 points on your square, on seam lines
Unit 3
- Take one 6" square of each color #1 and #2, place right sides together
- Place color #2 on top, draw two lines from corner to corner, and sew as you did unit #2
- Cut on the draw lines, DO NOT PRESS WITH IRON, only finger press at this point
- Take colors #3 and #4, place color #4 on top, draw lines from corner to corner and sew as you did unit #2
- Cut on the lines you drew
- Take one unit of colors #1 and #2 and one unit of colors #3 and #4 and sew together
- Press open, and trim, matching all 4 corners of your square to the 4 seam lines
- Place in the center of your block
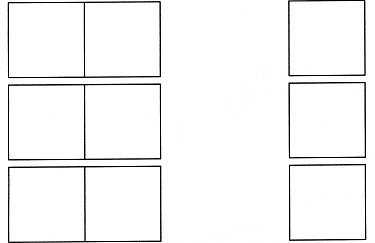
Sewing Units Into Blocks
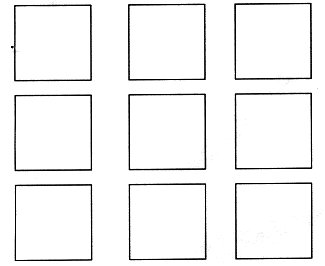
- Lay out units into block in 3 rows
- Turn unit #2 onto unit #1, just like turning the pages of a book, do NOT twist as your turn
- turn unit #5 onto unit #4
- turn unit #8 onto unit #7
- pick up units 1 and 2 and sew on the right side, do not cut threads
- pick up units 4 and 5 and feed them in right behind the first units, and sew on the right side
- pick up units 7 and 8 and feed them in right behind the first two sets of units
- Now you can cut the threads
- Open the units, take unit #3 and sew it to the right side of unit #2
- sew unit #6 to the right side of unit #5
- sew unit #9 to the right side of unit #8
- fold row one down onto row 2, sew across matching up opposing seams
- Press finished block
Have fun! Good luck!!
Return to Quilt Tips Page