November 22, 2004
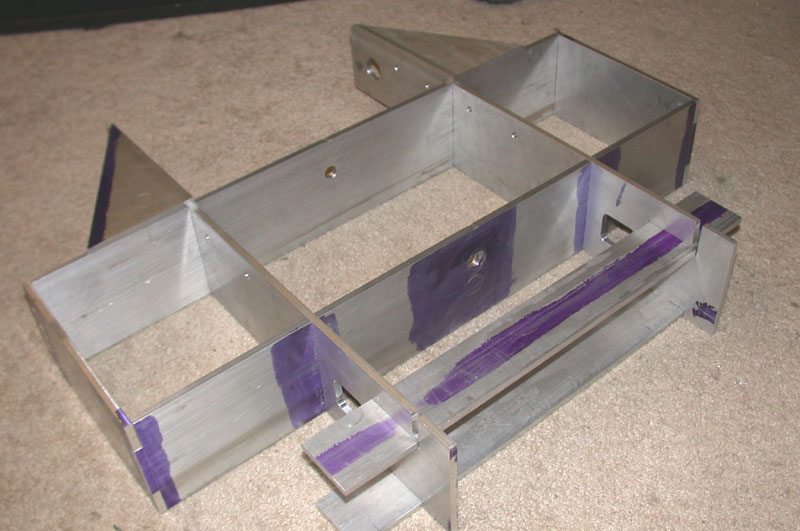
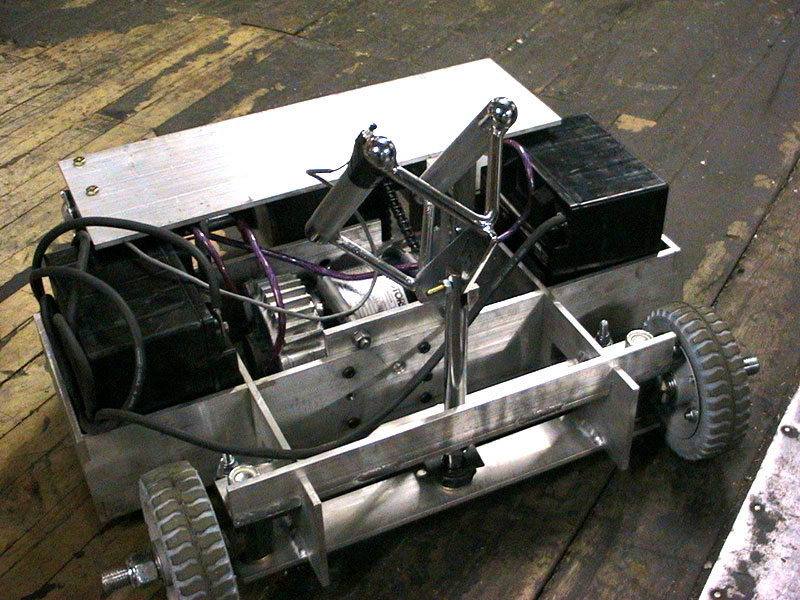
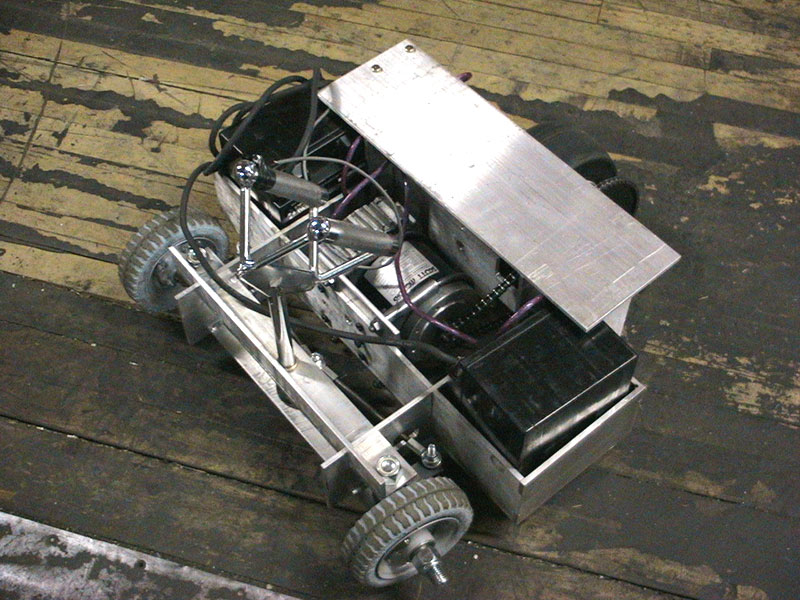
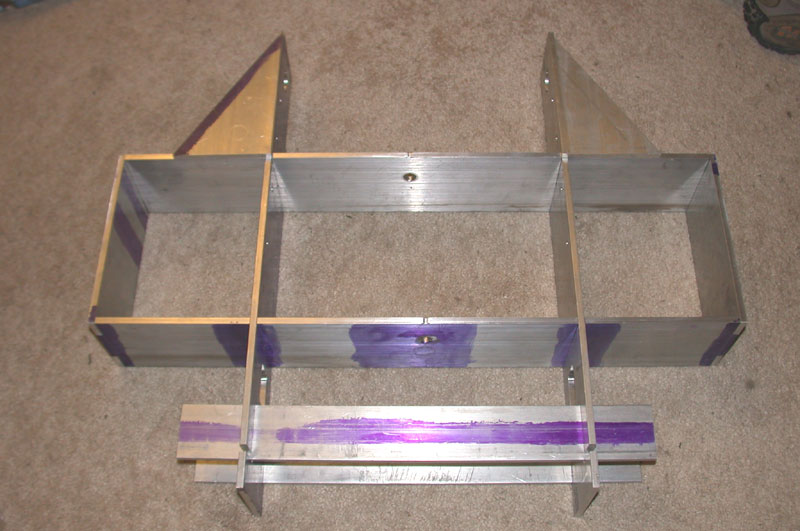
Begin with the frame of course. This project was also to help teach me how to use the Bridgeport at work. I was able to scrounge the aluminum from failed prototypes at work as well, so total cost was really low.

I had originally planned on using my old spindles which I had bought
from Northern Tool. When I did the design the old kart was in NH, and
I was still in NY. So I assumed some facts about them that were apparently
untrue. I thought they had a 3/4" pivot bolt, and I thought the axle
and steering arm were in different positions.
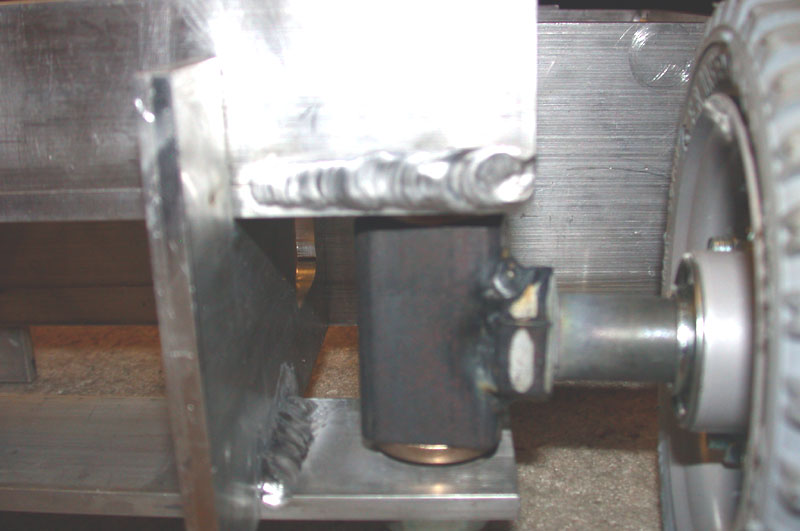
My solution was simply to make up these new ones. I used square tube and
pushed bronze bushings into it for smooth pivot action. The square tube
makes welding the spindle bolt on super easy, as well as the steering
arm. The tube was 1-1/4 outside square tube, with an 1/8 wall if anyone
wants to make their own. A 3/4" ID 1" OD flanged oillite fits
perfect after the edge is deburred.
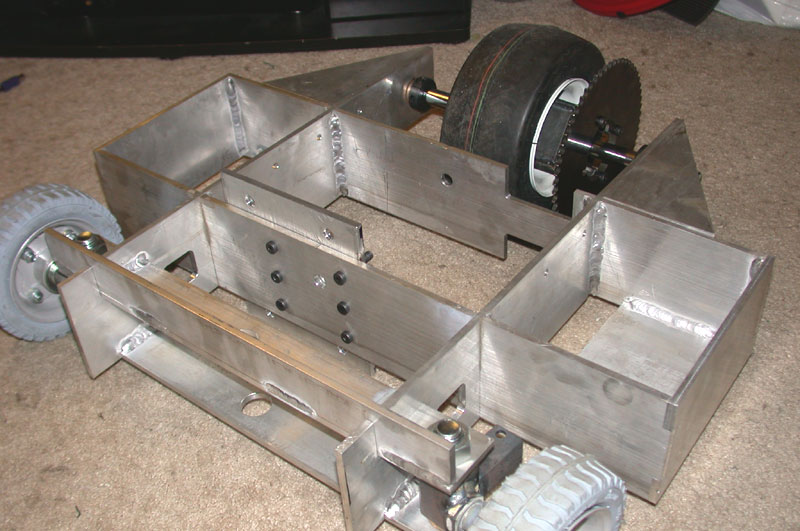
Welding aluminum is interesting. The machine that Rob has is not really the "recommended" amperage for this type of thing, but I think I was able to get adequate penetration. This combined with hopefully good joint design will help keep everything together.
There are a bunch of steps missing from the last pic to the video below.
The charger for the regular camera isn't cooperating with us, so I couldn't
take any more shots.
In a nutshell I keyed the Scott motor short shaft. It's not that hard
to do, it's relatively soft metal, and cuts easy with a 4 flute mill.
I took the can and the front plate off the motor, leaving the brushes
and rear end still attached to the arm. I wrapped the comm and all the
windings in a shop rag, and left the shaft sticking out. You can cut really
close to the bearing this way. The keyway length is plenty, in fact you
can easily key past where you can even use the shaft cause of the way
the front plate sticks out.
The steering is pretty simple, just a straight rod down through the two
steering support plates. One of the guys at work dug out this ultra cool
handle used in some sort of exercise machine. Thanks Mark! It looks like
one of those "mini" racing wheels in a weird sort of way. When
I fix up the camera charger I'll be sure and get some shots.
I was able to rig up some temporary wiring and a temp seat, and took it
for a spin. Initial tests on 12v seemed cool, if not a little slower than
I expected. Bumping up to 24v was interesting. Steering at this speed
currently falls into the "delicate" category. A couple wheelie
wheels and a solid seat that's a little further back will help a lot.
An example of this "delicate" steering is shown below, as after
being impacted in the tender regions by the steering wheel (seat was a
bit too close), I manage to loose control of the "yaw" axis
and crash into the shop kart. The "critical" hit does not occur
on impact, which was relatively minor in the grand scheme of things. The
good news is that it does not show the tremendous one wheel wheelie tendency
that the last one possessed. More pics and progress available soon, till
then enjoy the vid!
http://www.geocities.com/kokop76/kart/new_kart_test_1.wmv
November 24, 2004
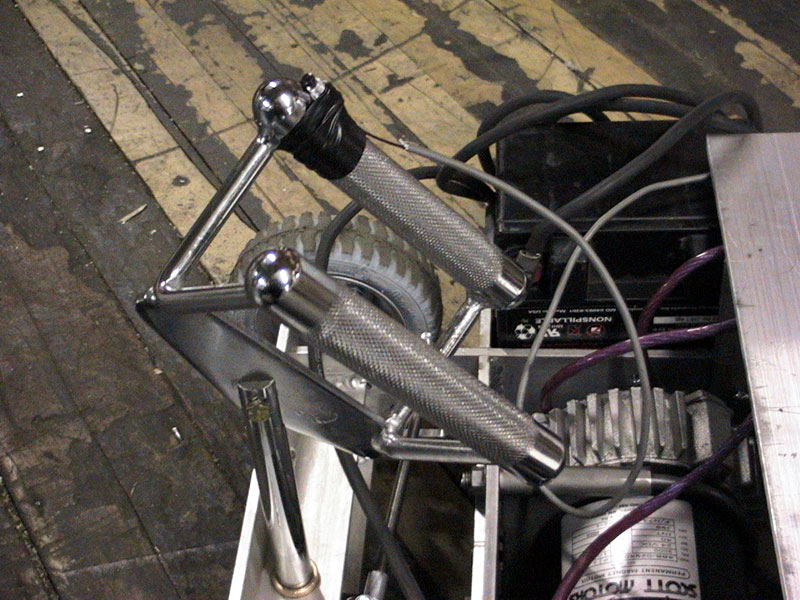
Well, Kirstin's camera charger is still not fixed, but I was able to use my camcorder to snap a couple shots. After an hour sifting through various boxes to find the propper cable, I was able to get them off the camera. This is the steering wheel, as I mentioned before, it's some kind of excercise handle. The tiny size makes for some tricky steering. A little editing to the steering arm and I was in decent shape.