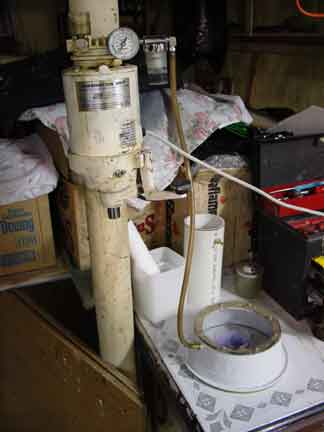
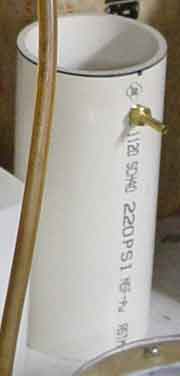
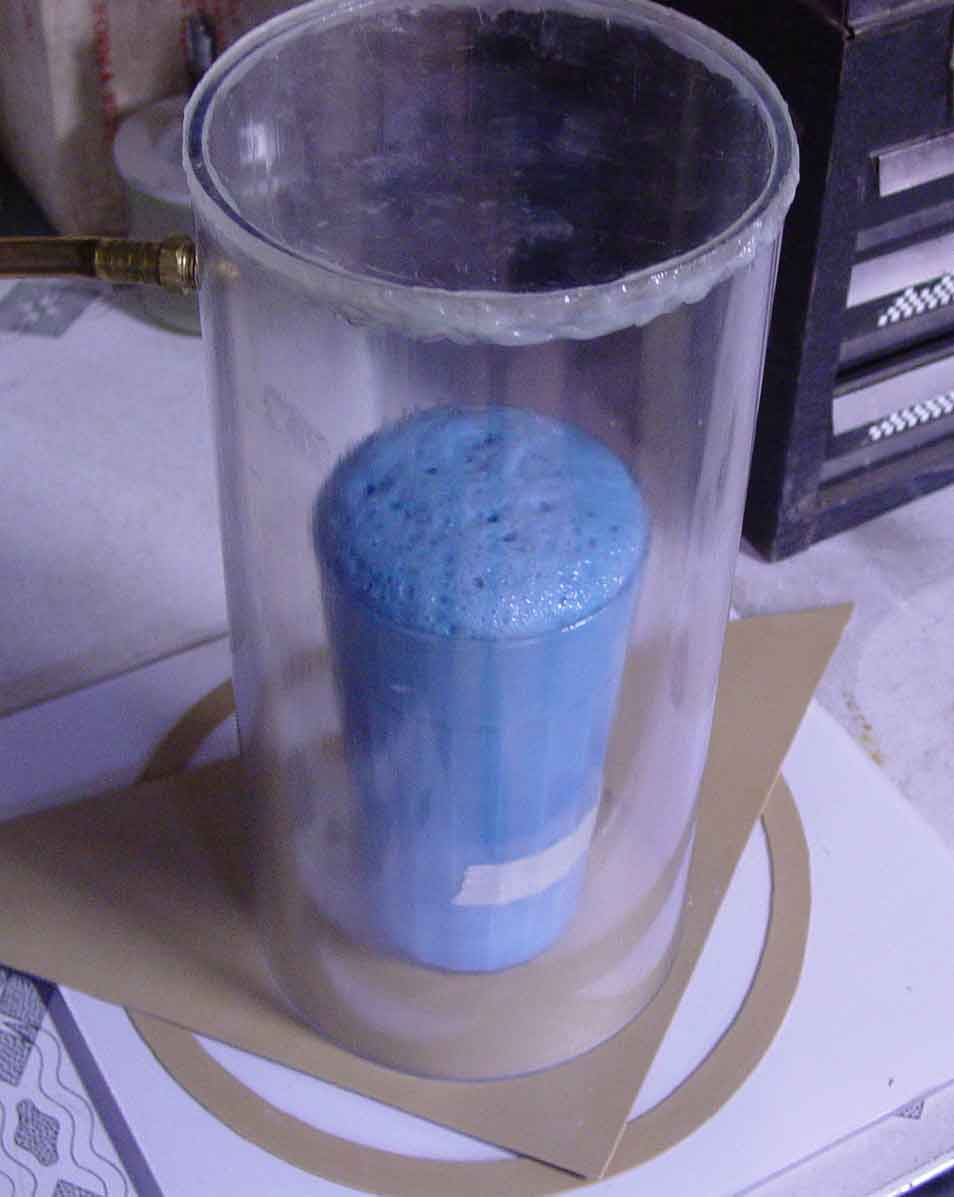
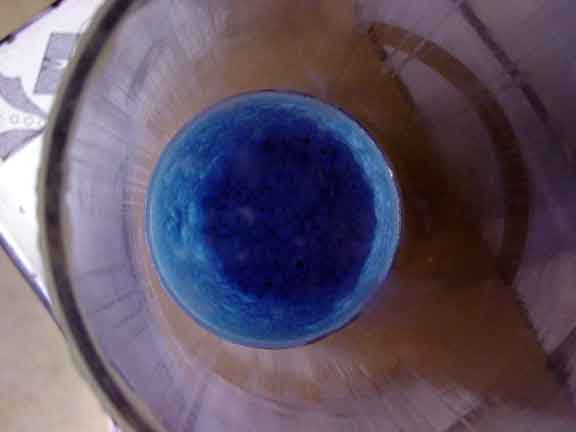
There are two types of chamber you'll need, a tall one and a short one. Silicone under vacuum expands to 3/4 the size of the original volume, as the trapped air bubbles struggle to the surface. The tall chamber can be used to vacuum after mixing ( before pouring into your mold box ). The mold box can then be placed in the short chamber and vacuumed again. The tall chamber is easy enough to make from 4 inch PVC pipe that you can get at Home Depot or Lowe's, etc. This is cheap (around $10.00), and the 4 inch inside diameter is just wide enough to fit a 32 ounce glass (Walmart - $0.97). The only problem I had is that I bought 10 feet! Someone ahead of me asked to have it cut, and they told him no, so I didn't bother to ask. (However, I've been told by others that they have cut a foot length off themselves and taken it to the cashier with no problems. The bar code is on the PVC every 1'; all they have to do is scan and measure.) You can also use a larger ( 6 to 8 inch outside diameter ) polycarbonate tube from McMaster-Carr, but the larger sizes aren't really necessary. I'll explain why on the mixing page. Small quantites can be mixed up in the short chamber - just be sure to turn off the vacuum before the froth hits the lid and makes a mess! The guide below shows how I made the short chamber.
|
 |
 |
 |
 |
| tall chamber |
short chamber |
expanded |
collapsed (top view) |
|
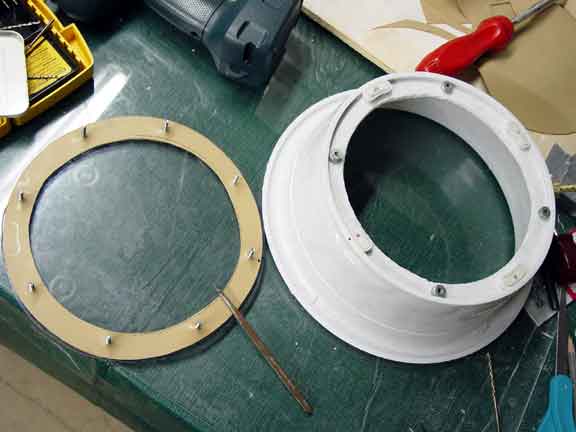
The short chamber is actually made from a pet dish I bought at Petsmart for about $6.00. It's made of a PVC type of material, and is strong enough to withstand the pressure from my pump. (29 inches of mercury)
|

|
| click the pic for a closer look ( - has manufacturer's website ) |
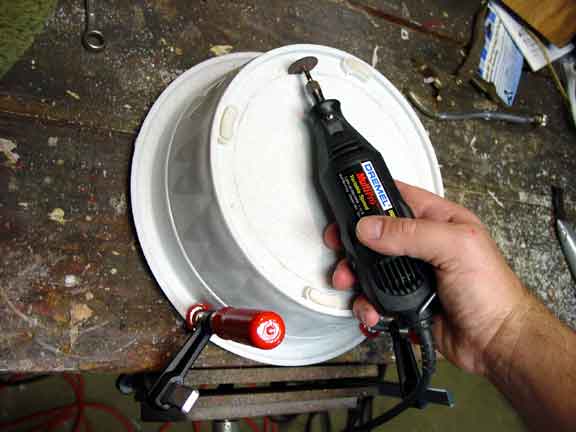
Since it's important to see what goes on inside, we need to remove the bottom of the bowl and replace it with a sheet of clear polycarbonate from McMaster-Carr (listed below). Attach securely to workbench and use a tool such as a dremel with a cutting wheel. Be sure to wear goggles! (Note - you'll also need to trace the diameter of the bowl on the sheet of poly, and then cut with a jig saw. You'll need to cut slowly and take short brakes to let the blade cool. Otherwise, it will melt and gum up the blade.)
|
 |
| The bottom of the bowl has a lip that extends, and four rubber feet. Remove the feet and slice with a razer blade until they are roughly even with the lips edge. Then drill a hole thru the PVC in the middle where the foot attaches (square hole between 2 round holes). Replace the foot, and then place a pic or punch thru the rubber (Even on slow speed, rubber doesn't drill well - just tends to wrap around the bit!) Then you need to drill 4 more holes at equal distance between the feet. Six washer will go between the bottom of the dish and the poly sheet. |
 |
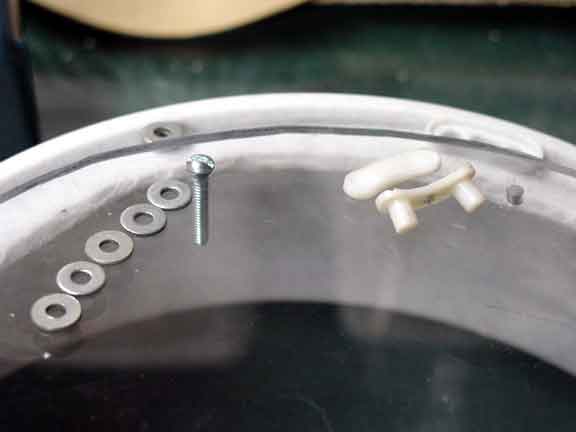 |
| Next you'll need to trace the outside and inside diameters of the bowl's bottom onto a sheet of natural gum rubber which we will use for our gasket (also from McMaster-Carr). Cut the rubber slightly wider than your pattern so that it won't be sucked in and cause a leak when the vacuum is turned on. Then, place the poly sheet without the gasket on the bowl and mark where the holes are with a magic marker. To help you line things up, place an extra dot near one of the holes on both the sheet and the bowl. Drill the holes in the poly sheet, then lay it on top of the gasket and mark where the holes are. Also mark the gasket with a dot for positioning. Take a pic or punch and put holes in the gasket. Then insert the screws through the poly and the lid. Now comes the hard part! Use alittle tacky glue to hold the washers together and in place. Take all the screws out but the one near the extra dot (the others needed a test fit anyway). Carefully fit this screw in place. Use some nails in the other 3 foot holes to line it up, and very carefully push the screws threw the holes with the washers. Gently flip & tighten the nuts evenly - work your way around until they're all snug, and then snug them just alittle more. Again, keep the pressure even, or you'll get a leak when you turn the vacuum on. The last pic below to the right is a big closeup. Look closely and you'll notice there is also a gasket underneath. |
| The table the chamber is on has a metal top, and if I push down on the bowl, the gasket will seal and the vacuum will form inside the chamber. If I use a sheet of polycarbonate underneath, and the bottom gasket, it seals nearly every time with out any need to push down. However, the sheet is only 1/4 inch thick, and will buckle after a minute or two. I don't have a photo of it, but to solve this problem I got a slab of polythylene (different kind of "poly") that's 1 1/2 inches thick. I realise now that one inch or maby 3/4 inch would have been sufficient, but this was only afew dollars more.
|
Pumps
| A chamber without a pump isn't much use. Below are some photos of the pump I use. This is a combination model from whipmix, which can mix under vacuum ( a handy feature for mixing casting material!). To quote Han Solo, "She may not look like much on the outside, but she's got it where it counts!". It was given to me by the head of a dental lab. It had a faulty switch, which I repaired for about $5.00. This model runs over $1000.00 new with all the accessories. Don't give up hope just yet - there are more affordable models which are worth investigating. Now, to have a pump that's useful for degassing (removing bubbles), you need one that can pull 25 to 29 inches of mercury. This is just techno-speak for how vacuum is measured. You can read the paragraph below for a short technical explanation. If you take a look at the pressure gauge below, you'll notice a section marked in green on the lower left. This is where the magic happens. I called McMaster-Carr and asked them about the pumps they carry, since several of them pull from 25 to 27 hg's and run between $200 - $300. The mechanic I spoke with said he couldn't tell me if these were suitable for my application or not as that would take an engineer's perspective, but that practical experience was the best guide, along with consideration of the factors involved, such as the size of the chamber and the type of materials or gases involved. I asked him about their hand-held pumps, which run from $50 - $80, and he said he personally uses these and they work quite well. Again, he couldn't say whether they would work for our application in custom mold making, but they could be worth a try.
|
About Vacuum Pumps
| Designed to "pull" a vacuum, these pumps produce a negative, or below atmospheric, pressure condition in a vessel or tank. Low to medium vacuum is measured in inches of mercury (Hg). High or deep vacuum is measured in microns of mercury (Hg). When measured in inches Hg, the higher the number the better the vacuum; when measured in microns, the lower the number the better the vacuum. Choose a pump that pulls at least the vacuum level you require. The vessel or tank size and how quickly the vacuum level needs to be reached will determine the cfm (flow) the pump will need to generate. To determine, how long (in minutes) it will take to form a vacuum, divide the tank capacity by the cfm of the pump. Forming a vacuum in a large tank will take much longer than in a small tank. (from McMaster-Carr's site, under "Pumping, Vibrating, and Filtering" / "Vacuum Pumps") |
A Word of Caution
| Some pumps have the ability to produce air pressure as well as vacuum. There is a method of degassing known as pressure casting. I DO NO RECOMMEND IT! First, it is more dangerous, as a failure in your chamber will send shrapnel flying your way (an explosion instead of a vacuum implosion). Second, it's much harder to build a chamber to withstand pressure that is pushing it apart than to build a chamber withstanding vacuum pulling it together. |
Resource list & links:
|
McMaster-Carr
|
This site is a great resource where you can find all kinds of useful and affordable materials (look under Raw Materials and Springs in particular). Their service has been top notch!
Here's part numbers of items I found useful:
|
8574 K28 - Polycarbonate sheet, 1/4 " thick, 12" x 12", clear $7.00 |
| 8574 K11 - Polycarbonate sheet, 1/4 " thick, 6" x 6", clear (sample) $1.97 |
| 8633 K52 - Pure Gum Rubber sheet, 1/16th " thick, 12" x 12", 40 A Durometer, tan $2.37 |
8585 K231 - Polycarbonate Hollow Rod, 1/4 " thick, 6" outside diameter, 5 3/4" inside diameter, 12" high, clear $25.95
8581 K37 - Clear Acrylic Disc, 6" Diameter, .236" Thick $5.58
(note - For the large tube, if you need it. The disc was attached with epoxy.)
|
8702 K62 - UHMW Polythylene Rectangular bar, 1/4" thick, 3/4" wide $0.64 per Ft (sold in 5' lengths)
(great for mold box walls) |
8657 K121 - Low-Density Polythylene sheet, 1 1/2" thick, 12" x 12" wide, $18.83
(base for short vacuum chamber) |
| Home Depot: |
| brass fittings - from Amflo 1/4" hose repair kit - you can find these near the air compressors - usually in the "Tool Corral" |
| 1/4" thread tap & 7/16" drill bit to install the fittings |
| teflon thread seal tape to wrap around fitting threads (try it afew times first without it to clean up the threads) |
| poly tubing - 3/8" outside diameter, 1/4" inside diameter. |
| screws - #6-32 x 1" |
|
Hirst Arts Fantasy Architecture
|
| If by some freak accident of nature you've found this guide and haven't been to the above site, then go now! It's how I got interested in casting. Please support Bruce Hirst and buy his molds, and abide by his policies when you do. The purpose of creating a custom mold is NOT to undermine his business! Read his legal statment if you have any questions. Also see his page on mold making. You can learn many secrets of casting & molding by visiting his message board |
| Smooth-On, Inc. |
| Probably the best place to get rubber & resin. They have many trial size samples of materials available. Their guide book, How To Make Molds & Castings (And Live To Tell About It!) is well worth the measly $3.00 price. |
Similar guides: