Bueno, convendría
que os leyerais esta sección si nunca habéis jugado antes a diablo II (cosa que
extrañaría mucho). Aquí os intentaremos dar una breve introducción a lo que són
los elementos que más utilizareis durante el juego.
Oro:
![]() El oro constituye uno de los
elementos más importantes en el juego. Con él podreis comprar todo tipo de
scrolls, pociones, armas, armaduras, etc. Aunque eso si, si quereis conseguir
un buen equipo lo tendreis que encontrar. Al principio solo podréis almacenar
una pequeña cantidad de oro en el alijo y en los bolsillos, pero a medida que
vayáis aumentando de nivel, esa cantidad irá aumentando. A continuación os
ofrecemos una tabla que explica esto:
El oro constituye uno de los
elementos más importantes en el juego. Con él podreis comprar todo tipo de
scrolls, pociones, armas, armaduras, etc. Aunque eso si, si quereis conseguir
un buen equipo lo tendreis que encontrar. Al principio solo podréis almacenar
una pequeña cantidad de oro en el alijo y en los bolsillos, pero a medida que
vayáis aumentando de nivel, esa cantidad irá aumentando. A continuación os
ofrecemos una tabla que explica esto:
|
Nivel |
Oro máximo |
|
1-9 |
50000 |
|
10-19 |
100000 |
|
20-29 |
150000 |
|
30-39 |
200000 |
|
40-49 |
250000 |
|
50-59 |
300000 |
|
60-69 |
350000 |
|
70-79 |
400000 |
|
80-89 |
450000 |
|
90-99 |
500000 |
Como
podeis ver, la cantidad máxima de oro que podremos tener en el alijo será de
500000, cantidad más que suficiente, ya que en niveles altos, lo que menos
importa es el oro.
El oro lo
podreis encontrar en muchos sitios:
Algunos
enemigos cuando mueren, sueltan oro.
En cofres
o cuerpos en los mapas o mazmorras.
Se puede
obtener oro vendiendo armas, o cualquier tipo de objeto.
Y también
conseguirás oro al luchar contra otro contrincante en Battle.Net, ya que el oro
que contenia ése será desprendido cuando muera. Esta última opción casi nunca
se usa, ya que casi todo el mundo al luchar, lucha con el acuerdo de no quitar
el oro al vencido una vez muerto. El oro también se verá afectado en los
niveles pesadilla e infierno, ya que cuando tu personaje muera, perderá parte
del oro que tenía.
El alijo:
 El alijo personal será un lugar muy
importante durante el juego. Cuando no tengas más espacio en el inventario para
guardar tus cosas, en el alijo podrás depositar todo lo que no te quepa. También
podrás depositar una cantidad de oro según el nivel que tengas (arriba). La
ventaja de poner el oro aquí, es que no lo pierdes en caso de que mueras. El
alijo estará presente en todos los actos y lo podrás usar siempre que quieras.
El alijo personal será un lugar muy
importante durante el juego. Cuando no tengas más espacio en el inventario para
guardar tus cosas, en el alijo podrás depositar todo lo que no te quepa. También
podrás depositar una cantidad de oro según el nivel que tengas (arriba). La
ventaja de poner el oro aquí, es que no lo pierdes en caso de que mueras. El
alijo estará presente en todos los actos y lo podrás usar siempre que quieras.
El portal a la
ciudad:
 El portal nos sirve para podernos
teletransportar de cualquier sitio a la ciudad. Es muy útil cuando se te han
acabado las pociones, se te ha roto el arma o simplemente cuando estás en un
apuro y deseas escapar. Para crear un portal necesitas un scroll de portal a la
ciudad. Estos scrolls pueden ser almacenados en un libro de portal a la ciudad.
También hay otra opción para crear un portal, aunque muy pocas veces se tiene
la opción de usarla. Esta opción son los templos de portal a la ciudad, que de
vez en cuando salen, y te dan la oportunidad de crear uno de estos portales.
El portal nos sirve para podernos
teletransportar de cualquier sitio a la ciudad. Es muy útil cuando se te han
acabado las pociones, se te ha roto el arma o simplemente cuando estás en un
apuro y deseas escapar. Para crear un portal necesitas un scroll de portal a la
ciudad. Estos scrolls pueden ser almacenados en un libro de portal a la ciudad.
También hay otra opción para crear un portal, aunque muy pocas veces se tiene
la opción de usarla. Esta opción son los templos de portal a la ciudad, que de
vez en cuando salen, y te dan la oportunidad de crear uno de estos portales.
Teletranpostador:
 Este es un sitio parecido a los
portales. Pero estos estan fijos durante todo el juego en un sitio. Sólo los
puedes usar si los activas y sirven para teletransportarse a un lugar de un
acto o simplemente para volver a la ciudad. Los teletransportadores han sido
creados para poder llegar a los sitios rápidamente porque si no fuera por ellos
se haría muy pesado ir de un sitio a otro. Con ellos también puedes viajar a lo
largo de todos los actos donde haya teletransportadores.
Este es un sitio parecido a los
portales. Pero estos estan fijos durante todo el juego en un sitio. Sólo los
puedes usar si los activas y sirven para teletransportarse a un lugar de un
acto o simplemente para volver a la ciudad. Los teletransportadores han sido
creados para poder llegar a los sitios rápidamente porque si no fuera por ellos
se haría muy pesado ir de un sitio a otro. Con ellos también puedes viajar a lo
largo de todos los actos donde haya teletransportadores.
JUGADA ARRIESGADA:
|
In each act, one NPC in town will allow you to Gamble. Once you have selected Gamble you will see an inventory of items. These items will not be identified, and they will be offered at different prices. Select an item of a type you want to buy. Buy it. The item will then be automatically identified and you will see the items statistics. The items generated for the Gamble stock are +4 Levels/-5 levels of
your character's level with a minimum level of 5. Note, this does not apply
to level requirements sometimes seen on magic items, but instead means the
base level requirements of base items. For example a Ring has a Level of 1,
which means it's available at Level 1. Ancient Armor has a level of 40 which
means you can see it in the Gambling screen at level 35. Look at the bottom
of this page for a list of base item levels. |
|
|
|

When selecting which Magic Prefixes/Suffixes are available to be Gambled,
the level of the Magical Prefix/Suffix is checked against the randomly chosen
value in the range of +6 Levels/-3 levels of your character's level. So a Magic
item with a Prefix level of 90 would be available at Character Level 84. The
chance of getting that item also becomes better at higher Character Levels.
The items you receive will be from most common, to most rare: Magic
Items (85%), Rare Items (7%), Set Items (5%), Unique Items (3%). You will
mostly get Magic items which may or may not be worth anything to you (hence
Gambling).
Gambling gives you a place to spend your money on the higher difficulty
levels (Nightmare, Hell), and gives you a better chance at getting specific
Unique items you're looking for as well as Rare and Set Items, that otherwise
might be very hard to find. For example, if you want some Frostburn Gauntlets
for your Sorceress, Gamble for/on any Gauntlets (about 38,000 gold a try) you
see. When you want to find a Unique or Set item of a certain type, Gamble on
items of those types. You can find out the Item's type in the Set and Unique items sections. If you spend enough time and
gold, eventually you will get them. It may take a long time or a short time
depending on how lucky you are. You can also get rare rings and amulets from
Gambling.
Buying all of the items on one screen doesn't help to improve your
chances any more than buying them one at a time per screen.
Items are created when you hit the Gamble button on the NPC menu.
Once you've unlocked all the item types at level 35, the items shown
will be the same from then on. However, as you reach higher Character Levels,
more Magic Prefixes and Suffixes will show up on items Gambled.
One of the best places to Gamble is with Elzix in Lut Gholein(Act II).
Look at Elzix's Gambling screen. If you don't see the item type you want to
Gamble for (such as Gauntlets, Rings, Amulets), then run over to the trap door
to the sewers, enter it, then use the stairs in the sewers back to Lut Gholein.
This will reset the Gambling screen's items, even if people are already in
town. If the town exit spawns next to Elzix, you can also use that to exit and
re-enter town to reset the Gambling screen. You can also use Waypoints and move
between Acts (such as Act II and Act IV) and bounce between two Gambling NPCS.
You cannot Gamble for Exceptional Items.
Staves, Wands and Scepters cannot be Gambled.
Gambling is a good way to find Rare Rings and Amulets which are more
difficult to find otherwise.
Getting money for Gambling
One of the best places to earn money for Gambling is in Act IV (any difficulty level).
When in Act IV, pick up valuable items to sell to the Vendors. Look for Normal
and Exceptional versions of Wands, Scepters, Staves. Don't look for just magic
versions of these, pick up the normal and socketed quality versions also. Also
look for Normal and Exceptional high end armor such as Light Plate/Mage Plate,
Field Plate/Sharktooth Armor, Plate Mail/Templar Coat, Gothic Plate/Embossed
Plate, Full Plate/Chaos Armor and Ancient Armor/Ornate Armor. Be sure to pick
up regular non-magical versions of armor as well. There are a few other types
of items you may wish to pick up such as Grand Crowns, Grim Shields, but most
other items you want to avoid because they don't sell for a lot of money or
take up too much room in your inventory. Throwing Weapons, especially Exceptional Throwing
Weapons, often sell
for a lot of money. Grim Wands are a favorite because they only take up two
slots. It's up to you to figure out what works best. Make sure you repair the
items before selling them to the Vendors.
You can also sell items to other players to generate money. Since the
majority of people like to trade items for other items, many players have large
amounts of cash (those who don't Gamble), they are willing to buy your items
for. Sell armor for imbuing, and just about any other non Unique, non ultra
important item to other players for Gambling money. Selling items to other
players is even more appealing since the Vendors will only pay a maximum of
25,000 Gold for an item.
You can also kill players for money for Gambling but we won't talk about
that here =)
Which Items should I Gamble for?
Look over the Set and Unique items sections and pick out an item that
you're looking for. Note the base item type listed below the item name and
Gamble for items of those types. Usually it's a good idea to stick to Gambling
for items around 50,000-75,000 Gold or less. If you have any more money,
usually you can use it to buy any Unique or Set items from other players rather
than trying to Gamble them. High end armor is especially expensive. At 800,000
Gold a try for Ancient Armor, and a 3% chance of getting a Unique Item,
Gambling for Silks of the Victor for example might be very costly,
although possible.
Popular items people Gamble for are: Unique Tarnhelm (Skull Cap), Unique
Wormskull (Bone Helm), Unique Magefist (Light Gauntlets), Unique Frostburn
(Gauntlets), Unique Treads of Cthon (Chain Boots), Unique Tearhaunch (Greaves),
Unique Lenymo (Sash), Unique Nightsmoke (Belt), Unique Stone of Jordan (Ring),
Unique The Eye of Etlich (Amulet), Set Vidala's Fetlock (Light Boots), Set
Sigon's Shield (Tower Shield) and missing Set Item pieces.
Will Items that give a better chance of finding magic items have an
effect on your chances at Gambling?
No
Does the number of players in the game, the Act or Difficulty Level have
any effect on the items you get from Gambling?
No, only level of character.
Finding and Gambling Unique Items
A Unique item that already exists in a given game will in most cases not be
generated again. Therefore, don't Gamble or search for a Unique item that you
or another character in the game already has. Note: this does not apply
to Set items, only Unique items.
There are no level requirements for Uniques, so you can Gamble for them
whenever you see an item of the same type as a Unique Item you're looking for,
it will be available.
Unique Items that have unique art, such as Silks of the Victor will not show their unique art on
the Gambling screen until they have been purchased and identified. So you can't
use the art shown on the Gambling screen to "cheat" to find out if an
item is unique.
Gambling Unique Rings and Amulets
There are 3 versions of Unique Rings, and 3 versions of Unique Amulets. They
will spawn in the following order:
Rings: Nagelring, Manald Heal, Stone of Jordan
Amulets: Nokozan Relic, The Eye of Etlich, The Mahim-Oak Curio
If you do not have the first one in the chain, the second won't spawn.
You must have the first two in the chain, to get the last one. You can have
them on your character, or in your stash, or they can be in the same game map
area (in any way). The items must be on your character or in the area on the
ground or on another player, out in the field if you expect a monster to drop
them.
Art for Unique Rings and Amulets will vary, so two Unique Rings with the
same name may both look the same or like any of the five possible rings. Take a
look at the Ring and Amulet art here. It doesn't matter which of the 5 Ring
pictures, or 3 Amulet pictures are shown in the Gambling screen. The art shown
will not give any clue as to whether the item is Unique or not.
Tips for Gambling for Uniques:
- Do not gamble for a Unique Item that you already
have
- Make sure no other players that are in Town have
the Unique Item you're looking for or Gamble when there are no other
players in Town.
- If you want to try to Gamble Unique Item that you
already have, give it to another player or character to hold while you try
to Gamble for it again.
- Act II and Act IV are the best areas to Gamble in
because it's the fastest way to reset the Vendor's Inventories(see above)
- You can reset the Vendor's Gambling screen even
when other players are in town by exiting and re-entering town.
Base Item Levels
Base item levels come into play in Gambling. You'll not see these items on the
Gambling screen until your Character Level is +4 Levels/-5 levels of the item's
level requirement. This information is valuable to figure out when you'll be
able to Gamble for certain items.
Here is a list of the base item levels.
To figure out at what Character level an item will be available for Gambling, subtract
5 from the item's level requirement. Note: Items that are not listed are
not available for Gambling.
|
Level 1
|
Level
12
|
Level
24
Level
30
|
Pozos:
 Qué sería de nosotros si estos apreciados
pozos, jejejeje. Se encuentran por todo el mapa, según el sitio son de distinta
forma, pero el resultado es el mismo: Una recuperación parcial de tu vida y de
tu maná, y con posibilidad de volver a apretar para recuperarla de completo. En
definitiva, nos sirven de mucho cuando no tenemos oro para gastar pociones o
cuando se nos han acabado y somos tan vagos que no queremos ir al pueblo a
repostar jejeje.
Qué sería de nosotros si estos apreciados
pozos, jejejeje. Se encuentran por todo el mapa, según el sitio son de distinta
forma, pero el resultado es el mismo: Una recuperación parcial de tu vida y de
tu maná, y con posibilidad de volver a apretar para recuperarla de completo. En
definitiva, nos sirven de mucho cuando no tenemos oro para gastar pociones o
cuando se nos han acabado y somos tan vagos que no queremos ir al pueblo a
repostar jejeje.
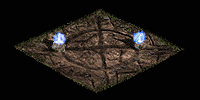
Los templos

Éste
es el símbolo del templo de la armadura. Cuando lo tenemos nuestra defensa
aumenta en un 100%. La duración de este templo és de 48 segundos.

Templo
de recarga de maná. La recarga de maná aumenta en un 400% y su duración es de
96 segundos.

Templo
del combate. El índice de ataque aumenta en un 200% y tb lo hacen el daño mínimo
y máximo. Duración: 48 segundos

Templo
de resistencia al fuego. La resistencia al fuego aumenta en +75. Duración: 48
segundos.

Templo
de resistencia al frío. La resistencia al frío aumenta en +75. Duración: 48
segundos.

Templo
de resistencia a los rayos. La resistencia a los rayos aumenta en +75. Duración:
48 segundos.

Templo
de resistencia al veneno. La resistencia al veneno aumenta en +75. Duración: 48
segundos.

Templo
de habilidad. +2 a todas las habilidades. Duración: 96 segundos.

Templo
de la resistencia. Resistencia infinita.Duración: 192 segundos.

Templo
de la experiencia. 50% de más de experiencia al matar a un monstruo. Duración
192 segundos.
Templo
de recarga: Recuperas por completo todo el maná y la vida.
Templo
del maná: Recuperación por completo de todo el maná
Templo
de la salud. Recuperación por completo de toda la vida.
Templo
del portal: Aparece un portal a la ciudad.
Templo
del monstruo: El monstruo más cercano se convierte en un monstruo único o campeón.
Templo
del veneno: Le da al jugador 5-10 pociones de gas venenoso-
Templo
de la explosión: Le da al jugador de 5-10 pociones de explosión.
Templo
de la gema: Aparece una gema aleatoria.
Templo
del fuego: Todos los jugadores y enemigos pierden 1/2 de HP.
Comandos del Chat
/help (ayuda) (Ejemplo: /help whisper)
Este comando abre el archivo de ayuda. En él encontrarás la información sobre
el funcionamiento del chat.
/whois [usuario] (¿quién
es?) (Ex: /whois
Eden o /whois #123115)
Este comando muestra algunos datos de un usuario en concreto, entre otras
cosas, dónde se encuentra en ese momento. Resulta estupendo para encontrar a
tus amigos en línea. Escribe /whois #[número] (Por ejemplo: /whois #1).
Otras variantes de este comando son: /where /whereis (¿dónde?, ¿dónde está?)
/whoami (¿quién soy
yo?) (Ejemplo:
/whoami), aparecerán todos los datos referidos a ti de los que dispone
battle.net.
/whisper [usuario]
(murmurar)
(Ejemplo: /whisper Eden o /whisper #263478)
Envía un mensaje a un usuario en línea, sin importar en qué canal se encuentre.
Es la forma ideal de hacer saber a un amigo que estás conectado.
Otras variantes de este comando son: /w /msg /m
/squelch [usuario]
(ignorar) (Ex:
/squelch Eden o /squelch #223281)
Al utilizar este comando ignorarás por completo a un usuario, y ya no recibirás
más mensajes suyos.
Otra variante de este comando es: /ignore
/unsquelch [usuario]
(no ignorar)
(Ejemplo: /unsquelch Eden o /unsquelch #223821)
Con este comando vuelves a recibir los mensajes de aquel jugador al que habías
ignorado.
Otra variante de este comando es: /unignore
/away [texto] (irse) (Ejemplo /away cenando)
Si tienes este comando activado, cuando alguien te envíe un mensaje de susurro
o del tipo /whois, recibirá un mensaje que le comunicará que no estás en el ordenador.
Para desactivar este comando, vuelve a ejecutarlo.
/dnd [texto] (no
molestar)
(Ejemplo: /dnd estoy en el lavabooooooo)
"Do Not Disturb": con este comando no recibirás NINGÚN mensaje de
susurro. Funciona de manera similar al comando /away.
Para desactivar el comando DND, sólo tienes que escribir /dnd, sin añadir nada
más. De esta manera, nadie podrá enviarte tampoco mensajes de susurro mientras
estés jugando una partida. Aun así, seguirás recibiendo todos los mensajes de
canales públicos.
/who [canal] (quién) (Ejemplo: /who abrir soporte técnico)
Muestra una lista de todos los usuarios que se encuentren en el canal indicado.
/stats [usuario] ID
(estadísticas)
(Ejemplo: /stats Eden STAR o /stats #42 STAR)
Abre el informe de un jugador con sus victorias, derrotas y desconexiones tanto
en las partidas normales como en escalera.
/users (usuarios)
Muestra el número de
usuarios que se encuentra en ese momento en battle.net.
/time (tiempo)
Muestra el tiempo de battle.net.
Los siguientes comandos sólo pueden utilizarse cuando te encuentras
en una sala de chat
/channel [nombre de
canal] (Ejemplo:
/channel Soporte técnico de Blizzard)
Este comando se utiliza para cambiar de canal sin tener que ir a la pantalla
correspondiente.
Otras variantes de este comando: /join (unirse)
/me [texto] (yo) (Ejemplo: /Puto Battle.Net!)
Con este comando envías un texto sobre tus emociones. Por ejemplo: "PatN ¡se
parte de risa!".
Otras variantes de este comando: /emote (emoción)
Los siguientes comandos sólo los pueden utilizar los operadores de
canales
/designate [usuario]
(designar)
(Ejemplo: /designate Eden o /designate #493462)
Selecciona a un usuario como siguiente operador de canal para cuando tú dejes
el puesto, ya sea porque dimites o porque abandonas el canal.
Cuando el operador deja el canal y ha designado a más de una persona, la última
persona designada será el operador.
/resign (dimitir)
Utilizarás este comando cuando desees dejar el puesto de operador de canal y
volver a ser un usuario normal.
Otras variantes de este comando son: /rejoin (volver a unirse)
/kick [usuario]
(echar) (Ejemplo:
/kick Eden o /kick #234786)
Echa a un usuario del canal. La mejor manera de utilizarlo es como advertencia,
ya que un ususario despedido puede volver cuando quiera.
/ban [usuario]
(prohibir)
(Ejemplo: /ban Eden o /ban #133989)
Echa a un usuario del canal y le impide volver a entrar hasta que el operador
actual dimita o se marche. Este es el comando más autoritario a disposición del
operador. Utilízalo con prudencia, no a la ligera.
/unban [usuario]
(retirar prohibición) (Ejemplo: /unban Eden o /unban #112389)
Con este comando puedes hacer que vuelva al canal un usuario al que habías
echado.
Combinación de teclas de acceso directo
Control+X
Corta el texto seleccionado.
Control+C
Copia el texto seleccionado.
Control+V
Pega el texto seleccionado.
Control+A
Selecciona todo el texto.
Control+N
Pega el nombre que has seleccionado.
Alt+N
Pega el nombre que has
seleccionado.
/d2notify (informar)
Alterna entre las comunicaciones entrar en/dejar canal.
Alt+V
Aterna entre las comunicaciones entrar en/dejar canal.
Alt+W (tras haber
seleccionado un usuario)
Envía un mensaje personal al usuario seleccionado.
Otras variantes de este comando: /w /msg /m /whisper
Tabulador
Pasa por los últimos diez comandos.
Control+M
Activa la música de battle.net y de los menús principales.