BANGKOK DEEP-SKY OBJECTS OBSERVING

SKETCHING TIP:

Why sketch ? please see the good reasons in sketcher by William H. Greer.
  • Sketching tools

  • Observing record form used in my observations
    The sketch record form from The AAAA
    Sketch board & red Led flash light I used A4 paper ,B2-B3 pencils and soft eraser
  • Stars & Open clusters

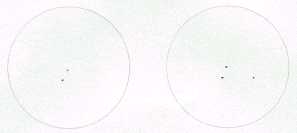
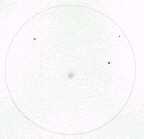
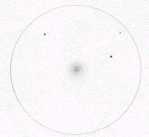
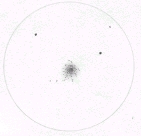
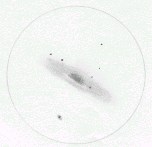
  • Start to sketch bright stars, the dot size represent star magnitude (approximately). Plot the next stars at apparent distance and angle relate to the first star. 
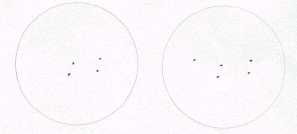
After plot 2 stars, use triangle technic to plot the third star. This technic also uses in star hopping as well. 
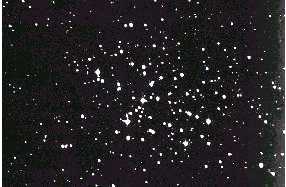
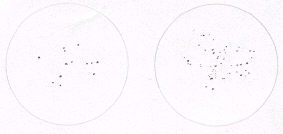
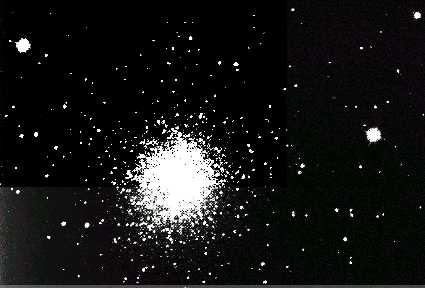
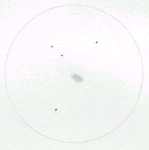
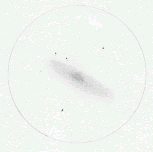
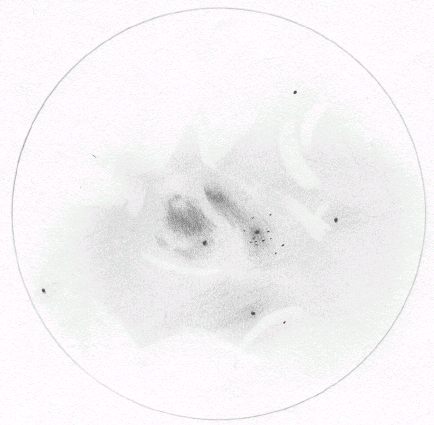
For open clusters, also start with the bright stars in the cluster. Try to watch the dim stars and faintest stars that can be seen. Waiting the moment of good seeing for more faint stars. Some time needs avert vision ,but it hard to locate the position. The unresolvable stars look like glowing smoke around bright star will be sketched by smudging technic.
M6 The butterfly cluster is good sample for open cluster
Step 1 mark the two bright stars at center area the plot the third star which form as right triangle
Step 2 Plot the forth star that parallel with the third one. The fifth star located at the top of triangle that have two sides in equal length.
Step 3 Add more fainter stars by observe their form and relation e.g. triangle, straight line, square, curve

  • Globular cluster

  • It is very hard to plot resolved stars but quite easy to sketch unresolved stars (as my observing with small scope & heavy light polluted).
    M13 is the finest globular cluster in northern hemisphere. Not easy to get all sketch details form photograph, it good for training your eyes and hands.
    Step 1 mark the location of M13 and three bright stars which forms as right triangle. My sketch also showed such stars.
    Step 2 sketch the roughly detail e.g. round or elongated, concentration & nucleus. Use finger to blend the graphite to represent unresolved stars which look like nebulosity. If can't resolve the stars, it is completed.
    Step 3 plot the stars at the edge, observe pattern e.g. curve, radiant, concentration..etc. At the nucleus, is over exposure, then non detail. But for visual observing it should be more details

  • Galaxy

  • The additional technic for Galaxy is using eraser to create the dark lane of dust & gas
    M31 or Andromeda galaxy is remarkable deep-sky object. Delicate details can be best seen with photograph
    Step 1 mark the bright features and the center of M31. (the bright features included M32 & M110)
    Step 2 Sketch M31 major details e.g. size, elongation, nucleus..etc.
    Step 3 Use eraser to delete some graphite to create dark lane add other details such as nebulosity around M110 below

  • Nebula

  • Nebulae are full with delicate features, all technic can be used together
    M8 or Lagoon Nebula consists of star cluster, nebulosity, dark lane..
    step 1 Mark the major features Step 2 sketch the roughly side & shape of nebulosity and use smudging technic to blend graphite to represent glowing gas Step 3 Use eraser to create dark lane & dark area

  • Moon

  • Start from single crater, observe its rim, central peal, light & shadows. Observe at terminator for craters, for moon rays observe at full moon.

  • Planets

  • Jupiter: observe for cloud band & great red spot, galilian moons position moon shadow(s) casting Saturn: The ring & ring's division, some big moons. Mars : Try to observe at the opposition for clear detail, the dark feature e.g. srytis major.. Venus observe/sketch its phase

  • Sun

  • Dark spots sketch observe their umbra, penumbra & movement
    Sun observing is very dangerous! and can cause blindness, please consult/study from experience observer or good text.

  • Birds

  • sketch all detail including their activities, three, feeding.. and try to identify it name with bird watching manual. It is very fun in day time. Home
    1
    Hosted by www.Geocities.ws