 From Sea to Shining Sea *
"Ocean" Activities
for kids who don't live close to the ocean
Though developed for children in preschool, these activities can easily be adapted for older children. You will probably need some helping hands to make sure the children don't end up getting soaked. These are great activities to do outdoors, but they can also be successful indoors if you protect the floor with drop clothes--I did them with about 50 children between the ages of 4-12 and, believe it or not, we didn't have a single spill!
Ocean in a Bottle
Materials
- Pour about � c mineral oil into the clean soda bottle. (It's probably a good idea for an adult to do this step)
- Fill the bottle as full as you can with water (don't leave any air space )
- Let the child add a few drops of food coloring to the bottle.
- Put contact cement in the bottle lid and twist on the lid.
- The child can make waves in the bottle by moving it slowly back and forth.
Bubble Pictures 
Materials
- Mix 2 t liquid tempra, 1 T dish detergent and about 1 C water in the dish or cake pan. Use a separate container for each color.
- Show children how to blow through the straw to make bubbles. Stress that they must not drink the paint solution!
- When the child has a good head of bubbles on top of the water, carefully place a piece of paper on top of the bubbles and press just hard enough to break the bubbles, but not so hard that the paper actually touches the water.
- Turn the paper over and allow it to dry. If desired, you may use more than one color of bubbles on the same picture, but allow them to dry between colors.
- Use crayons or markers to make fish and other sea creatures swimming through the bubbles.
Permanent Sand Castings
- Mix sand, cornstarch, and cream of tartar in a large saucepan.
- Stir in the hot water
- Cook over medium heat until the water is absorbed and the mixture becomes very thick. [An adult definitely needs to do this step as the mixture must be close to boiling to work.]
- Cool sand mixture until it can be handled.
- Mold using your hands, plastic beach molds or other molds such as cake pans. Shapes may be removed from molds more easily if the mold is sprayed with cooking spray or coated with cooking oil before the sand is packed into the mold
One fun activity is to place the sand in a low flat mold such as a cake pan, then have the child make handprints or footprints and write their name with a stick or dull pencil. Add small shells around the edge of the molded shape.
Mixture should dry and be fairly stable after a couple of days. Molded shapes will break if dropped, but will last if handled carefully.
Treasures in a bottle
Materials- Fill the bottle about half full with sand.
- Place the shells and other treasures in the bottle
- Glue the lid on the bottle.
- If using wax, you will need a small clean can such as a tuna or tomato paste can, a small saucepan full of water and a heat source such as a stove.
[This part should be closely supervised by and adult--never heat wax directly over the burner!] Place the wax in the small can and place the can in the saucepan full of water. Be sure the water doesn't come higher than the top of your can. Heat the water to simmering and allow the wax to melt. Dip the top of the bottle into the melted wax. Allow to cool and repeat until the top of the bottle is covered with a thin coating of colored wax. This makes it look like a really old bottle.Turn your bottle on it's side and see how many of the treasures you can see and how many remain hidden in the sand.
 Jellyfish
 Materials - 9" paper plates
- Construction paper or crepe paper cut into 1" x 12" pieces
- Construction paper or wiggle eyes (optional)
- Crayons
- Glue
- Stapler w/staples
- Precut construction paper or crepe paper into 1" X 12" pieces--8 pieces for each child.
- Have child color the back of the paper plate with crayons.
- Glue or staple the construction paper or crepe paper streamers around the edge of the paper plate. Glue on eyes if desired.
- Activity--For creative movement, play slow, symphonic music and have the children dance and move their jellyfish in time to the music.
Tactile stimulation/Group Discussion
Adults sometimes forget that children may not be familiar with beaches or ocean dwellers. When presenting stories that tell about walking along the beach or looking for seashells, it is helpful to give the children a frame of reference by making a "beach" and seashells available to them!

Materials:
- Large, low sided plastic container such as a small wading pool
- Clean sand to fill container at least half way
- Shells, dried sea horses, starfish etc. obtained from beach or craft store
- Drop cloth
- Containers for water (optional)
- Put down drop cloth in play area.
- Place the sand in the container and mix in the shells . If you are working in an area where water play will not cause damage, you may wish to mix in enough water to make the sand stick together.
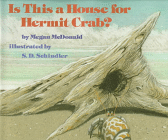
- Read stories that have to do with the ocean (Is This a House for Hermit Crab, We Go to the Seashore, etc.)
- Encourage the children to play gently in the sand. You can talk about the temperature of the sand, the way it sticks to your fingers, how it pours through your open hand, etc. Let the children look for shells in the sand and talk about the shapes and colors of different shells.
- Remember that if your "beach" is outside, other critters might decide to take up residence in the sand. After playtime is over, cover your "beach" to keep out insects or dump the sand into a garbage bag and close it tightly between use.

* These activities were originally developed for use by C.J.Brown for use in the Arizona Reading Program and included in the Summer Reading Handbook distributed to libraries throughout Arizona and Kentucky. They may be used by individuals or groups, but may not be published in any other form without written permission of the author.
Click on the book cover to be taken to Amazon.com,
where you can purchase these titles.
Animated sea creatures(c) Kitty Roach. Used by permission.