Home Made Homebrew Kegerator
Here is the basic process I went though in making my kegerator. I have to give credit to a few people whom I got the idea from:
Dan Shultz
Not sure of the persons name but he has the same size freezer.
First conversion I saw on the internet. Again not sure of his name.
Star City Brewers Guild
Mike Schwedhelm
And also a tutorial from www.homebrew.com
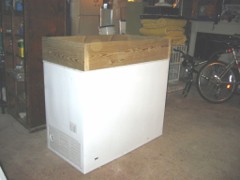
I am using an 8.8cu ft chest freezer. I got it from Lowes on clearance for $99.

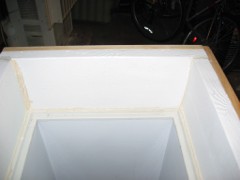
After a few weeks of it sitting in the basement I was able to get some wood to build the collar. I wanted to get cedar boards, but it seems to be hard to come by (spring of '04) these days. Instead I went with 2x8 pressure treated lumber for the inner part of the collar that will be exposed to the inside of the freezer and a 2x10 to go around the 2x8 and also hold the collar onto the top of the freezer so it will not fall off and I don't need to put any holes in the freezer itself.
I put 2 coats of primer and 2 coats of mildew resistant white paint on the 2x8's . After removing the lid I put the 2x8's on top of the freezer and attached them to each other with screws.

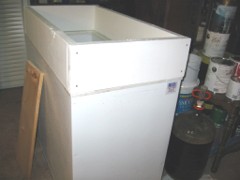
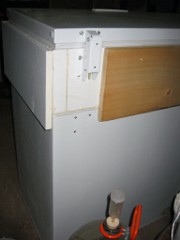
I predrilled 1 inch holes for the taps in the 2x10's then attached them to the 2x8's keeping them flush at the top. I countersunk the screws and filled the holes with wood puddy then sanded it smooth for the finish paint. I also caulked the hell out of the inside with bath and kitchen caulking.
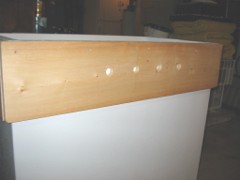
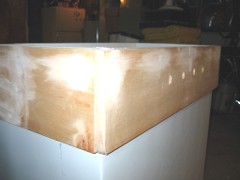
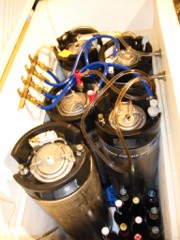
I put 2 coats of white paint on the 2x10's to finish it off. I also added 4 brass screws to the front for a decorative look. To keep the lid flush with the 2x8's I cut the 2x10 for the back of the freezer short so that it would fit between the lid hinges with would therefor attach to the 2x8 so the lid would be flush on the 2x8's all the way around. I also used bath and kitchen caulking tape to line the top of the 2x8's. The lid will sit on this rather than directly on the wood to give it a smoother seal. I figure I can fit up to 6 kegs or as you can see in the picture, 5 kegs and 1 5 gallon fermemter. I used 2x8's so that I am able to fit a keg or fermenter (with airlock) on the compressor chamber. This does, however make for a very deep freezer. I think I'll add a few milk crates or make a shelf to raise the kegs off the bottom more.
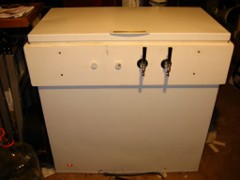
I have room for 4 external taps which I'll add 1 at a time. I just need to drill through the 2x8.
UPDATE
May '05. It is fully functional. In July of '04 I finally got the 4-way manifold (from B3. In Nov '04 I added 2 external taps (from beveragefactory.com). I currently have 4 kegs up and running. 2 using the external taps and 2 using picnic taps. I also have 1 keg of stout that is ready to go when another keg is emptied. I have a total of 6 kegs (2 pin lock and 4 ball lock). I have room for 6 kegs, but I normally only keep 4 kegs. I keep some comercially brewed micro brew on the shelf above the compressor. At least until I need the space to carbonate any extra batches I make.
The temperature controller is also in and working great. I keep the temp in the low 40's. By the end of 05' I'll be adding the other 2 external taps. Faucet, shank, handle and line run about $40 each. I also found a web site that tells you how to inexpensively and easily make your own tap handles. Just what I like, more fun projects. I have bought a staircase spindle, a wooden circle and a wooden oval along with 4 threaded inserts from Williams Brewing to attach the tap handles to the faucet. I plan on making a Patriots and a Red Sox tap handle. The spindle ran me about $2.75 which I cut in half. Each of the wooden circles goes about $5 and the oval goes for about $6. With shipping the inserts cost $2.75 ea. Plus the cost of paint and decorations, each tap handle will end up costing about $11. Compare that to commercially made Patriots or Red Sox handles that run upwards of $40-50. I hope to have pictures of the process and finished product soon.
Return to Kyle's Homebrew Page.