The Sistema Project
I've had an Argentine Sistema M1927 for several years now. I had performed some minor custom touches on it soon after buying it, most notably fitting a Brown grip safety, adding Wilson fixed sights, and painting it with Brownell's teflon moly coating.
Other aftermarket parts came and went, usually to other 1911s in my collection when one of them needed a new trigger or plunger tube spring. The teflon moly coating also suffered scratches and nicks, due to its rather thick application from the spray-can and also due to my neglecting to sandblast the gun prior to coating it. The Brown grip safety was robbed for another project, leaving a GI safety behind.
Recently I decided to give the poor old thing a facelift. I didn't care to sink much money into it, as the Sistemas are generally considered beaters. But I wanted to give it some much needed attention in the areas of accuracy, reliability, ergonomics, and appearance.
Accuracy
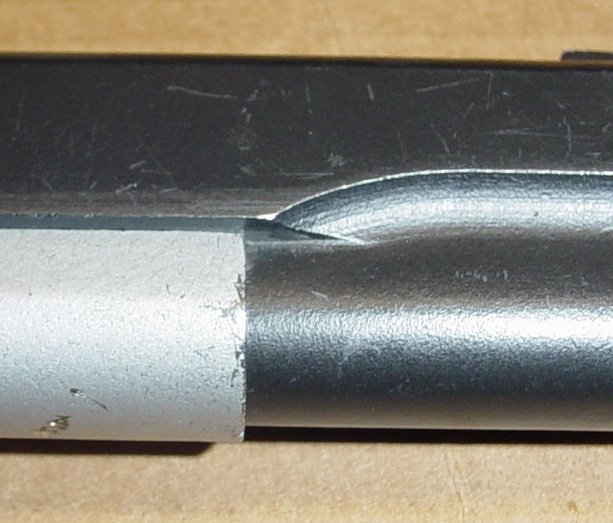
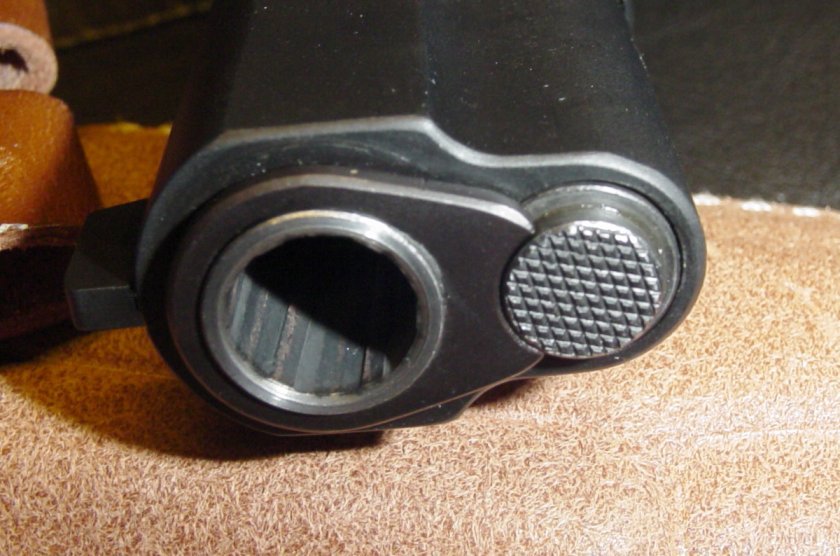
First on the list was tightening up the barrel-bushing-slide system. Minimizing movement of the barrel relative to the slide is a significant contributor to accuracy. Mine was quite loose. I could wiggle the muzzle back and forth relative to the slide by about .002 or .003" while the gun was in battery. I also saw that most of that movement was due to the bushing wiggling around inside the slide.
One trick Kuhnhausen recommends to fix this is to flare the rear skirt of the bushing to form a tight fit inside the slide. This was easily accomplished by placing the bushing facedown on an anvil and using a tapered metal object to flare open the rear of the bushing. For the "metal object" I used a metric 10mm socket from one of my junk socket sets. The bushing's now flared enough to require a bushing wrench to turn it. I could fit it looser but it will no doubt loosen up some in time anyway. I can live with the bushing wrench until then.

After the bushing was expanded, I observed perhaps .0005" movement of the muzzle relative to the slide. Good enough for me.
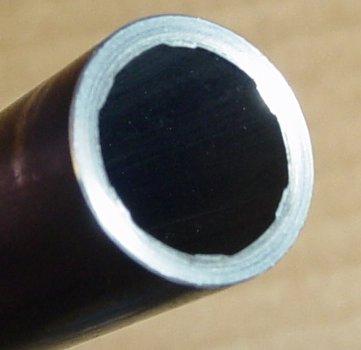
The factory barrel was in good enough shape but the crown had the amount of scratches and dings one would expect after several decades as an issued service pistol. I cut a new crown on the barrel on my mini-lathe. This required fabricating a mandrel out of aluminum to turn the barrel. My mandrel is about as simple as it gets. A 9" aluminum rod was turned down over about 7" of its lenth to allow a tight fit inside the barrel. The fit is tight enough that I don't need a lathe dog to keep the barrel from spinning on the mandrel, but if it ever does, a lathe dog or stop collar will be easy enough to make.
Shooting the gun with these two improvements alone accounted for a noticeable improvement in accuracy.
Reliability
There are several main trouble spots in the 1911 which are the cause of about 90% of the reliability problems experienced: recoil spring, extractor, barrel throat, magazines, and feed ramp.
The recoil spring in the gun was the clapped-out spring that it had come with. I like to run an 18 lb spring in my Government length 1911's, so this was a natural upgrade. Reliability has not been a real problem for this gun, but I wanted to forestall any future issues.
The stock extractor was removed long ago and used elsewhere, to be replaced by a decent part from Brownell's, probably a Wilson if I had to guess. Tension on it seemed to be fine, not requiring any adjustments.
The barrel throat is already cut to the wadcutter profile, where the bevel is basically extended up to the 9:00 and 3:00 spots on the chamber face. Nothing to fix here.
The feed ramp had been polished several years ago, and needed no further attention.
I use McCormick Power Mags and Wilson Combat mags in this gun, and they have always performed flawlessly.
Ergonomics
Now I moved on to the "fun" part of gunsmithing as far as I am concerned. A 1911 should be easy and comfortable to operate; luckily there are a lot of things that can be done with a minimum of expense regarding parts replacement.
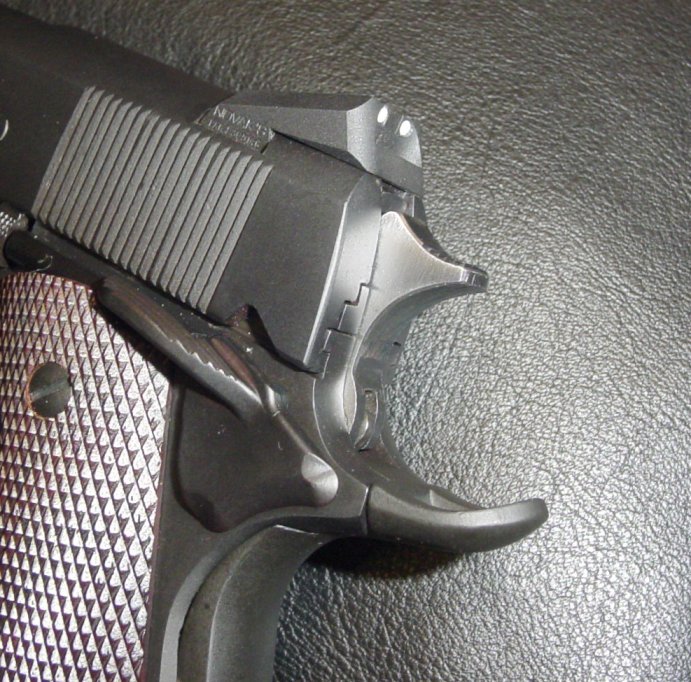
Hammer
The hammer currently in the gun was a cheap elongated Commander-style. It was sorely lacking in finish and refinement but it had done the job well enough. At any rate I was tired of looking at it, and it had to go -- it fit loosely in the frame and was a detriment to a good trigger pull.
Frankly I am not a huge fan of the look of the elongated hammers, so I decided to use a Colt spur hammer. It would have to be bobbed to operate with the beavertail, though. This was done easily enough with a bench grinder and some light touches on a belt sander to round off the spur. A Dremel sanding drum reshaped the top and bottom of the spur, and a 30-lpi checkering file put a new set of serrations on the spur tip. I beveled the sides with a needle file.
Trigger
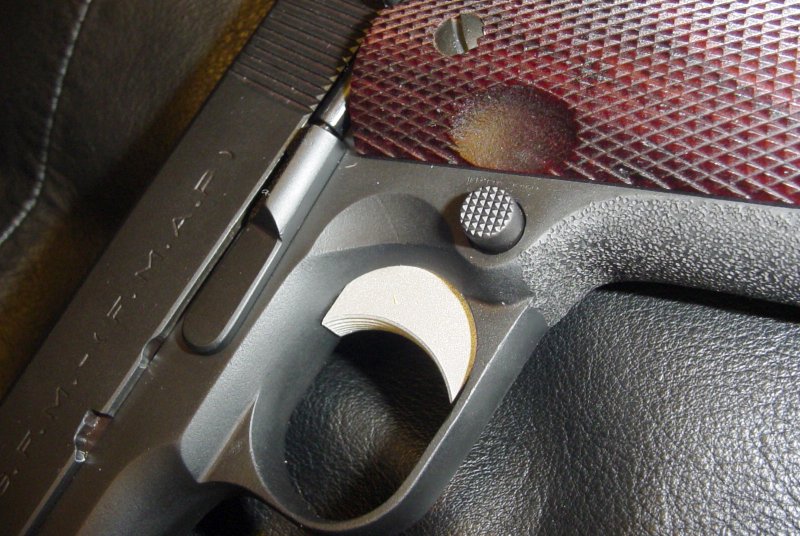
The steel short trigger originally on the Sistema was too heavy, rattly, and short for me. A solid Greider Precision aluminum trigger was purchased to replace it. A few minutes filing the top and bottom of the trigger shoe were necessary to fit it. The stirrup fills the cuts in the frame quite nicely with no up or down movement (which can cause problems for grip safeties, among other things). I'd have preferred the trigger without the hole drilled for the set screw, but couldn't find one on Brownell's site. I have one I got from Dane Burns, and I think I'll use another on my next build.
Grip Safety
The frame had previously been cut for a Brown high-sweep safety which had gone on to a better home elsewhere. I had a stainless safety someone had given me that fit quite well, however. It bore some scars where a Dremel had gone awry, but these were not difficult to polish out. Since aesthetics weren't a priority, I didn't see much point in going to a lot of trouble to blend the grip safety with the frame.
I took the opportunity to replace the beat-up plunger tube with a new one, and new plunger assembly as well.
Novak Rear
The Novak sight came with instructions showing how to machine the slide to accept the sight. There are three steps: 1) lower the part of the slide behind your existing dovetail; 2) widen the dovetail with a 1/4" endmill, and 3) cut the new dovetail. I made two passes with the carbide dovetail cutter. The second pass only removed about .002" of metal from the front of the new dovetail. The sight slid in and fit nearly perfectly. The gun still shoots to point of aim with the staked on Wilson front sight.
Trigger Job
I installed a Brown match sear to replace the stock sear, which was too short to do a safe trigger job on. Using the Brown sear jig, I got the trigger pull down to just over 4.5 lbs.
Dehorning
My routine here usually consists of softening all edges that are remotely sharp, especially around the slide, slide catch, and dust cover. I also filed out some divots and nicks on a part or two.
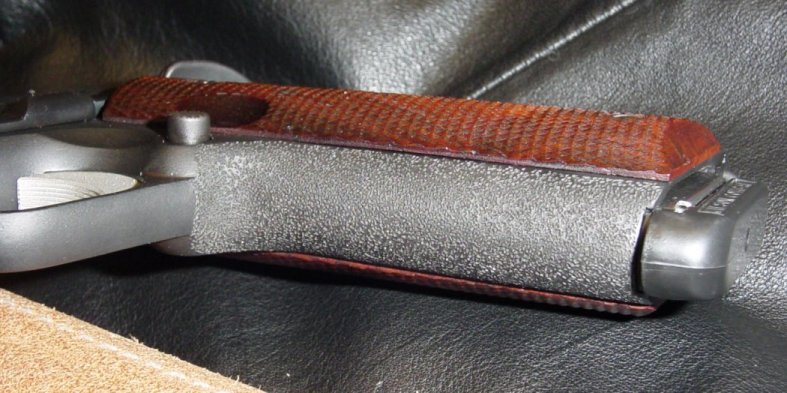
Frontstrap
I cut a relief on the frontstrap where it meets the trigger guard. I used a 1/2" endmill, then blended the contours with a couple of round and half-round files. I generally don't like to do too much of an undercut here, just move the frontstrap up a bit. I have discovered that I prefer the feel of a stippled frontstrap to almost every other treatment out there. I clamped the frame in a vise with some keystock on the sides to act as guards, then used a hammer and punch (ground into a 4-sided pyramid point) to stipple the frontstrap.
Magazine Well Bevel
I cut the bevel with an 82* HSS countersink purchased at Lowe's. With a bit of care, it's possible to cut both sides and the rear of the mag well with this countersink. I just eyeballed the cutting, and it turned out great.
Appearance
I didn't think that investing a lot of time cleaning up the metal, blending lines, and doing a lot of cosmetic work would be very worthwhile on an old service gun like this. I'd be happy just to get that paint off and get a decent hot blue finish on the metal.
To get rid of the teflon-moly finish, I used aluminum oxide in my benchtop blasting cabinet. This also removed the file and sanding marks left behind, as well as taking the sharp edge off the frontstrap stippling.
After cleaning and thoroughly degreasing, the gun was hot caustic blued using the lye and fertilizer formula. It came out of the bath with a light red smut on it, but that wiped right off.
I assembled it and replaced the rubber grip panels with a set of Ahrends cocobolo stocks.
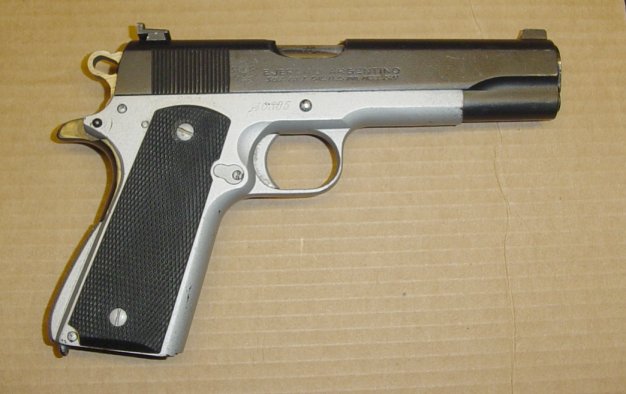
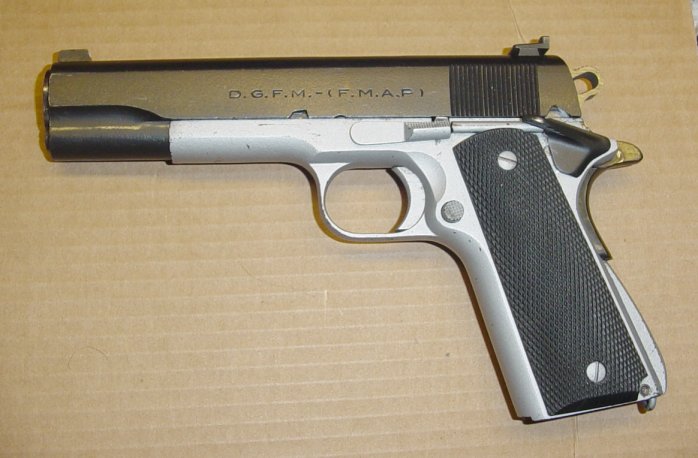
The finished gun:
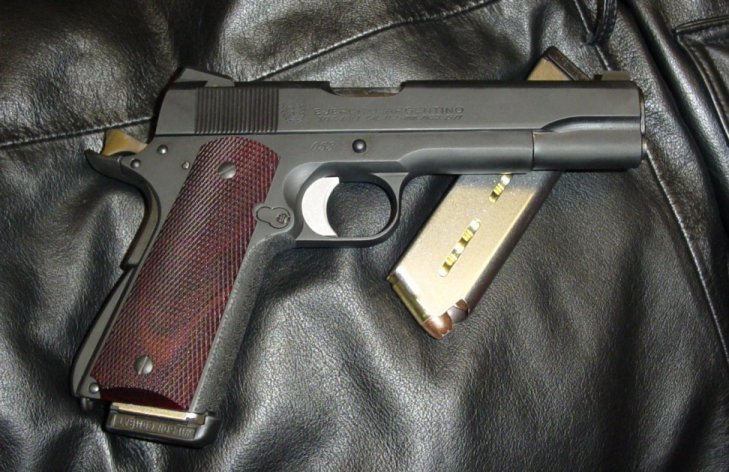
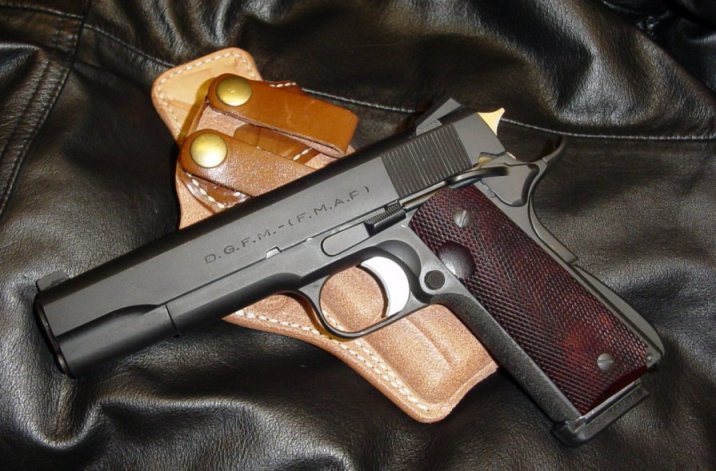
Total cost of upgrades: about $100.