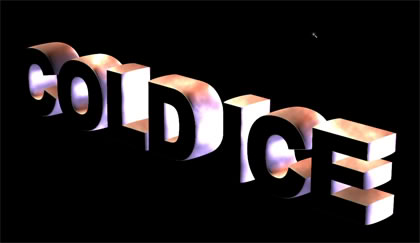
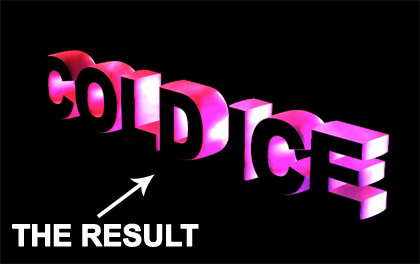
Text Effect: Stunning 3D Effect
(you can download the 3D image at the resources page) Announcing the first tutorial of a new series! Together, with a pinch of this and a dash of that, we�ll figure out how to create this cool effect in just 30 minutes. Ingredients: 1 normal, everyday Photoshop 1 set of real 3D text. 1 large black canvas (1600�1200px)
Step 1: First, we�ll need something written in 3D. We have two possible variations: If you prefer a bit of Mac spice, use the command �Extrude and Bevel� in illustrator. This tutorial from PSDUTS may help you through it. If you swing more toward a Windows flavor, Xara3D is another.

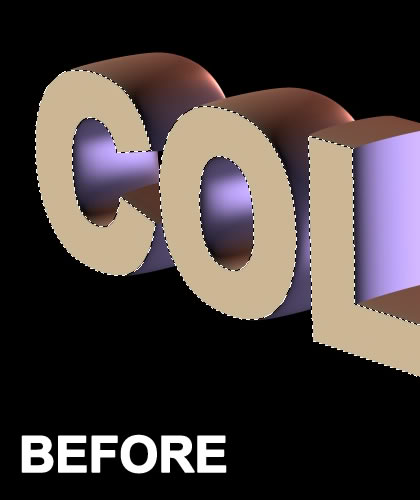
Step 2: Place the 3D text and rename it as �3D Text�. Then, with the Magic Wand Tool select the face of the letters and cut that part as you can see from the screenshots below.

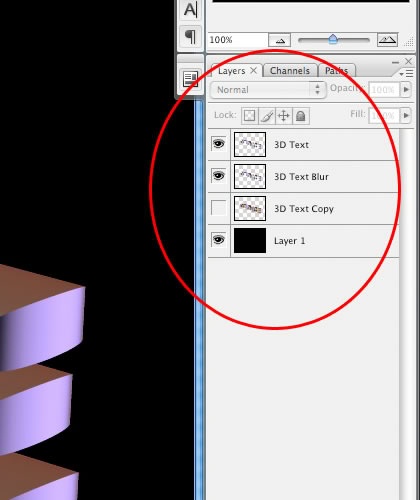
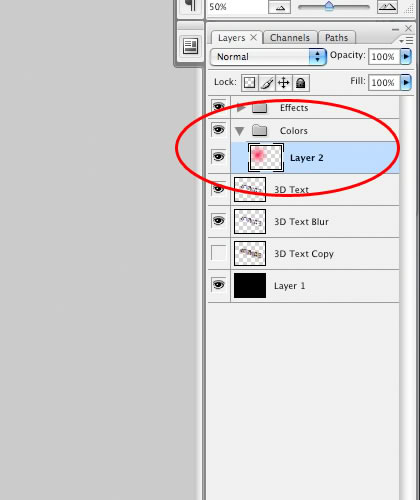
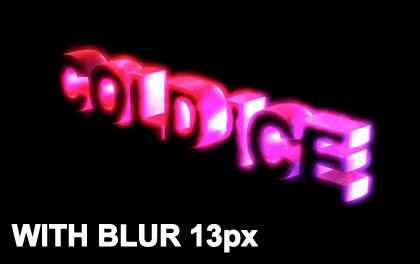
Step 3: With me so far? Now comes the fun part. Make two copies of this layer, one for backup (�3D Text Copy�) and another one (�3D Text Blur�). Set the backup copy aside to cool for a bit (aka, Hide). Leave the other two layers (3D Text and 3D Text Blur) on the fire and easily accessible. Turn down the heat a bit on “3D Text Blur let it simmer for a while and come back to it later.
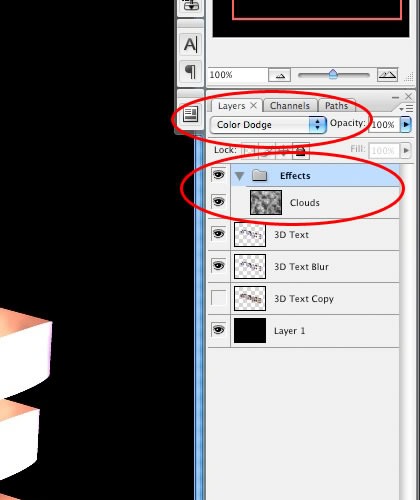
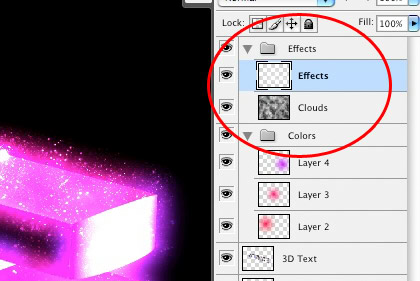
Step 4: Next, create a new layer group, rename it �Effects�, and change the blending option of this group to �Color Dodge�. Now, being careful not to disturb the other layers, reach inside this new layer group and, with a flick of the wrist, create a new layer, applying the filter �Clouds� (Filter -> Render -> Clouds) to give it that nice, puffy consistency that we�ve all come to know and love.
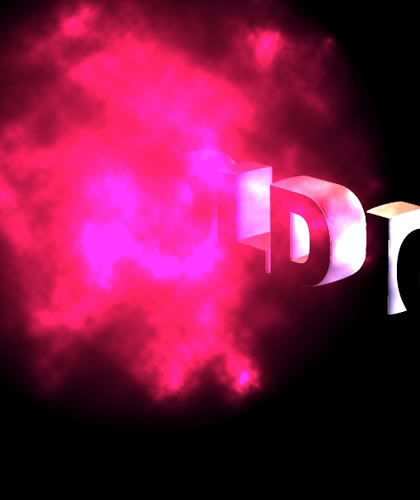
Step 5: Dropping just below that group in your palette, create another group, this one named �Colors�. Remember that little wrist-flick technique from Step 4? Didn�t get it quite to your satisfaction the first time? Well, we�re going to give it a go again. As before, within this new group you�ll need to create a new layer; add a sprinkle of pink, and with the gradient tool (in Radial Mode) draw a soft edge glow. After that, set the layer blending mode to the Low mixer setting, or �Soft Light�.
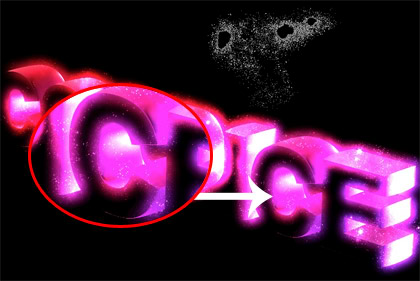
At this point, you might see a strange pink cloud, but don�t worry. All part of the plan.
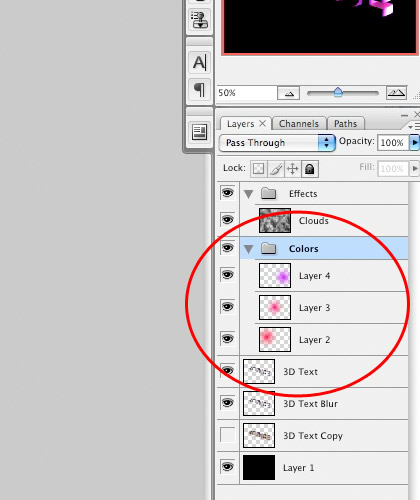
Step 6: Repeat the previous step with two other bright colors, but placed differently.
Step 7: Now, for the secret ingredient
Do you remember the �3D Text Blur� we set aside way back in Step 3? Well, it's been simmering long enough! Select it now and apply a Gaussian Blur of 13 pixel radius (Filter -> Blur -> Gaussian Blur)
Step 8: Now the creative part. Add a new layer in the �Effects� group, immediately above the �Clouds�. Download a cool brush from DeviantArt and use white to trace around the inside face of each the letters.
Step 9: Still with me? We�re almost there! Carefully slide yet another new layer between the two groups (Effects and Clouds ). Reach for your trusty Gradient Tool (this time in Linear Mode), choose White and, holding down the Shift key, drag the Gradient tool from the outside edges of the canvas to the middle of the image. Set your blending mode to �Saturation� and see what happens.
Step 10: Ready for another layer? We�ll need a new one in the Effects group; name it �Abstract Lights�.
img src="photoshop_tutorial_16.png">
Step 11: Then ctrl-click (command-click for you Mac lovers) the �3D Text� layer icon in the layer�s palette and paint inside the new selection with a custom abstract brush as we did in Step 8 (remember, use WHITE).
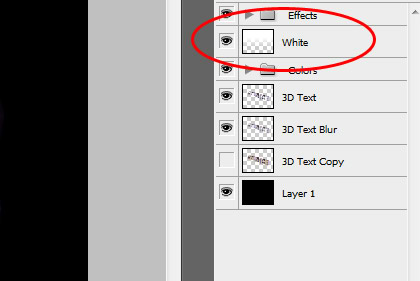
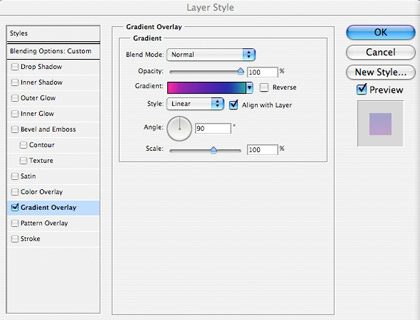
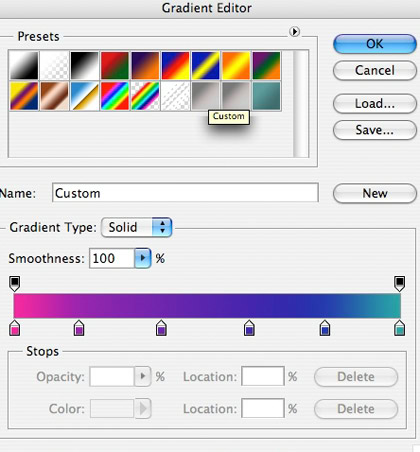
Step 12: You�ve made it. The final step. The icing on all of these layers. Create one last layer above the �White� layer we just did. Use a nice LARGE custom brush, like this, and draw a single Cloud above the text. Apply a Motion Blur (Filter -> Blur -> Motion Blur) with an Angle of �-11? and a distance of �200? pixels. Change the Opacity to �30%� and apply a gradient overlay with the following settings:
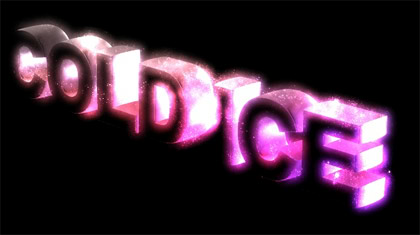
Voila! There you have it. A quick, easy way to spruce up any old 3D text into something to set anyone�s mouth watering. Serve hot or cold to your friends, and watch em drool Enjoy!

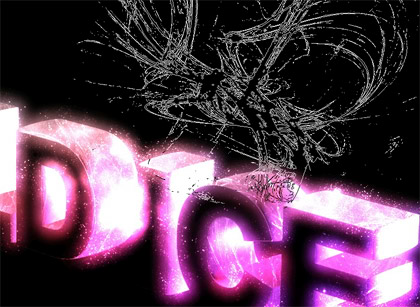
For a bit of a twist if you�re feeling a bit adventurous�above all the layers, try new custom brushes (like smoke) and repeat the last step to apply cool lights. Experimenting can be fun!