 |
| The Knots |
| Right Hand Knot: |
|
| NOTE: All knots are formed the same way no matter if you're a righty or a lefty. The name simply comes from what side of the string the knot will finish on. |
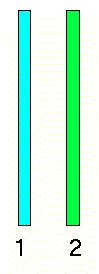
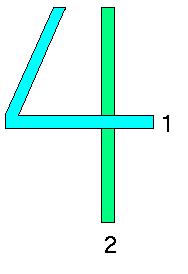
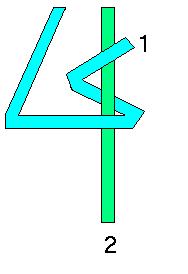
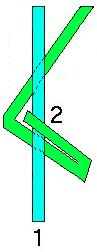
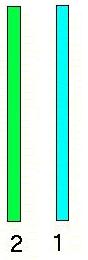
| Start out with two pieces of string (Fig. 1). Cross the first string over the second string, making a "4" (Fig. 2). Bring String 1 under String 2 (Fig. 3). Pull String 1 tight while holding on to String 2 (Fig. 4). Repeat process once to form an RHKnot. Place String 1 on the right of String 2 when done (Fig. 5). |
 |
 |
| Left Hand Knot: |
|
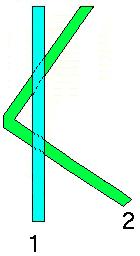 |
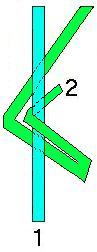
| Again, start with two pieces of string (Fig. 1). This time, cross String 2 UNDER String 1 (Fig. 2). Lift String 2 and pull it through the center of the triangle (Fig. 3). Pull String 2 tight while holding String 1 (Fig. 4). Repeat process once to form an LHKnot. Put String 2 on the left of String 1 when done (Fig. 5). |
 |
 |
| Joining Knot: |
|
|
 |
|
|
|
|
|
 |
 |
|
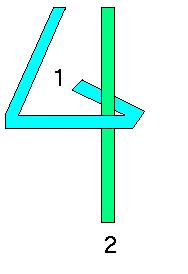
| Use the same directions you would use if you were making an RHKnot with String 1 (Fig. 1-4). Only follow the steps one time, though. Then use the same directions you would use if you were making an LHKnot with String 2 (Fig. 5-8). Again, only do them once. String 1 should end up to the left of String 2 (Fig. 9). |
|