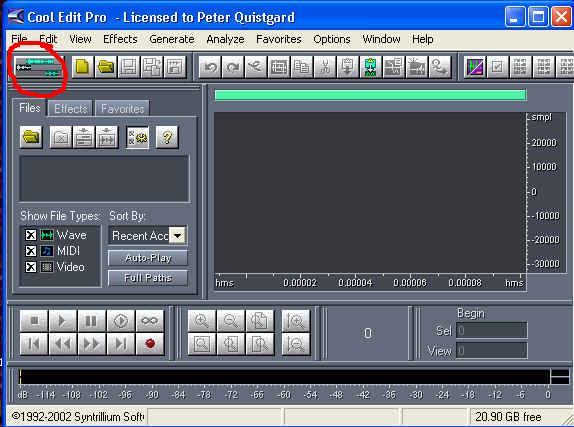
1. Open up CoolEdit...
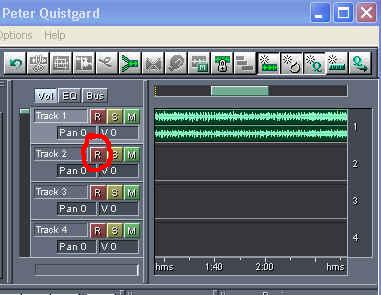
2. You will then click on the multi track view button.... shown below, circled in red....
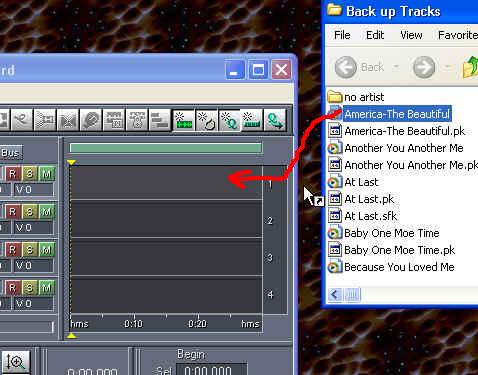
4. You are going to then, open the folder that has the backing track you want to use and drag it into the first multi track section...see below.... you may have to use the screen size features to make CoolEdit's screen smaller so you can view both your folder with your backing tracks and the CoolEdit window.
Put on headphones for best recording quality...you dont want to have the music coming through the speakers at the same time as your singing...because this will pick up through the mic and sound distorted.
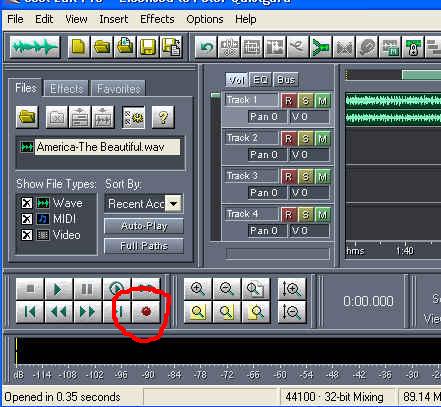
Click on the Red record button on the bottom left side....
when you are finished, click that red record button again to stop it...
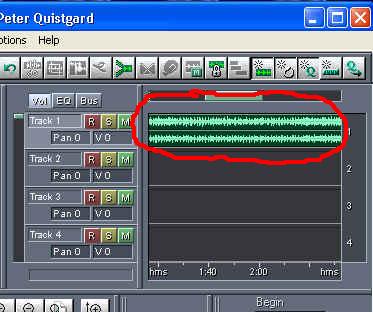
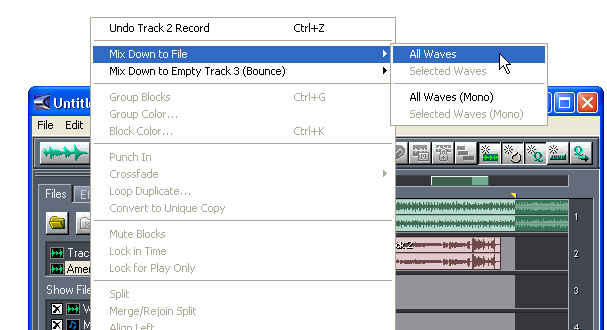
9. then when you are finished and want to hear the recording, click on the play button to hear your backing track and your voice playing together...If you dont like it... then right-click on your voice track from the multi view window and click "remove block" to erase it and start over.
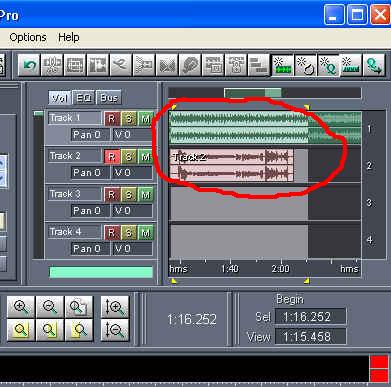
10. From there, once you are satisfied with your recording, put your cursor in between the two tracks and drag it to the end of them both to highlight the two tracks together....
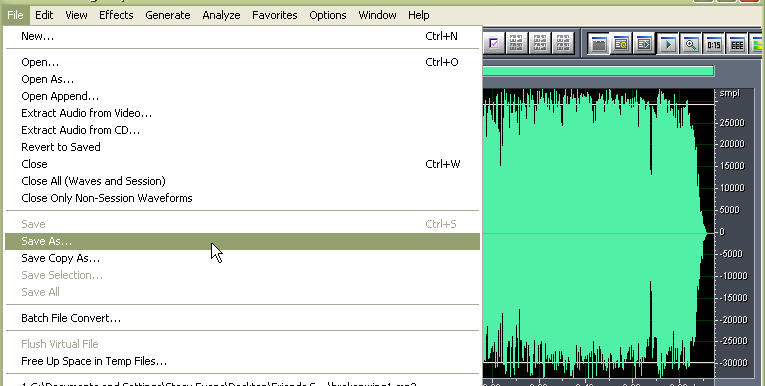
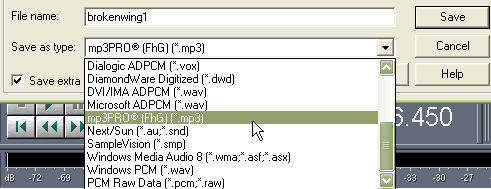
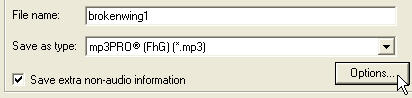
When you are all done editing your file, click "file" - "save as.."
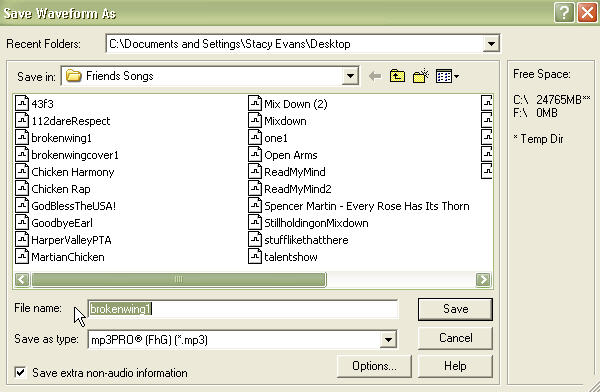
The first thing you want to do is to click the checkbox that says "convert to mono" (this will automatically help you with keeping the file size lower without depriving it of too much of its original quality)
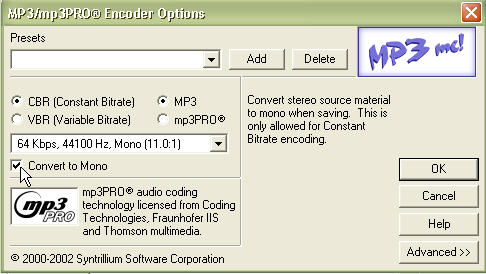
Now, you want it to sound decent but for posting it to some websites, you need to keep the file size down so I would start with selecting the option for 80kbps, 44100Hz, Mono(8.8:1)
Click save.... make sure it is saved to your desktop and this is why...
Now you should minimize CoolEdit (do not close it out!!), go to the file on your desktop and right-click on it.... go to properties and right there it will tell you how many MB's that file is... if its at the file size that you want, then you are good to go and you can close out of cool edit and etc...
If it is still too large... then you go back into your cool edit (which will still have the same file yu were working on, open in the single track).....
Do the whole save as process again and this time, save it at 64 Kbps, 44100 Hz, Mono (11.0:1)... this is a lower bitrate and it should then be a smaller size. You may get a message when you hit the ok and save buttons asking you if you want to overwrite the file that you had saved before (the one that was too big)... you can click 'OK'....
Then go back, right click on the file on your desktop and check it again.... Now, the only way you would have to go any lower then that is if you really have a super LONG song..... otherwise, that should be just fine... depending on the song, you may even be able to make it bigger, like 96Kbps... it all depends... This is why I save it to my desktop... so I can go and check it easily....
But always keep the Hz's at 44100.... this way the quality will remain decent.
