This is something I've wanted to do for awhile, even if it seems a little silly to do so. I've wanted to time how long it takes me to do one of my drawings. Though, in retrospect, I really should have done a less complicated drawing, more along the lines of what I usually do, but oh well!
I timed about how long I spent drawing. If I stopped for any reason, I recorded it, and I even timed every individual step. I didn't count the time it took me to get together my materials, or scan.
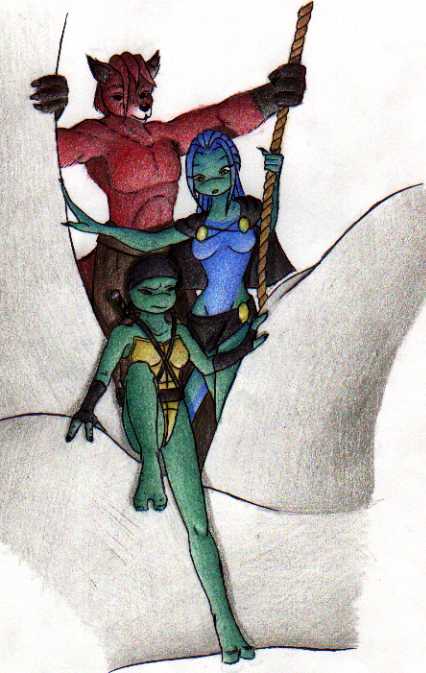
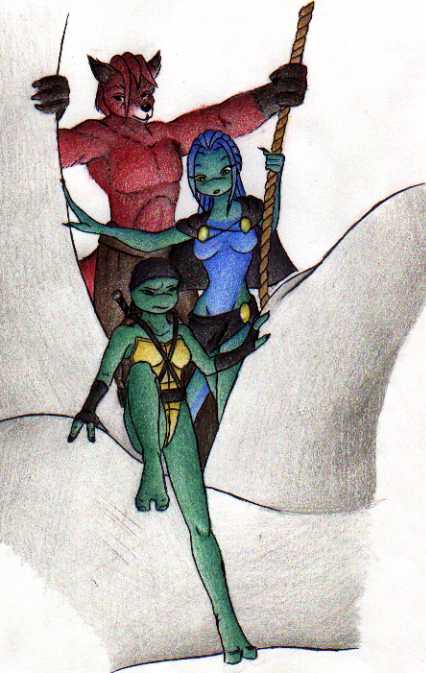
I'd also like to introduce you to the characters in the picture. I'll be referring to them by name from this point on, and I don't want you getting confused. These are my three main characters from my novel-in-progress Diathians: The Truth. From top to bottom they are: Rusty, a red fox; Lalena, a lizard; and Jezebel, a turtle.
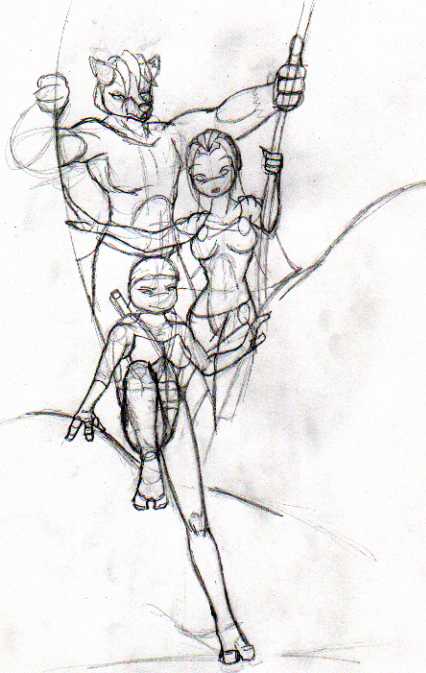
Step 1: Pencil sketch
Well, after I got everything together, I thought about what I wanted to draw. This thinking process was not timed, since I'd really been thinking since that morning about it. So, I started right away. I used a regular #2 pencil from Roseart and a gum eraser on computer paper. This step took me almost an hour. 53 minutes to be truthful, and that's excluding the three minutes it took me to go through my books for a decent reference pic for a red fox, and I still don't think I got it right. I did spend a good chunk of time on Jeze's lower leg. I'm told I have trouble in the leg department. ;P
Here is the finished pencil sketch:
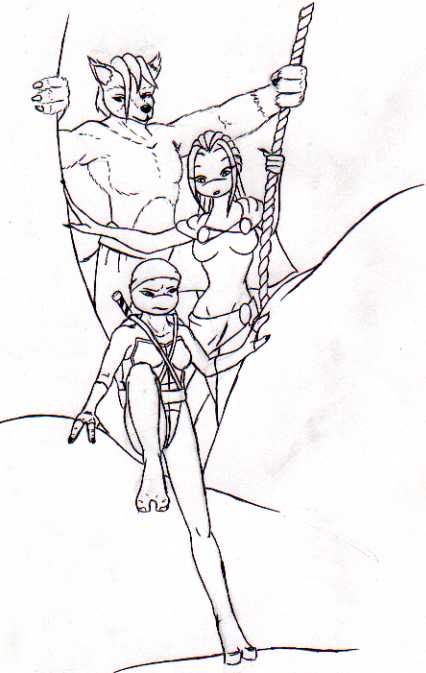
Step 2: Inking
I use a regular BIC ballpoint pen to do my inking. Yep, the kind you get at the grocery store for a $1.50 for a pack of ten. This step took me a total of 36 minutes. I don't have to worry much, just follow the lines, but I have to go slow because my vision tends to go out of focus now and then, and I don't want to mess up. It's very hard for me to correct an inking mistake. I did take a break because my brother asked me to take over his video game. Then I realized how much time was left in the game, and called it off. I got back to work and finished up. The 36 minutes included erasing the pencil lines with that gum eraser. Erasing is a lot harder than it looks, since I had to go slowly to avoid smearing and crumpling the paper.
Here's the finished inked picture:
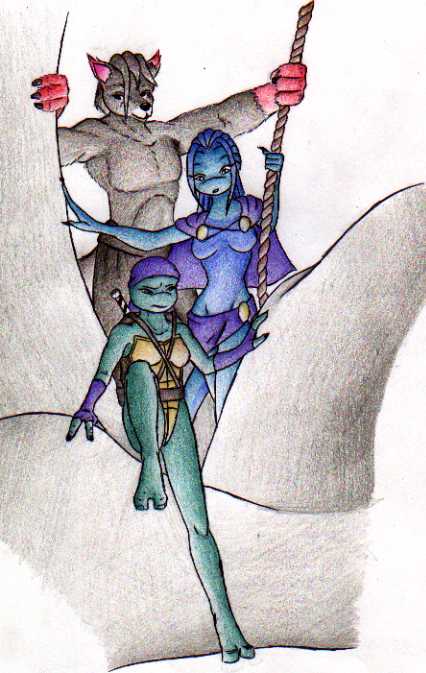
Step 3: Under Shadows
I'm using Crayola colored pencils here, nothing fancy. Now, I know every artist will tell you to go from light to dark, but I don't. You're probably better off doing it their way, but I like this technique. I go from dark to light, literally. I start with a dark version of the color I want the object to be. For example, I used green for both Jezebel and Lalena's base color (next step) but I used different shadow colors. I used blue-green for Lalena and pine green for Jezebel. I find where I want my light source to come from (in this case, bottom center) and start from the edge opposite it and color, using less and less pressure as I go.
The only exception is black, which has no darker shade. So I used violet, or dark brown, or red as the under shadow, depending on the object.
This step took the longest, by far, at 65 minutes.
Here's the picture with under shadows:
Step 4: Base Color
Next step, base color. I use a lighter shade of color than the one I used for the shadows. I use the same technique, starting dark at the edges, and going lighter. This blends in nicely with the shadows and creates a smoother color. I hope.
An exception is, once again, black. I put the darker color over the lighter one. Hopefully a bit of the other color shows through so the black doesn't look so flat. Black is rarely ever truly all black, it will highlight purple or blue or red or whatever color. This step took 49 minutes and I took a break for something, I'm not sure what. I think my back and arm was starting to hurt.
Here's the picture with the base colors:
Step 5: Touchups and Over Shadows
Last step, and also the easiest. First I go through and do all the cast shadows, which is when an object casts a shadow on another. Like Lalena's head on Rusty's arm. I also touch up any other areas I see as needing to be touched up in any way, like darkening shadows, or even running the eraser over parts to make them a bit lighter.
This step took only 12 minutes, and that was because I was eating dinner at the same time.
Overall, the entire thing took a total of 3 hours and 35 minutes, if my calculations are correct. This was a large, complex piece compared to most of the stuff I do, so my usual one character pose pictures usually take a third to maybe half this time.
Here's the finished product: