Jonathan Stephenson's
Lego Technic Mustang
Jonathan Stephenson's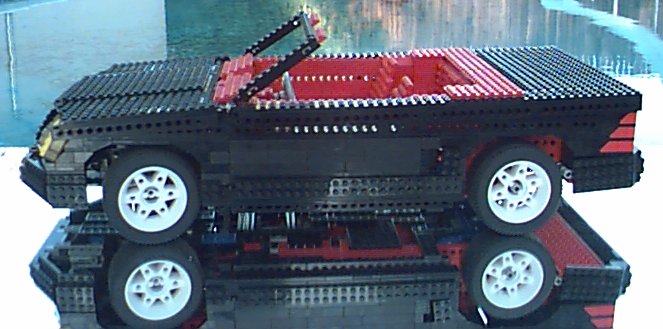
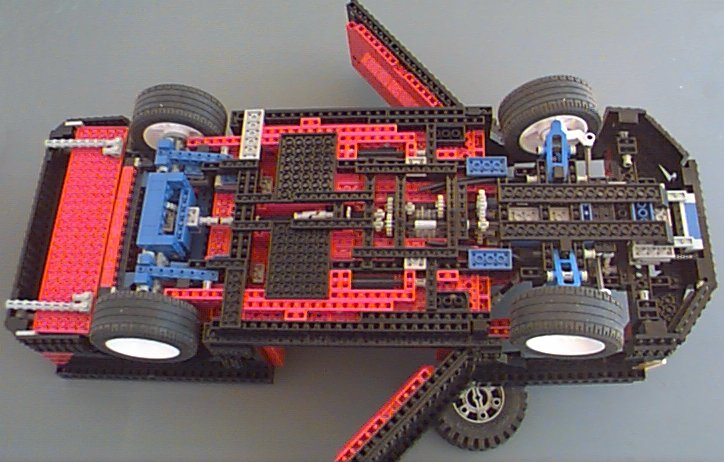
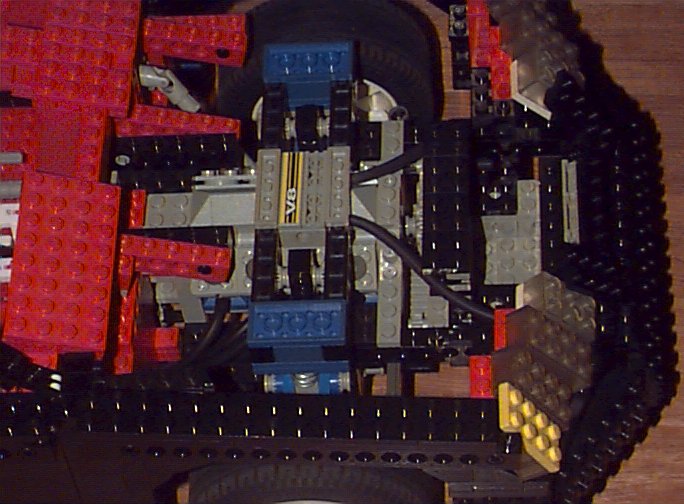
The Lego Technic Mustang is my own design of a sporty convertible that's a rough replica (is there any such thing as an exact Lego replica?) of the 94-95 Ford Mustang. The purpose of building this car was to have a fully-featured Technic car that also has a full body and interior. Its features include V8 engine, 4-speed transmission, full suspension, steering (of course), parking brake, two-way adjustable seats, and front and rear impact-absorbing bumpers. I've written a fair amount of detail on this page because I know if I ran across something like this, I'd want to know all about it. If you prefer, feel free to skip the text and just click on the pictures for a larger view. By the way, if you have any Lego cars of this type on the net, please email me your address.
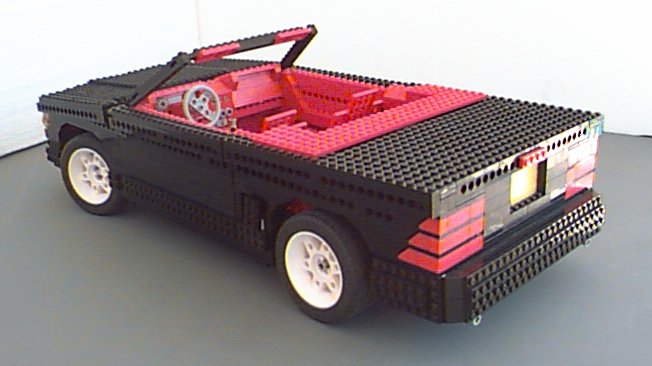
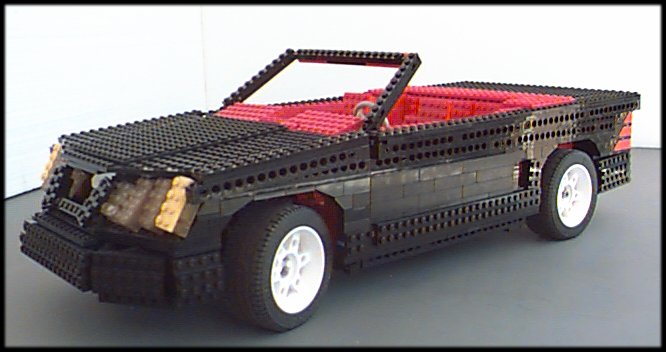
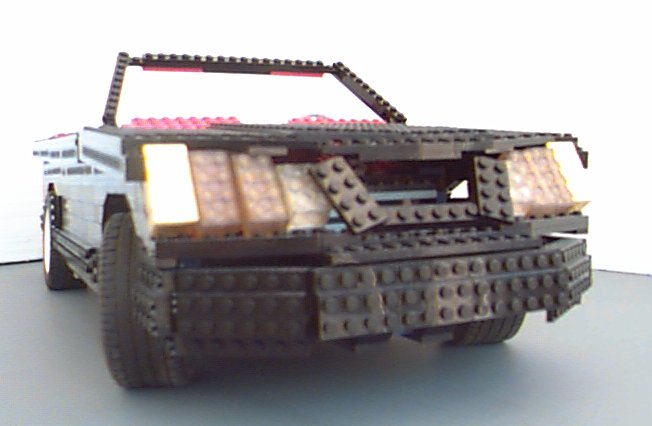
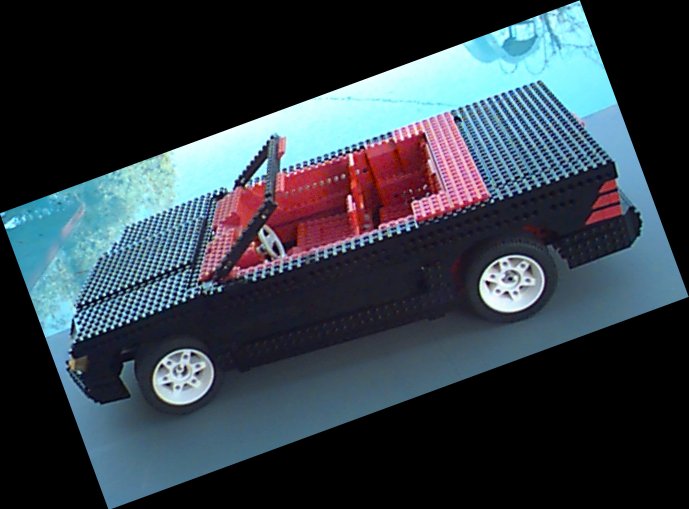
The hood, trunk and doors all open. The hood and trunk lid hinges prop open. The body flex puts just enough pressure on the doors to keep them closed. The front bumper uses two of the small shock absorbers in the main section and the small edge sections are hinged to the body. There are hinges between each section. It works very well. The rear bumper uses two large shock absorbers, one on each end. The whole bumper is solid and attached only to the shocks. The big shocks are a lot stiffer, so it doesn't work quite as well as the front. The windshield is simply on hinges attached to solid chassis uprights. I was really happy with the look of the headlights. Unfortunately they're attached only by gravity, so they tend to go flying in a frontal impact or in turning the car over! The black grill piece is on hinges. The vertical pieces along the lower body between the wheels are attached using those cool half -pegs from the newer Technic kits. I'm also really grateful for those black pegs! They make the body look a lot cleaner than if I had to use gray ones (the black pegs are also a lot tighter, which comes in handy for many purposes). I wanted to make a folding fabric convertible top, but even Technic Legos have their limits.
HOME
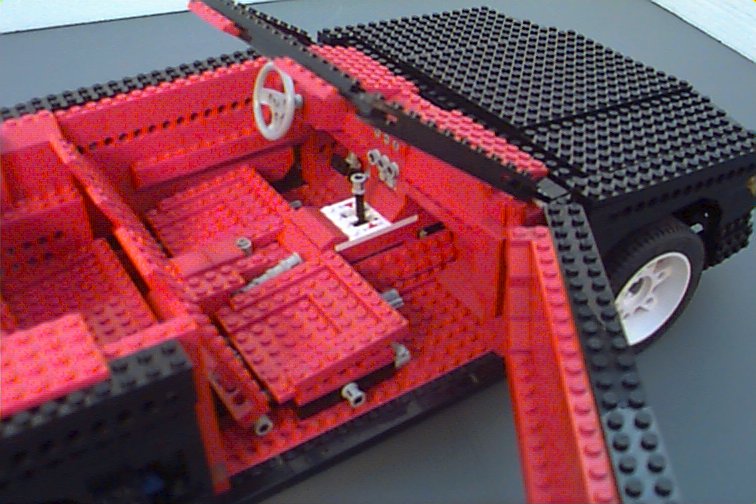
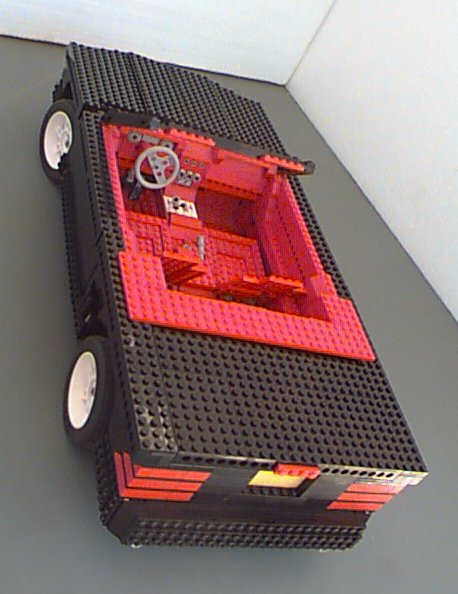
Interior
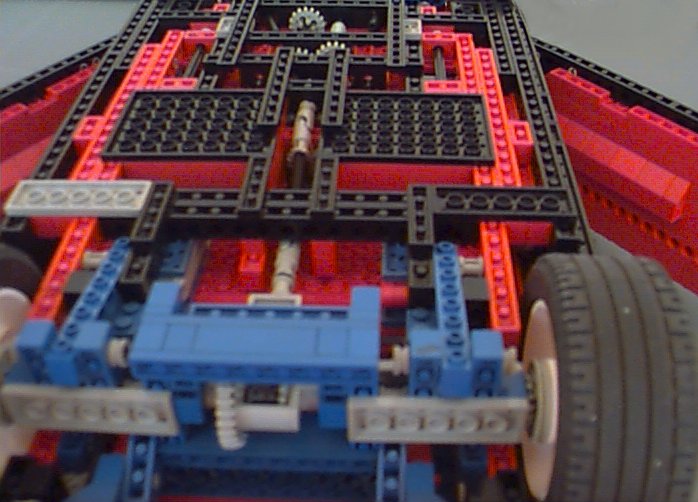
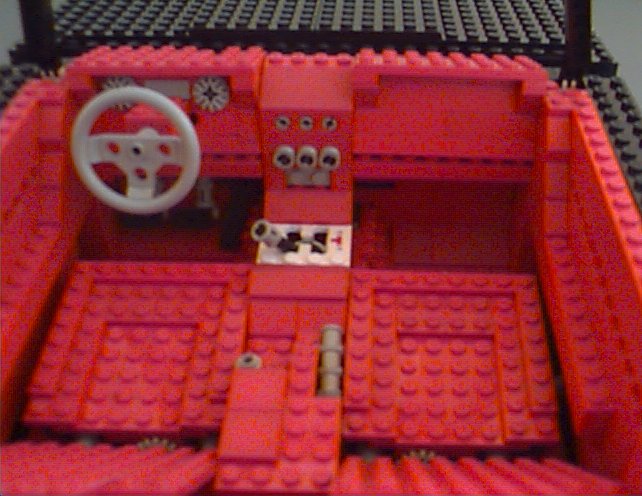
The seats move forward and back and the seat backs recline. You may notice in the pictures that the seat backs are a bit thin and ugly. This is because I simply ran out of pieces. The seat bottoms were one of the first things I did, then I built the rest of the car. By the time I was done, I only had enough flat red pieces to make very minimal inaccurate ones. As soon as I can get ahold of some more pieces, I'll revise them. The back seat is even more cramped than the real one (in a scale way, that is). Real convertibles nowadays have very narrow back seats, to make room for the top mechanism. My car has a similarly narrow back seat, but to be able to fit between the frame rails. The holed pieces that can be seen just above the seat bottom are the frame pieces that go over the axle and into the trunk. Real cars also generally have their seat backs pushed back very close to the rear axle. This is hard to do with Legos, since a structurally strong chassis requires more space than a real car's, especially when having to accommodate the rear suspension. My back seat is pushed back as far as possible before hitting the cross member needed for the coil springs. I think it's a pretty tight design for Legos, but those scale back seat passengers are still going to be a bit cramped. The drive shaft/transmission tunnel is a bit larger than the real one. This was necessary both to accommodate the transmission and because it is a weight-bearing chassis support structure. The gray lever on the right side of the console is for the parking brake. The round gray piece to the left of it is attached to a 1x3 flat piece which slides under the lever to lock it in place. The lever is attached to a fixed gear, which lowers onto a gear on the drive shaft. It's pretty solid and will keep the car from moving on a slight incline, but much of a push will make clicking gears and a moving car. The goals of this were mainly to enable me to say it has a working parking brake with a realistically placed control that doesn't take up much space. The gas, brake and clutch pedals are strictly for show.